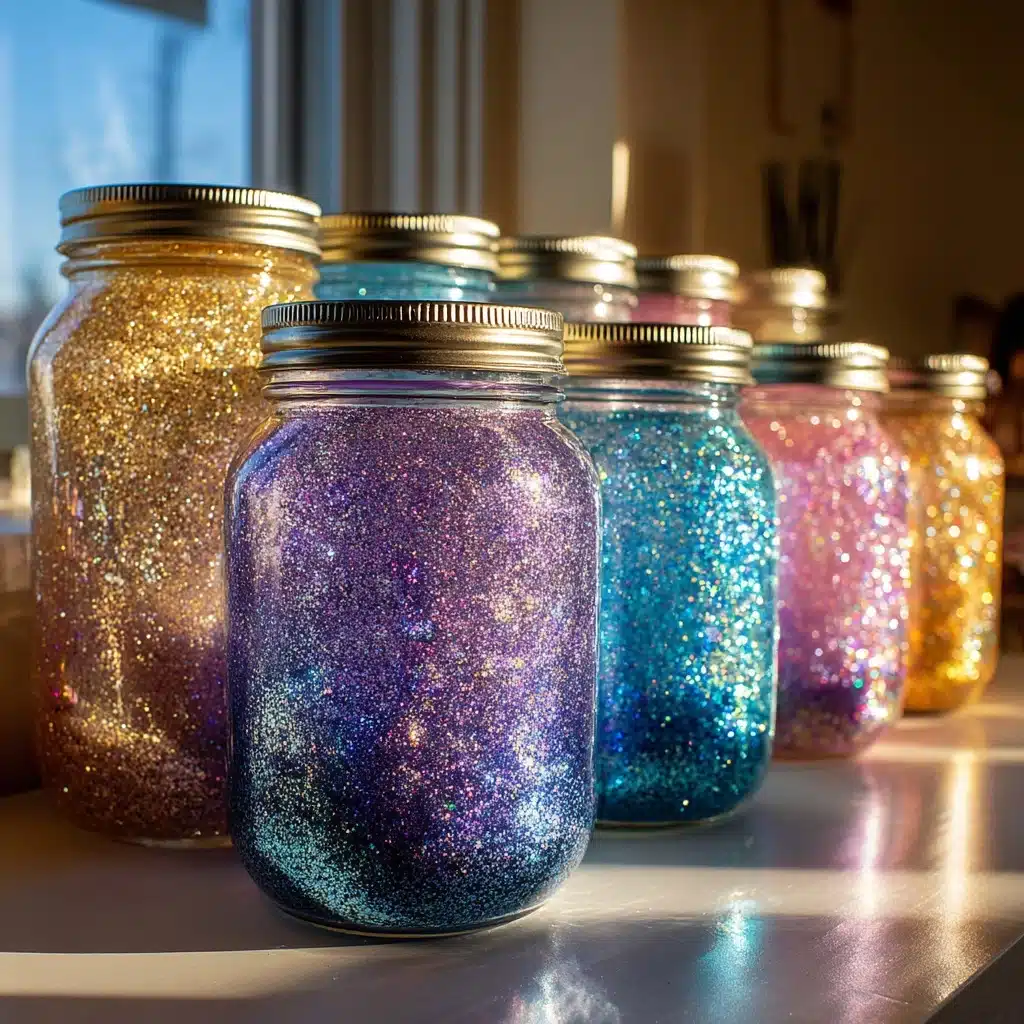
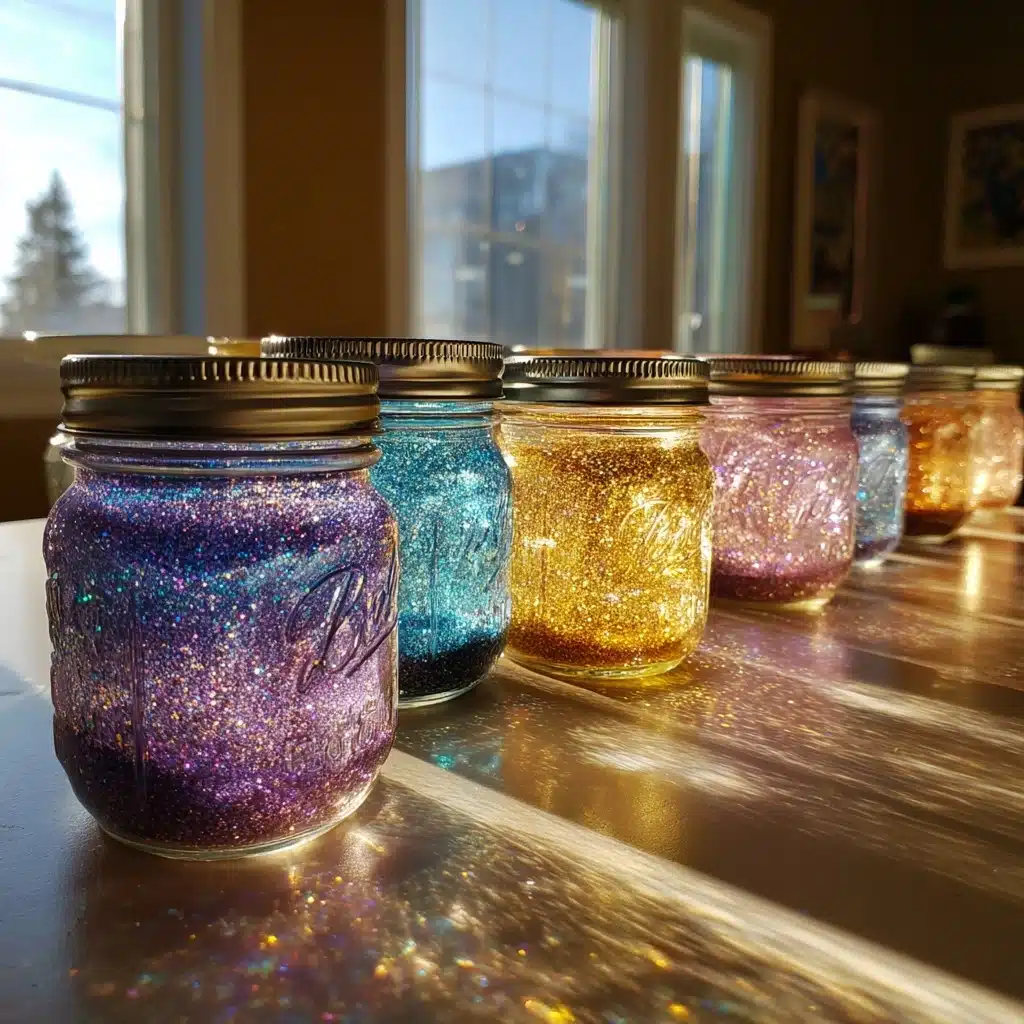
Suncatcher Glitter Jars Create Sparkling Magic Today! Recipe
Let’s talk about instant joy in a jar—Suncatcher Glitter Jars Create Sparkling Magic Today! This project is pure delight, and it blends a little creativity with a whole lot of sparkle. Whether you’re crafting with kids, looking for a calming DIY, or searching for a whimsical handmade gift, these jars are your ticket to happiness. With just a few simple materials and a sprinkle of imagination, you’ll end up with a twinkling, colorful suncatcher that lights up any room. The swirling glitter and playful colors inside each jar give you a personal moment of magic, every time you hold one up to the light. Suncatcher Glitter Jars Create Sparkling Magic Today!—and trust me, you’ll want to make these again and again.
Ingredients You’ll Need
-
Gather these supplies:
- 1 clean glass jar with lid (mason jar or recycled jar)
- 1 cup warm water
- 1 tablespoon clear glue or glitter glue
- 1–2 teaspoons fine glitter (any color)
- 1–2 drops food coloring or liquid watercolor (optional)
- small trinkets or sequins (optional for extra sparkle)
- strong adhesive or hot glue (to seal the lid)
How to Make Suncatcher Glitter Jars Create Sparkling Magic Today!
Step 1: Prepare Your Jar
Start by making sure your glass jar is sparkling clean—this ensures nothing dulls the glitter inside. If you’re reusing a jar, scrub off any labels or residue, then dry it thoroughly with a lint-free cloth.
Step 2: Fill with Warm Water
Pour warm (not boiling) water into the jar until it’s about three quarters full. Warm water helps dissolve the glue evenly, making your glitter swirl beautifully rather than clumping.
Step 3: Add the Glue
Drizzle in one tablespoon of clear glue or glitter glue. Stir slowly until the glue is fully dissolved. The glue creates that slow-motion snowfall effect, letting the glitter and trinkets float gracefully.
Step 4: Sprinkle in the Sparkle
Add one or two teaspoons of fine glitter—the more you use, the denser your swirling galaxy will look. This is your moment to choose your favorite color or mix shades for a rainbow effect.
Step 5: Add a Pop of Color (Optional)
If you’re aiming for a vibrant suncatcher, now’s the time to add a drop or two of food coloring or liquid watercolor. Stir gently, watching as tendrils of color curl through the water, blending with the glitter.
Step 6: Add Trinkets or Sequins (Optional)
Drop in some shiny sequins or tiny trinkets for extra surprises with every shake. Little stars, moons, or smiley faces look adorable and make your jar truly one-of-a-kind.
Step 7: Top Off and Seal
Add a touch more water to top up the jar, leaving a little space to prevent overflow. Dry the rim thoroughly, then secure the lid tightly. For extra safety (especially with kids), seal the lid with strong adhesive or a line of hot glue to prevent leaks or spills!
Step 8: Shake and Watch the Magic
Give your finished jar a gentle shake and hold it up to the light. Watch as the glitter sparkles, spins, and settles—this is when Suncatcher Glitter Jars Create Sparkling Magic Today! really comes to life. Each shake reveals a brand-new, mesmerizing mini galaxy.
How to Serve Suncatcher Glitter Jars Create Sparkling Magic Today!
Garnishes
Personalize your jar even more by tying a bright ribbon or twine around the lid, or stick on a personalized label with a sweet message. You can also glue a charm or even a paper flower on top, making the Suncatcher Glitter Jars Create Sparkling Magic Today! not just beautiful, but uniquely yours.
Side Dishes
While these jars aren’t for eating, they pair perfectly as a set with other DIY crafts. Display them alongside hand-painted rocks, origami cranes, or scented playdough for a full sensory table. The color and shimmer add an enchanting accent to any playroom, craft night, or tranquil corner.
Creative Ways to Present
Gift your Suncatcher Glitter Jars Create Sparkling Magic Today! in a small basket with crinkly paper, or nestle them among fairy lights for an extra dreamy effect. For birthdays or holidays, wrap them in cellophane and tie off with curling ribbon. They also make calming “focus jars” as a thoughtful classroom or office gift!
Make Ahead and Storage
Storing Leftovers
Once you’ve made your Suncatcher Glitter Jars Create Sparkling Magic Today!, just keep them tightly sealed when not in use. Store them at room temperature, away from direct sunlight to prevent the colors from fading or glue from clouding up. If you notice water evaporation over time, just top them up with a little extra warm water.
Freezing
It’s definitely not recommended to freeze Suncatcher Glitter Jars Create Sparkling Magic Today! The water and glue mixture can expand and crack your jar, and freezing might also cloud the contents or fade the glitter. Keep these creations cozy at room temperature for the longest-lasting dazzle.
Reheating
No need to ever reheat your suncatcher jar. If you see the glitter settling too much or sticking to each other as the jar sits for a while, simply give it a gentle shake to bring back the mesmerizing swirl. If needed, add a dash of warm water to reactivate the glue.
FAQs
Can I use plastic jars instead of glass?
Absolutely! Plastic jars with screw-on lids are safer for younger kids, plus you can find ones in all kinds of fun colors and shapes. Just make sure to still use strong adhesive or hot glue on the lid to keep your glittery creation leak-free.
What types of glitter work best?
Fine glitter is the star of this project for that magical snow-globe look, but you can also experiment with chunky glitter or shaped confetti for extra texture and sparkle. Avoid craft sand or extra-large sequins that might settle too quickly.
Is clear glue better than glitter glue?
Both clear and glitter glue work wonderfully! Clear glue gives you that classic, floating effect and lets your custom glitter truly shine, while glitter glue adds an extra hint of shimmer and color right from the start.
How do I keep the lid from leaking?
A tight-fitting lid is step one, but don’t skip the strong adhesive or hot glue for extra security. After sealing, let the glue dry completely before shaking your jar to be sure it’s leak-proof—especially if you plan to gift these or use them with little ones.
Can I use other add-ins like beads or buttons?
Yes, the sky’s the limit! Flat, lightweight beads, small buttons, or tiny plastic figures can turn your Suncatcher Glitter Jars Create Sparkling Magic Today! into a themed sensory jar, story jar, or even a scavenger hunt jar. Just avoid anything that might rust or dissolve in water.
Final Thoughts
Few crafts are as satisfying, joyful, and mesmerizing as Suncatcher Glitter Jars Create Sparkling Magic Today! Whether you’re making them solo, with a child, or as a gift, you’ll love how a swirl of glitter can light up an entire day. Grab those jars and supplies—it’s time to create and share a little sparkling magic!
Print
Suncatcher Glitter Jars Create Sparkling Magic Today! Recipe
- Total Time: 10 minutes
- Yield: 1 jar 1x
- Diet: Vegetarian
Description
Create magical suncatcher glitter jars with this easy DIY craft project. These sparkling jars are perfect for adding a touch of whimsy to any space and make great sensory or calming tools for kids.
Ingredients
Gather these supplies:
- 1 clean glass jar with lid (mason jar or recycled jar)
- 1 cup warm water
- 1 tablespoon clear glue or glitter glue
- 1–2 teaspoons fine glitter (any color)
- 1–2 drops food coloring or liquid watercolor (optional)
- small trinkets or sequins (optional for extra sparkle)
- strong adhesive or hot glue (to seal the lid)
Instructions
- Prepare the Jar: Fill the jar about three-quarters full with warm water.
- Add Glue and Glitter: Add the clear glue or glitter glue and stir until fully dissolved.
- Mix in Glitter: Add your chosen glitter to the jar, along with a drop or two of food coloring if using. Stir gently to combine.
- Decorate: Add optional sequins or small trinkets for more visual interest.
- Seal the Jar: Top off the jar with additional water, leaving a little space at the top. Seal the lid tightly and secure it with strong adhesive or hot glue to prevent leaks.
- Enjoy: Shake the jar gently and watch the glitter swirl and sparkle in the light, creating a beautiful suncatcher effect.
Notes
- Use warm (not hot) water to help the glue mix smoothly.
- For younger kids, plastic jars with screw-on lids are a safer option.
- Customize with colors to match seasons or themes.
- Great for calming jars or DIY gifts.
- Prep Time: 10 minutes
- Cook Time: 0 minutes
- Category: DIY Craft
- Method: No-Cook
- Cuisine: Not Applicable
Nutrition
- Serving Size: Not edible
- Calories: 0
- Sugar: 0g
- Sodium: 0mg
- Fat: 0g
- Saturated Fat: 0g
- Unsaturated Fat: 0g
- Trans Fat: 0g
- Carbohydrates: 0g
- Fiber: 0g
- Protein: 0g
- Cholesterol: 0mg


