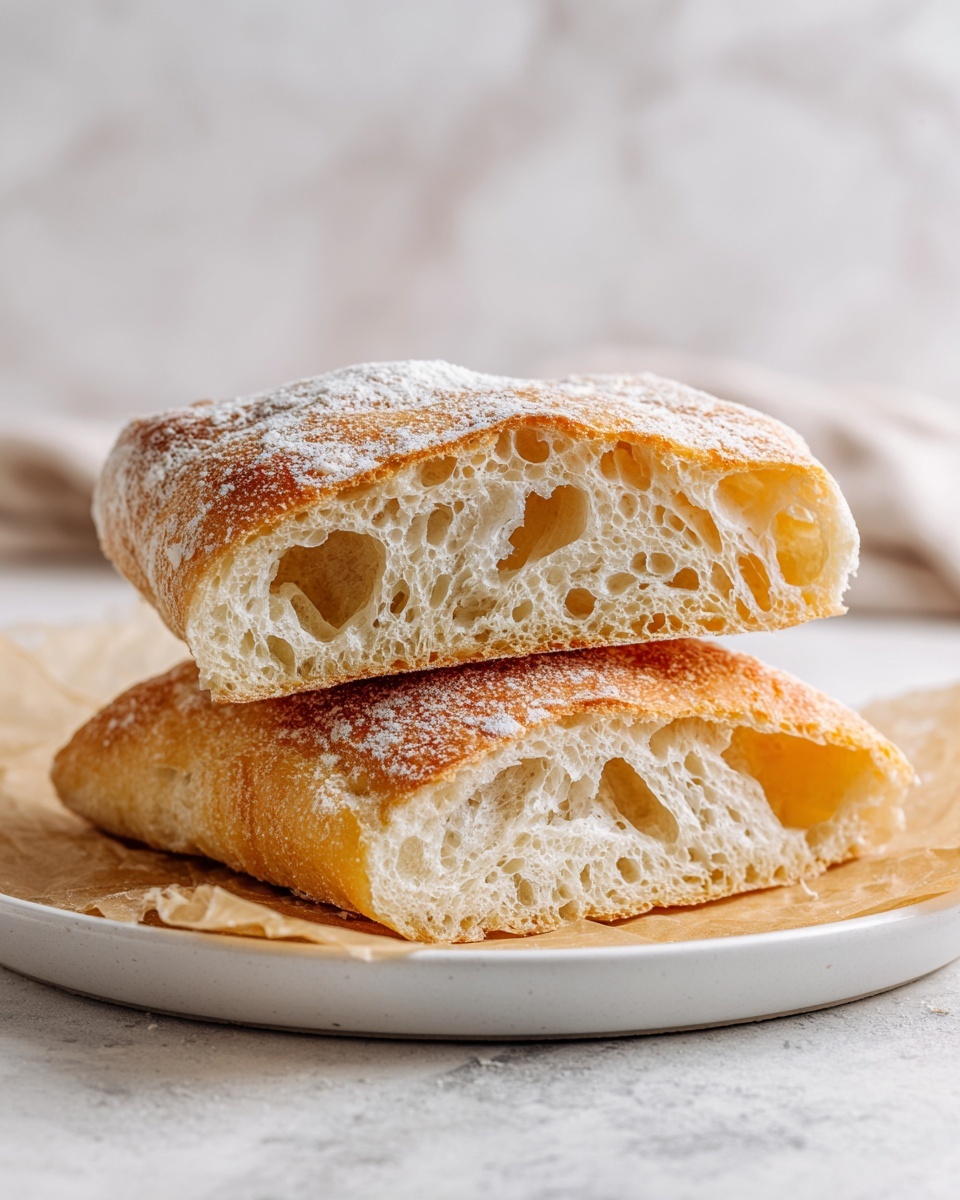
If you have ever dreamed of baking bread that fills your kitchen with a warm, inviting aroma and boasts a satisfyingly crunchy crust with a soft, airy crumb inside, this Rustic Italian Crusty Bread Recipe will quickly become your go-to favorite. With simple ingredients and straightforward steps, this homemade bread is not only a joy to make but also perfectly captures the heart of traditional Italian baking — crisp on the outside, tender and flavorful on the inside. Whether you’re new to bread baking or a seasoned kitchen pro, this recipe offers that authentic Italian crusty experience right in your own oven.
Ingredients You’ll Need
Nothing could be simpler or more fundamental to great bread than the ingredients you use. Each element here plays a vital role in building the perfect texture and flavor, blending together into a loaf that sings with rustic charm.
- 4 cups all-purpose flour: Provides the structure and substance that forms the chewy crumb of the bread.
- 1 ½ tsp active dry yeast: The magical ingredient that makes this rustic bread rise and develop its airy texture.
- 1 ½ cups warm water (110°F / 43°C): Activates the yeast and helps bring everything together in a workable dough.
- 2 tsp sea salt: Enhances the flavor while strengthening the gluten network for a better crust.
- 2 tbsp extra virgin olive oil: Adds subtle richness and keeps the crust beautifully tender yet crisp.
How to Make Rustic Italian Crusty Bread Recipe
Step 1: Activate the Yeast
Start by pouring warm water into a large mixing bowl and sprinkling the active dry yeast on top. Let this mixture sit for about five minutes until it becomes frothy and bubbly. This indicates that the yeast is alive and ready to work its magic, creating all those lovely air pockets in your bread.
Step 2: Form the Dough
Next, stir in the flour and sea salt until you get a shaggy, rough dough. Don’t worry if it looks messy at this point—it will come together soon. The salt not only flavors the loaf but also regulates yeast growth for an ideal rise.
Step 3: Knead for Strength
Turn the dough onto a floured surface and knead it for about ten minutes. This is where the dough develops the strength and elasticity crucial for a chewy, resilient crumb. Your hands will thank you with a little workout and soon you’ll have a smooth, slightly tacky ball ready to rise.
Step 4: First Rise
Place your dough in a bowl lightly coated with olive oil, cover it with a damp cloth, and set it aside in a warm spot. Over roughly one hour, it will double in size, thanks to the yeast creating carbon dioxide bubbles that make the bread light and airy.
Step 5: Shape and Rest
Once risen, gently punch down your dough to release excess gas and shape it into a round loaf. Cover it again and let it rest for another 30 minutes. This rest period relaxes the gluten, making your loaf easier to slash and improving the final texture.
Step 6: Prepare for Baking
Preheat your oven to 450°F (230°C). Just before baking, use a sharp knife to make a few slashes on top of the loaf. These cuts allow the bread to expand during baking without cracking unpredictably, giving it that classic rustic look.
Step 7: Bake to Perfection
Bake your bread on a preheated stone or baking sheet for 30 to 35 minutes. You’ll know it’s done when the crust turns a deep golden brown and sounds hollow when gently tapped on the bottom. Let the bread cool completely before slicing to preserve the soft interior and to avoid gumminess.
How to Serve Rustic Italian Crusty Bread Recipe
Garnishes
While the bread is delicious all on its own, you can sprinkle a bit of flaky sea salt or brush the crust with extra virgin olive oil before serving to amplify its rustic charm. Fresh herbs like rosemary or thyme lightly pressed into the slashes before baking can add a fragrant twist as well.
Side Dishes
This Rustic Italian Crusty Bread pairs beautifully with hearty soups, rich stews, and fresh salads. Imagine dunking it into a bowl of tomato basil soup or scooping up creamy risotto — it complements bold and subtle flavors alike with its crunchy texture and gentle chew.
Creative Ways to Present
For a memorable presentation, slice the bread thick and arrange it in a rustic basket lined with a linen napkin. You might also turn slices into crostini topped with bruschetta or melted cheeses for a delightful appetizer. Using the bread as the base for an open-faced sandwich transforms any simple meal into something special.
Make Ahead and Storage
Storing Leftovers
Once your bread has cooled completely, store it in a paper bag or loosely wrapped in a kitchen towel to maintain its crustiness while preventing it from drying out too quickly. Avoid plastic bags as they trap moisture and can make the crust soggy.
Freezing
If you want to keep the bread for longer, slice it and freeze the portions in an airtight container or freezer bag. This way, you can take out exactly what you need without sacrificing any freshness. Frozen bread can last up to three months without losing quality.
Reheating
To bring your rustic loaf back to life, warm it in the oven at 350°F (175°C) for 10-15 minutes. This rekindles the crisp crust and soft crumb, making it taste almost freshly baked — perfect for enjoying leftovers or bread pulled from the freezer.
FAQs
Can I use bread flour instead of all-purpose flour?
Absolutely! Bread flour has more protein, which can give your bread a chewier texture and a better rise. It’s a great option if you want a sturdier crust, but all-purpose flour works beautifully for this Rustic Italian Crusty Bread Recipe as well.
Do I need a bread stone to bake this bread?
While a bread stone helps create an evenly heated surface for an optimal crust, you can bake the bread on a regular baking sheet with great results. Just make sure it’s preheated well to get the crust nice and crispy.
Can I add herbs or olives to the dough?
Yes! Mix-ins like fresh herbs, chopped olives, or sun-dried tomatoes can add wonderful flavor dimensions. Incorporate them during the kneading stage so they’re evenly distributed throughout the dough.
How long can I keep this bread fresh at room temperature?
When stored properly in a paper bag or wrapped in a towel, the bread stays fresh for about two days. After that, it’s best to use it quickly or freeze it to enjoy later.
Is it okay to use instant yeast instead of active dry yeast?
Yes, instant yeast can be used and often speeds up the process since it doesn’t need to be activated in water first. Just adjust the liquid slightly or add the yeast directly to the flour, following package instructions for best results.
Final Thoughts
There’s something deeply satisfying about baking your own Rustic Italian Crusty Bread Recipe at home — from watching it rise to savoring that first crunchy, flavorful bite. This recipe celebrates simplicity and tradition, proving that with just a handful of honest ingredients and a little patience, you can create a bread worthy of any Italian table. So grab your mixing bowl, roll up your sleeves, and get ready to enjoy the warm comfort and unmistakable aroma of freshly baked rustic bread right from your kitchen!
Print
Rustic Italian Crusty Bread Recipe
- Prep Time: 15 minutes
- Cook Time: 35 minutes
- Total Time: 1 hour 50 minutes
- Yield: 12 servings
- Category: Bread
- Method: Baking
- Cuisine: Italian
Description
This Rustic Italian Crusty Bread recipe yields a deliciously golden, crusty loaf with a soft interior, perfect for sandwiches, dipping, or serving alongside your favorite Italian dishes. Using simple ingredients and traditional techniques, this homemade bread brings the charm of an authentic Italian bakery right to your kitchen in under two hours.
Ingredients
Dry Ingredients
- 4 cups all-purpose flour
- 1 ½ tsp active dry yeast
- 2 tsp sea salt
Wet Ingredients
- 1 ½ cups warm water (110°F / 43°C)
- 2 tbsp extra virgin olive oil
Instructions
- Activate yeast: In a large mixing bowl, combine the warm water and active dry yeast; let it sit undisturbed for about 5 minutes until the mixture becomes frothy, indicating that the yeast is active and ready.
- Mix dough: Stir in the all-purpose flour and sea salt into the yeast mixture until a shaggy dough forms, ensuring the ingredients are just combined.
- Knead dough: Transfer the dough onto a floured surface and knead for about 10 minutes until it becomes smooth and elastic, which is essential for good gluten development.
- First rise: Place the kneaded dough in a bowl lightly coated with olive oil, cover it with a damp cloth, and let it rise in a warm, draft-free spot until it doubles in size, about 1 hour.
- Shape loaf: Gently punch down the risen dough to release trapped air and shape it into a round loaf on a clean surface.
- Preheat oven and rest dough: Preheat your oven to 450°F (230°C). Cover the shaped loaf with a cloth and let it rest for an additional 30 minutes to allow for a final proofing.
- Score the loaf: Using a sharp knife, make slashes on top of the loaf to allow it to expand evenly while baking and to create a rustic appearance.
- Bake: Place the loaf on a preheated baking stone or sheet and bake for 30-35 minutes until the crust turns golden brown and the loaf sounds hollow when tapped, indicating it is fully baked. Allow to cool before slicing.
Notes
- Ensure the water temperature is around 110°F (43°C) to properly activate the yeast without killing it.
- Using a baking stone mimics traditional bread ovens and helps achieve a crispy crust.
- Letting the bread cool completely before slicing prevents a gummy texture inside.
- You can add herbs like rosemary or garlic powder for a flavored twist.
- Store leftover bread in a paper bag to maintain its crustiness for up to 2 days.


