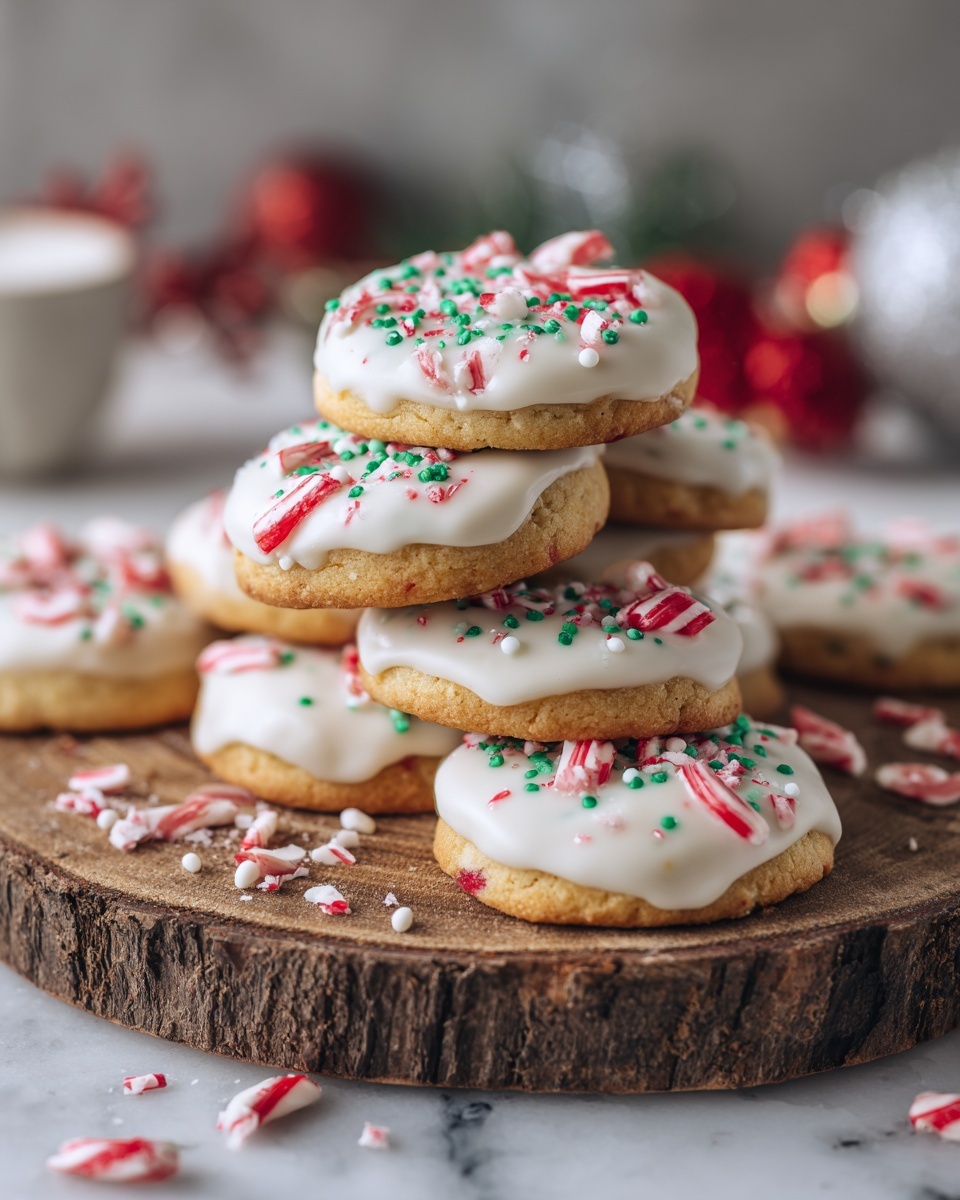
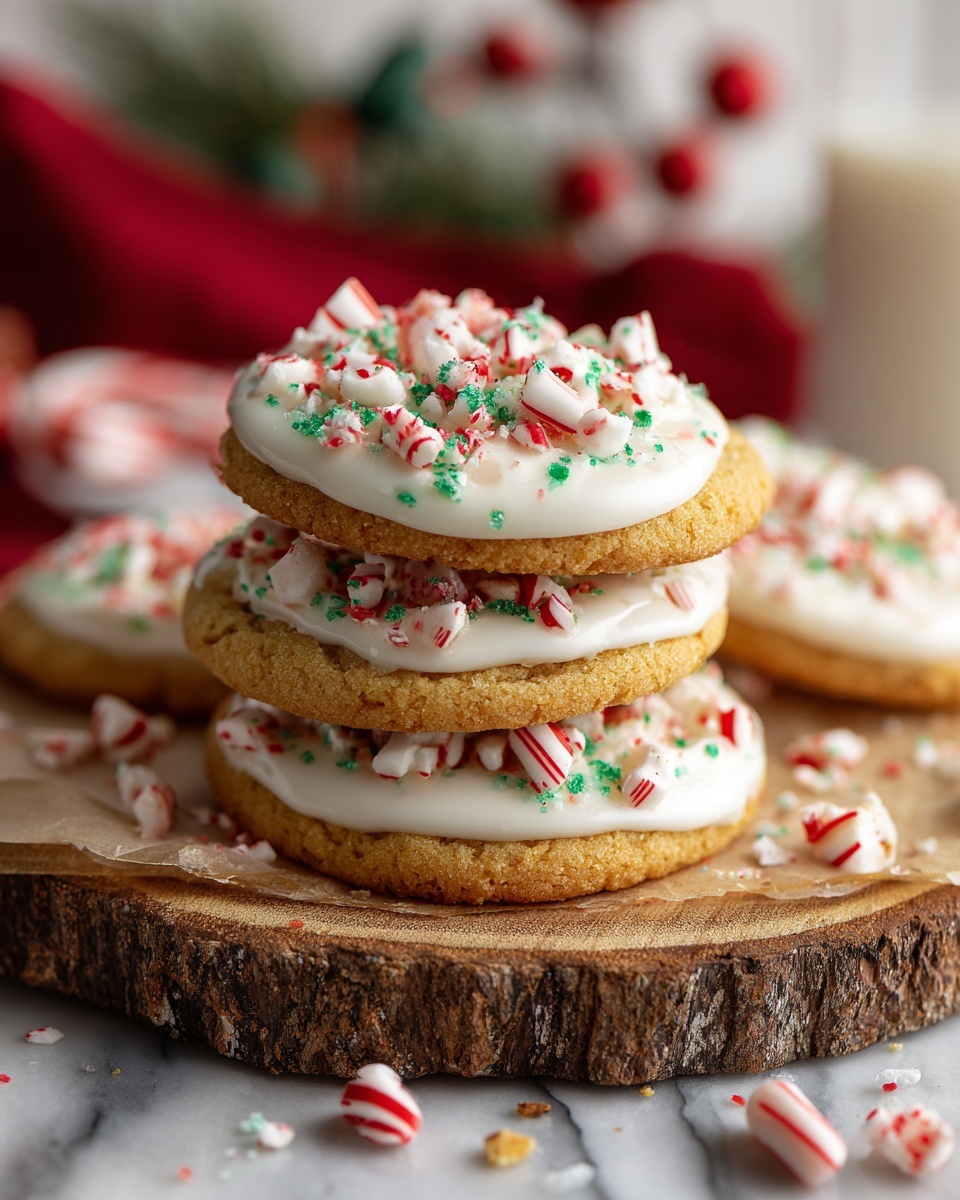
There is something truly magical about these Peppermint Meltaway Cookies Recipe that makes them an absolute holiday favorite in my kitchen and beyond. These delicate, buttery cookies practically dissolve on your tongue, leaving behind a refreshing peppermint hint paired with a luscious white chocolate finish. Every bite feels like a cozy winter hug, blending simple pantry staples with festive flavors to create a treat that’s both elegant and irresistibly comforting.
Ingredients You’ll Need
Ingredients You’ll Need
The beauty of this Peppermint Meltaway Cookies Recipe lies in its straightforward ingredients, each one playing a vital role in crafting that perfect melt-in-your-mouth texture and bright peppermint splash. From the creamy richness of butter to the crisp sweetness of crushed peppermint candies, every element is essential.
- 1 cup unsalted butter, softened: Provides the rich, tender base that makes these cookies so buttery and soft.
- 1/2 cup powdered sugar: Adds a delicate sweetness and contributes to the silky texture.
- 1/2 teaspoon peppermint extract: Infuses the dough with that bright, refreshing minty flavor.
- 1 1/4 cups all-purpose flour: Builds the structure of the cookies while keeping them tender.
- 1/2 cup cornstarch: Essential for achieving that ultra-soft, meltaway consistency.
- 1/4 teaspoon salt: Balances the sweetness and enhances all the flavors.
- 1 cup white chocolate chips: Adds creamy richness and pairs perfectly with peppermint.
- 1/2 teaspoon vegetable oil: Helps melt the white chocolate smoothly for dipping.
- 1/3 cup crushed peppermint candies or candy canes: Provides a festive crunch and extra peppermint punch on top.
How to Make Peppermint Meltaway Cookies Recipe
Step 1: Prepare Your Oven and Mixing Bowls
First things first, preheat your oven to 350 degrees Fahrenheit and line a baking sheet with parchment paper. This ensures your cookies bake evenly and release easily without sticking, setting the stage for baking success.
Step 2: Cream Butter and Sugar
In a large bowl, beat the softened butter and powdered sugar together until the mixture is light, fluffy, and creamy. This step is key because it incorporates air, giving your cookies that delicate texture you love.
Step 3: Flavor with Peppermint Extract
Next, gently blend in the peppermint extract. Be mindful not to overdo it, as this ingredient adds the signature zing that defines this Peppermint Meltaway Cookies Recipe.
Step 4: Combine Dry Ingredients
In a separate bowl, whisk together the all-purpose flour, cornstarch, and salt. These dry ingredients need to be well combined before slowly mixing them into the buttery mixture, ensuring an even dough that holds together just right.
Step 5: Form and Bake Cookies
Roll the soft dough into 1-inch balls and arrange them on your prepared baking sheet about 2 inches apart to leave room for gentle spreading. Flatten them slightly with the bottom of a glass for that classic meltaway shape. Bake for 10 to 12 minutes until the edges are set but not browned – this careful timing guarantees tender, delicate cookies.
Step 6: Cool and Decorate
Once baked, let the cookies cool briefly on the baking sheet, giving them a chance to firm up. Then, transfer to a wire rack to cool completely before moving on to that heavenly white chocolate dip.
Step 7: Melt White Chocolate and Add Peppermint Topping
In a microwave-safe bowl, melt the white chocolate chips with vegetable oil in short 20-second intervals, stirring until perfectly smooth and shiny. Dip each cooled cookie top into the melted chocolate and immediately sprinkle with crushed peppermint candies for that festive sparkle and crunch. Allow the chocolate to set fully before enjoying.
How to Serve Peppermint Meltaway Cookies Recipe
Garnishes
To elevate your Peppermint Meltaway Cookies Recipe, consider adding a few extra garnishes. A light dusting of powdered sugar or a drizzle of melted dark chocolate can add visual interest and contrast to the white chocolate base, making your cookies look as delightful as they taste.
Side Dishes
These cookies pair beautifully with a warm cup of cocoa, peppermint tea, or even a creamy latte. Their delicate sweetness balances perfectly with hot beverages, making them ideal for cozy winter afternoons or festive holiday gatherings.
Creative Ways to Present
For a whimsical touch, arrange your cookies on a decorative platter lined with fresh evergreen sprigs or place them in clear cellophane bags tied with red and green ribbons as thoughtful gifts. You can also stack them with wax paper between layers in a festive tin to share the joy with friends and family.
Make Ahead and Storage
Storing Leftovers
Once fully cooled and decorated, store your Peppermint Meltaway Cookies Recipe in an airtight container at room temperature. This keeps them fresh and soft for up to 5 days, preserving their melt-in-your-mouth quality.
Freezing
If you want to enjoy these cookies over a longer period, freeze them in a single layer on a baking sheet, then transfer to a freezer-safe container or bag for up to 2 months. Just thaw at room temperature before serving to recapture that tender texture.
Reheating
While these cookies are best enjoyed at room temperature, you can gently warm them in a low oven (around 250 degrees Fahrenheit) for a few minutes to refresh their softness if needed. Avoid microwaving as it may melt the chocolate topping unevenly.
FAQs
Can I use peppermint oil instead of peppermint extract?
Peppermint oil is much stronger than extract, so if you substitute, use it sparingly—usually a drop or two will suffice to prevent overpowering the cookies’ delicate flavor.
What is the role of cornstarch in this recipe?
Cornstarch helps create the signature meltaway texture by making the cookies tender and soft instead of chewy or crispy.
Can I substitute the white chocolate chips with another type of chocolate?
Yes! While white chocolate complements peppermint beautifully, dark or milk chocolate can also work well if that’s your preference. Just be sure to melt it gently with a bit of oil for smooth dipping.
How do I prevent the cookies from spreading too much?
Chilling the dough slightly before baking can help control spreading, but since these cookies are meant to be soft and tender, slight spreading is completely normal and desirable.
Are these cookies suitable for vegetarians?
Absolutely. This Peppermint Meltaway Cookies Recipe contains no animal-derived ingredients beyond dairy and eggs, making it a perfect festive treat for vegetarian diets.
Final Thoughts
There is nothing quite like sharing a batch of these Peppermint Meltaway Cookies Recipe with loved ones during the holidays or anytime you want a sweet, minty pick-me-up. Their simple ingredients and straightforward steps make them approachable for bakers of all skill levels, while the results feel truly special. I can’t wait for you to try making these melt-in-your-mouth treats and see just how quickly they disappear from the cookie jar!
Print
Peppermint Meltaway Cookies Recipe
- Prep Time: 20 minutes
- Cook Time: 12 minutes
- Total Time: 32 minutes
- Yield: 24 cookies
- Category: Dessert
- Method: Baking
- Cuisine: American
- Diet: Vegetarian
Description
Delight in these Peppermint Meltaway Cookies, a perfect holiday treat combining buttery melt-in-your-mouth texture with refreshing peppermint flavor. Topped with smooth white chocolate and crushed peppermint candies, these festive cookies are easy to make and ideal for Christmas celebrations or anytime you crave a sweet, minty indulgence.
Ingredients
Cookie Dough
- 1 cup unsalted butter, softened
- 1/2 cup powdered sugar
- 1/2 teaspoon peppermint extract
- 1 1/4 cups all-purpose flour
- 1/2 cup cornstarch
- 1/4 teaspoon salt
Topping
- 1 cup white chocolate chips
- 1/2 teaspoon vegetable oil
- 1/3 cup crushed peppermint candies or candy canes
Instructions
- Preheat Oven: Preheat your oven to 350°F (177°C) and line a baking sheet with parchment paper to prevent sticking and ensure even baking.
- Mix Butter and Sugar: In a large bowl, beat the softened butter and powdered sugar together until the mixture becomes light and creamy, which will give your cookies a tender texture.
- Add Peppermint Extract: Stir in the peppermint extract to infuse the dough with a refreshing mint flavor that defines these cookies.
- Combine Dry Ingredients: In a separate bowl, whisk together the all-purpose flour, cornstarch, and salt, then gradually add this mixture to the butter mixture. Mix just until combined to form a soft dough, avoiding overmixing.
- Shape Cookies: Roll the dough into 1-inch balls and place them 2 inches apart on the prepared baking sheet. Flatten each ball slightly using the bottom of a glass to help them bake evenly.
- Bake Cookies: Bake for 10 to 12 minutes or until the edges are set but not browned, ensuring a meltaway texture inside.
- Cool Cookies: Let the cookies cool on the baking sheet for 5 minutes before transferring them to a wire rack to cool completely, which helps them firm up and retain shape.
- Melt White Chocolate: In a microwave-safe bowl, melt the white chocolate chips together with vegetable oil in 20-second intervals, stirring each time until smooth and glossy.
- Decorate Cookies: Dip the tops of the cooled cookies into the melted white chocolate and immediately sprinkle with crushed peppermint candies for a festive and crunchy topping.
- Set and Serve: Allow the chocolate to set completely before serving or storing the cookies to ensure the toppings stay intact.
Notes
- For a softer peppermint flavor, reduce peppermint extract to 1/4 teaspoon.
- Store cookies in an airtight container at room temperature for up to 5 days or freeze for up to 2 months.

