
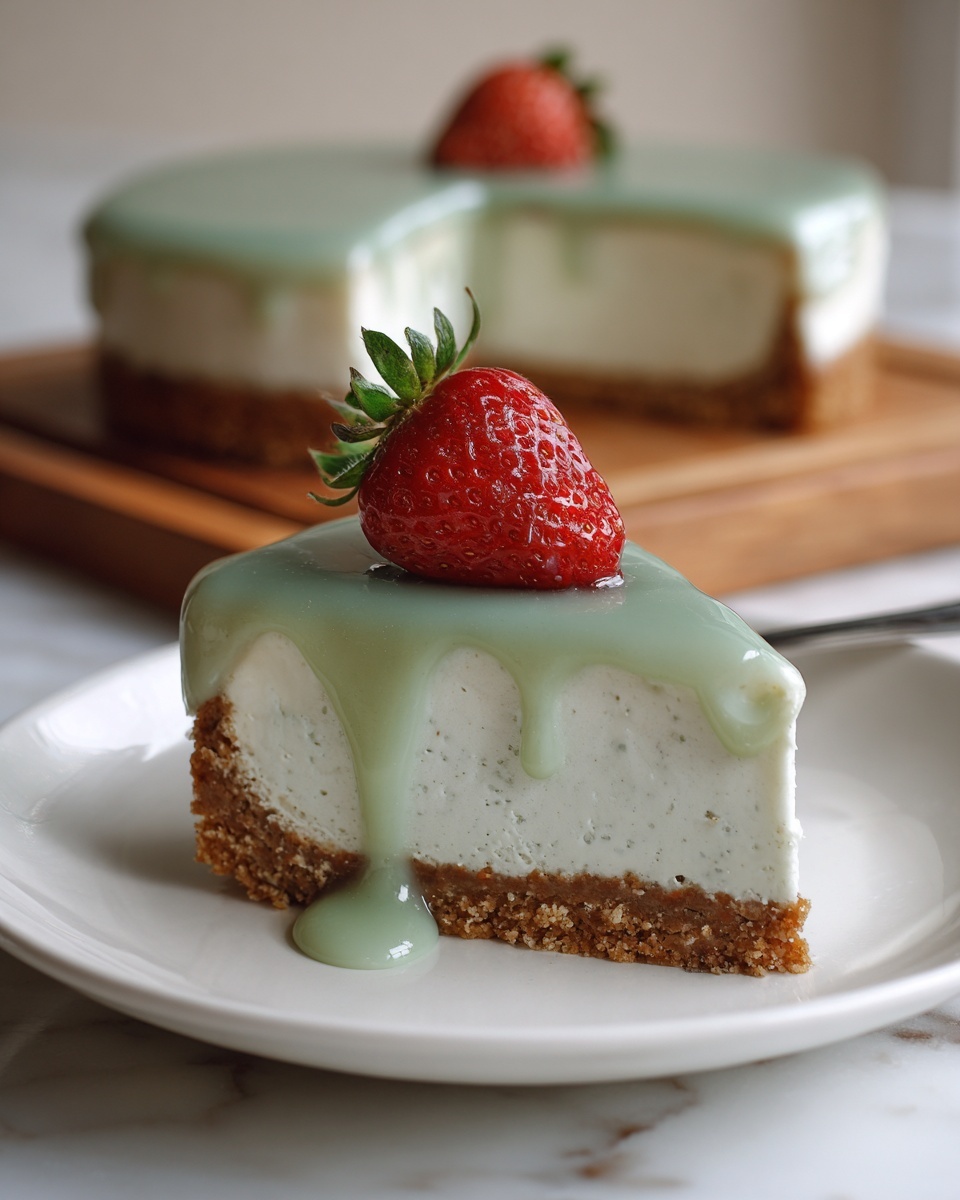
There’s something truly magical about a dessert that’s as quick to put together as it is delightful to eat, and this No Bake Pistachio Cheesecake Recipe is exactly that kind of treasure. Imagine a crisp, buttery biscuit crust giving way to a luscious, creamy pistachio-infused filling that is both rich and light, all without ever heating up your oven. This cheesecake balances the nutty warmth of pistachios with the fresh brightness of strawberries for a treat that’s as beautiful as it is delicious. Whether you’re an experienced baker or a kitchen newbie, this no-fuss recipe invites you to enjoy a stunning dessert that feels special yet is incredibly simple to make.
Ingredients You’ll Need
Gathering the right ingredients for this No Bake Pistachio Cheesecake Recipe is a breeze, and each one plays a crucial role in building up the perfect taste, texture, and color. From the buttery biscuit base to the creamy pistachio filling, everything combines to create a harmonious balance that’s sure to win hearts.
- Biscuits (200 grams): These form the crunchy and buttery foundation when crushed and combined with butter.
- Melted butter (45 grams): Helps bind the biscuit crumbs for a firm crust that holds up beautifully.
- Cream cheese (500 grams): Provides the rich, velvety texture essential to any cheesecake.
- Pistachio spread (150 grams + 100 grams): Brings the signature nutty flavor and a lovely green hue to the filling and topping.
- Powdered sugar (100 grams): Sweetens the cheesecake gently without overpowering the pistachio notes.
- Heavy whipping cream (200 grams, 35% fat): Whipped to lightness, it creates that airy, fluffy texture in the filling.
- Fresh strawberries: Optional for garnish, adding a pop of color and a burst of tangy freshness.
How to Make No Bake Pistachio Cheesecake Recipe
Step 1: Prepare the Biscuit Crust for Your No-Bake Cheesecake
Start by turning those biscuits into fine crumbs using a food processor, blender, or even a trusty rolling pin if you prefer a hands-on approach. Melt your butter gently and mix it with the crushed biscuits until the texture resembles wet sand. This combination ensures your crust will hold together firmly but still offer a lovely crunch with every bite.
Step 2: Press the Biscuit Crust into the Pan and Freeze
Lightly grease your pan for easy cheesecake removal, then press the biscuit mixture firmly into the bottom and slightly up the edges. This step is key for creating a solid base that supports the creamy filling. Pop the pan into the freezer so the crust can set while you focus on the filling—it’s like letting everything fall perfectly into place.
Step 3: Prepare the Creamy Pistachio Cheesecake Filling
In a clean bowl, mix the room-temperature cream cheese with the pistachio spread until smooth and uniform. This blend forms the heart of your no-bake pistachio cheesecake, rich and full of nutty flavor that’s simply irresistible.
Step 4: Whip the Heavy Cream for the Perfect Texture
Using a cold bowl, whip together the heavy cream and powdered sugar until soft peaks form. It’s important not to overdo it here because you want the cream to stay light and airy when folded into the filling, lending the cheesecake its signature fluffiness.
Step 5: Fold in the Whipped Cream for a Light and Fluffy Filling
Gently fold the whipped cream into the cream cheese mixture in three parts, preserving the airiness that makes this cheesecake so delightful. This careful folding keeps the filling smooth and luscious without losing that irresistible light texture.
Step 6: Chill the No-Bake Pistachio Cheesecake to Set
Spread the pistachio filling evenly over the chilled biscuit crust, smoothing the top to perfection. Cover it with plastic wrap or a tray and place it in the refrigerator for at least eight hours, ideally overnight. This patience rewards you with a cheesecake that’s perfectly set and bursting with flavor.
Step 7: Garnish and Serve Your No Bake Pistachio Cheesecake Recipe
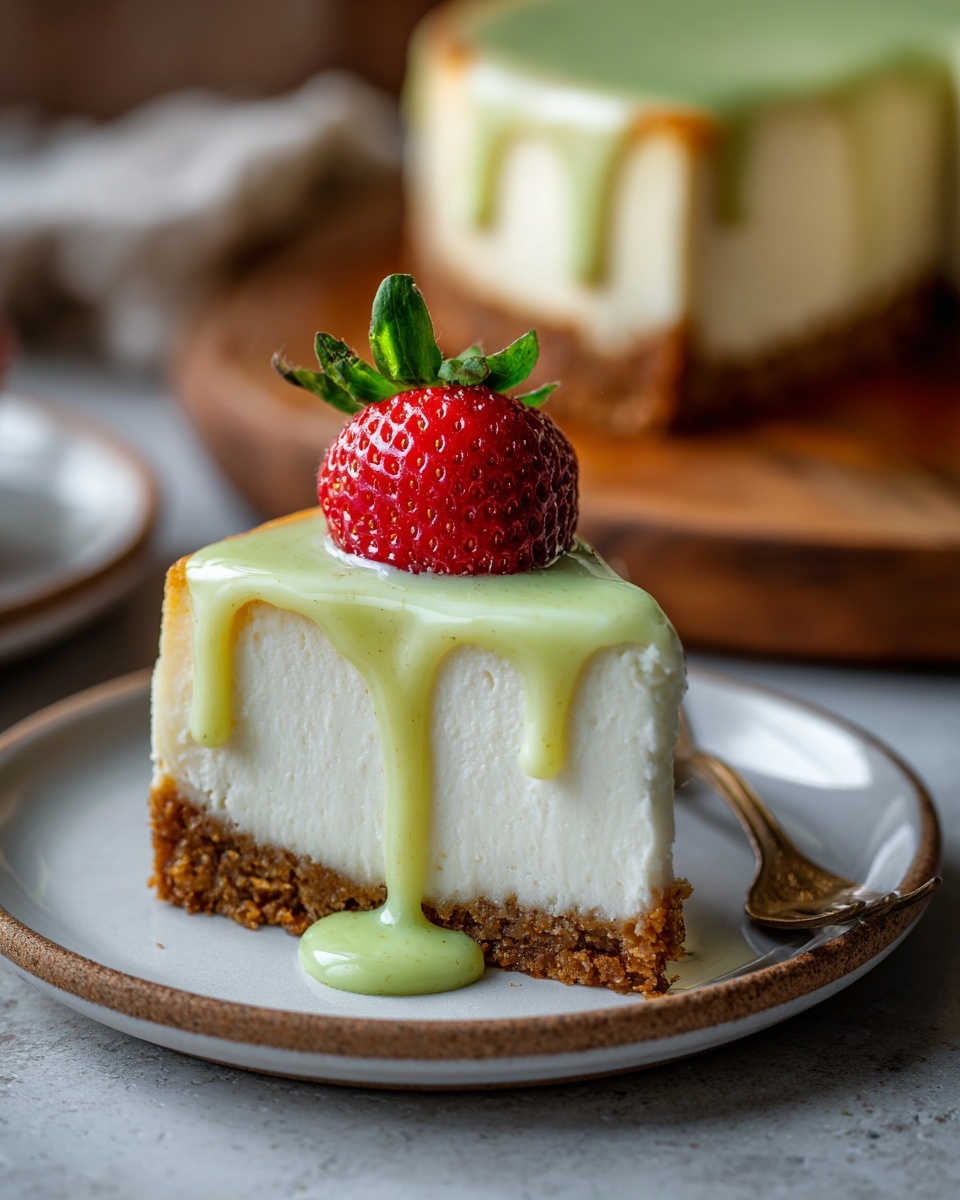
Once your cheesecake has set, enhance it by pouring the extra pistachio spread on top, letting it cascade beautifully across the surface. Add fresh strawberries or crushed pistachios for that extra wow factor that makes presentation just as exciting as taste.
How to Serve No Bake Pistachio Cheesecake Recipe
Garnishes
Fresh strawberries add a delightful pop of color and a perfect tart contrast, while crushed pistachios bring extra crunch and boost the nutty aroma. You can also consider edible flowers or a light dusting of powdered sugar for a delicate finishing touch that makes your cheesecake look like it came from a fancy patisserie.
Side Dishes
This cheesecake pairs wonderfully with a cup of rich espresso or a floral herbal tea, balancing the dessert’s sweetness perfectly. Fresh fruit salads, especially citrusy ones, complement the creaminess well, while a simple dollop of whipped cream can add an extra layer of indulgence without overpowering the pistachio flavor.
Creative Ways to Present
Try serving this cheesecake in individual clear glasses to showcase the beautiful layers, topped with a sprinkle of pistachios and a strawberry slice for visual appeal. Another fun idea is to create mini cheesecakes in mason jars—perfect for entertaining or gifting. Whichever way you choose, this recipe’s vibrant green color and inviting texture are sure to be a conversation starter.
Make Ahead and Storage
Storing Leftovers
Keep your leftover no-bake pistachio cheesecake covered tightly in the fridge to maintain freshness for up to 3 days. The flavors actually deepen with time, so leftovers make an excellent treat the next day or two. Make sure it’s well protected to avoid absorbing any other fridge odors.
Freezing
If you want to enjoy this cheesecake later, freezing is a fantastic option. Wrap the cheesecake tightly with plastic wrap and then foil to prevent freezer burn, and store it for up to one month. When ready to eat, thaw in the refrigerator overnight for the best texture and flavor.
Reheating
This dessert is best served chilled and does not require reheating. Allow it to sit at room temperature for 10–15 minutes before serving if you prefer a slightly softer texture, but avoid heating it in the microwave or oven to keep that perfect pistachio creaminess intact.
FAQs
Can I substitute the pistachio spread with another nut butter?
Absolutely! While pistachio spread is what gives this cheesecake its unique flavor, almond or hazelnut butter can be interesting alternatives if you want to experiment. Just keep in mind the flavor profile will shift accordingly.
How long does the cheesecake need to chill to set properly?
Chilling the cheesecake for at least 8 hours, preferably overnight, is essential for the filling to firm up and develop rich flavors. Rushing this step might result in a softer, less stable dessert.
Can I use a different base instead of biscuits?
Yes! Crushed graham crackers, digestive biscuits, or even ginger snaps can add intriguing flavor twists to your crust, though the texture and taste will vary slightly from the traditional biscuit base.
Is this recipe suitable for beginners?
Definitely! The no-bake aspect and straightforward steps make this recipe very approachable for cooks of all skill levels. It’s a fantastic option for anyone wanting to impress without complicated techniques.
How do I prevent the crust from becoming soggy?
Pressing the biscuit crust firmly and freezing it before adding the filling helps keep it firm and crisp. Also, ensure the butter is well mixed with the crumbs for a solid barrier against moisture.
Final Thoughts
There’s nothing quite like the joy of creating a stunning dessert that’s as easy as it is delicious, and this No Bake Pistachio Cheesecake Recipe is a shining example. It’s a joyful celebration of textures and flavors, combining crispy crust, creamy nutty filling, and fresh garnishes in a way that feels both elegant and totally approachable. So go ahead, gather your ingredients, invite some friends over, and share the magic of this lovely cheesecake. Your taste buds will thank you!
Print
No Bake Pistachio Cheesecake Recipe
- Prep Time: 30 minutes
- Cook Time: 0 minutes
- Total Time: 8 hours 30 minutes
- Yield: 8 servings
- Category: Dessert
- Method: No-Cook
- Cuisine: Western
- Diet: Vegetarian
Description
This No Bake Pistachio Cheesecake is a luscious, creamy dessert perfect for those who love pistachio flavors without the hassle of baking. Featuring a buttery biscuit crust and a smooth pistachio cream cheese filling, topped with fresh strawberries and extra pistachio spread, this recipe is an elegant and effortless treat that sets beautifully in the refrigerator.
Ingredients
Crust
- 200 grams biscuits
- 45 grams melted butter
Filling
- 500 grams cream cheese, room temperature
- 150 grams pistachio spread
- 100 grams powdered sugar
- 200 grams heavy whipping cream (35%), chilled
Topping
- 100 grams pistachio spread
- Fresh strawberries, for garnish
Instructions
- Prepare the Biscuit Crust: Crush the biscuits finely using a food processor, blender, or rolling pin. Melt the butter and combine it thoroughly with the crushed biscuits until the mixture resembles wet sand, ensuring the crumbs are fully coated to form a solid base.
- Press the Crust and Freeze: Lightly grease your cheesecake pan. Press the biscuit mixture firmly and evenly into the bottom and slightly up the sides of the pan. Place the pan in the freezer to chill and solidify while preparing the filling.
- Make the Pistachio Cheesecake Filling: In a clean bowl, mix the room-temperature cream cheese with the pistachio spread until smooth and fully incorporated to create a creamy base.
- Whip the Heavy Cream: In a chilled bowl, combine the heavy cream and powdered sugar. Whip until soft peaks form, being careful not to over-whip to maintain a light texture.
- Fold in the Whipped Cream: Gently fold the whipped cream into the cream cheese and pistachio mixture in three parts, keeping the mixture airy and smooth to preserve lightness.
- Assemble and Chill: Pour the filling over the prepared crust and smooth the top. Cover with plastic wrap or a tray to protect it, then refrigerate for at least 8 hours or overnight to allow the cheesecake to set firmly and develop flavors.
- Garnish and Serve: Once set, spread the additional pistachio spread evenly over the top. Decorate with fresh strawberries and optionally crushed pistachios for an inviting presentation. Slice and serve chilled.
Notes
- Ensure the cream cheese is at room temperature for a smooth filling without lumps.
- Do not over-whip the heavy cream to prevent it from turning into butter.
- Press the crust firmly to create a sturdy base that holds the filling well.
- Refrigerating for at least 8 hours is crucial for the cheesecake to set properly.
- For a stronger pistachio flavor, you can lightly toast crushed pistachios for garnish.

