“`html
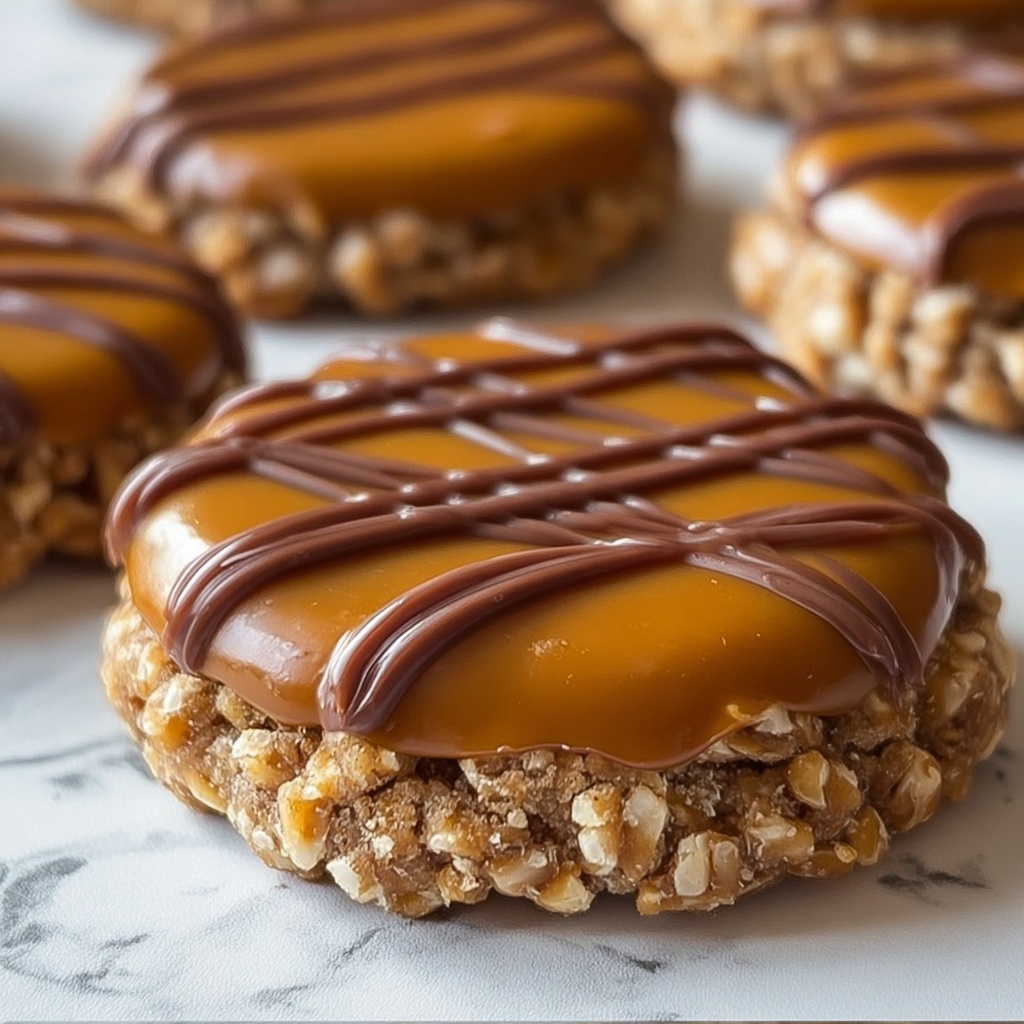
If you’ve been searching for a sweet treat that combines richness, nostalgia, and the ease of no-fuss preparation, then you absolutely need to try this No-Bake Caramel Cookies Recipe. These cookies bring together buttery caramel, creamy peanut butter, and hearty oats in a way that’s simply irresistible. The best part? You don’t need to heat up your oven! With just a few simple ingredients and some chilling time, you’ll have a delicious batch of cookies that are chewy, sweet, and satisfyingly textured. Whether you’re whipping up a quick dessert or craving an anytime snack, these no-bake gems are bound to become one of your favorite go-to recipes.
Ingredients You’ll Need

Ingredients You’ll Need
This No-Bake Caramel Cookies Recipe calls for basic pantry staples that each play a crucial role in its texture and flavor. The combination of buttery richness, sweet caramel notes, and hearty oats creates a blend that’s truly comforting, while optional mix-ins bring extra dimension.
- 1 cup unsalted butter: Melts smoothly to create the luscious caramel base, essential for that rich flavor.
- 1 cup brown sugar, packed: Adds depth and molasses undertones to the caramel mixture.
- 1/2 cup granulated sugar: Balances the brown sugar with sweetness and helps form the perfect caramel consistency.
- 1/2 cup milk: Lightens the caramel and keeps it creamy without overpowering the flavor.
- 1 teaspoon vanilla extract: Enhances the sweet and buttery notes with aromatic warmth.
- 3 cups quick oats: Provides chewy body and a wholesome texture that holds everything together.
- 1 cup creamy peanut butter: Brings a smooth, nutty richness that complements the caramel beautifully.
- 1 cup chocolate chips (optional): Offers little pockets of melty chocolate for an indulgent twist.
- 1/2 cup chopped nuts (optional): Adds satisfying crunch and a savory contrast to the sweetness.
How to Make No-Bake Caramel Cookies Recipe
Step 1: Melt the Butter
Start by placing 1 cup of unsalted butter in a medium saucepan over medium heat. Stir occasionally as it melts completely, creating the rich foundation for your caramel mixture. This gentle melting ensures a smooth texture without scorching the butter.
Step 2: Add Sugars and Milk
Once the butter is melted, add the packed brown sugar and granulated sugar directly into the pan, followed by the milk. Stir continuously as the sugars dissolve, and bring the mixture gently to a boil. This melding step is crucial as it transforms the sugars and butter into that dreamy caramel flavor we’re all craving in these cookies.
Step 3: Boil the Mixture
Allow the caramel mixture to boil gently for about 2 minutes, stirring constantly. This short boil thickens the caramel and intensifies its richness, setting the stage for the perfect chewy cookie texture.
Step 4: Incorporate Vanilla
Remove the pan from heat and immediately stir in 1 teaspoon of vanilla extract. The vanilla adds a lovely aromatic depth that complements the caramel’s sweet, buttery profile perfectly.
Step 5: Add Quick Oats
Slowly fold in 3 cups of quick oats, stirring thoroughly until every oat flake is generously coated in that luscious caramel mixture. These oats provide the satisfying chew and structure that hold the cookies together without baking.
Step 6: Incorporate Peanut Butter
Next, add 1 cup of creamy peanut butter to the mixture. Stir well until the peanut butter is fully blended in, thickening the batter and enriching the flavor with nutty creaminess that makes these cookies downright addictive.
Step 7: Add Chocolate Chips and Nuts (Optional)
If you want to elevate your No-Bake Caramel Cookies Recipe, gently fold in chocolate chips and chopped nuts at this stage. These add-ins create delightful bursts of texture and flavor, making each bite a little celebration.
Step 8: Prepare the Baking Sheet
Line a baking sheet with parchment paper to ensure your cookies don’t stick when chilling. This simple step makes cleanup a breeze and helps keep your cookies perfectly shaped.
Step 9: Scoop the Mixture
Using a spoon, drop scoopfuls of the caramel oat mixture onto the prepared baking sheet. Leaving space between scoops prevents them from merging during chilling.
Step 10: Flatten the Cookies
Press down gently on each cookie with the back of a fork or your fingers to slightly flatten them. This helps them set into the classic cookie shape once chilled.
Step 11: Chill the Cookies
Place the baking sheet in the refrigerator for 30 minutes to 1 hour. This chilling period lets the cookies firm up and develop their chewy, luscious texture so they’re easy to handle and delicious to eat.
Step 12: Check for Firmness
After chilling, test the cookies gently. They should be set but still soft in the center. If they feel too soft, give them a little more time in the fridge until they reach that perfect balance of firmness and chewiness.
Step 13: Transfer to a Plate
Once your cookies have set, move them carefully to a serving plate. They are ready to enjoy immediately, but waiting a few hours or overnight can intensify their flavors and texture even more.
How to Serve No-Bake Caramel Cookies Recipe
Garnishes
For a touch of elegance and extra flavor, sprinkle these cookies with a light dusting of sea salt, a drizzle of melted chocolate, or even some finely chopped toasted nuts. These simple garnishes add visual appeal and a flavor contrast that will delight your guests.
Side Dishes
This No-Bake Caramel Cookies Recipe pairs wonderfully with a scoop of vanilla ice cream, a mug of hot coffee, or a tall glass of cold milk. These combinations elevate the overall experience, balancing sweetness with creaminess or bitterness.
Creative Ways to Present
Serve these cookies on a decorative platter with fresh fruit slices or alongside bite-sized brownies for a diverse dessert spread. You can also skewer mini cookies with marshmallows and fruit for a playful party snack that’s both fun and delicious.
Make Ahead and Storage
Storing Leftovers
If you have any leftover No-Bake Caramel Cookies, store them in an airtight container at room temperature. They’ll stay fresh and chewy for up to a week, making them a convenient grab-and-go treat for busy days or unexpected visitors.
Freezing
To keep these cookies longer, freeze them in an airtight container with parchment layers in between. They freeze beautifully and can last up to 3 months. When you’re ready to enjoy, simply thaw them at room temperature for about 30 minutes.
Reheating
If you prefer your cookies slightly warm, you can reheat them gently in the microwave for 10 to 15 seconds. This revives the soft, gooey center and enhances their comforting caramel flavor perfectly.
FAQs
Can I use natural peanut butter instead of creamy?
Yes, you can substitute natural peanut butter; however, it may result in a slightly different texture as natural peanut butter tends to be thinner and less creamy. For best results, stir it well before measuring and consider chilling the mixture a bit longer to help the cookies set.
Are quick oats essential for this recipe?
Quick oats are recommended because they absorb the caramel mixture well and contribute to the chewy texture. Using old-fashioned oats may make the cookies denser and less cohesive, but you can try it if you prefer a heartier bite.
Can I make these cookies vegan or dairy-free?
Absolutely! Substitute the butter with a plant-based margarine and use a non-dairy milk like almond or oat. Just make sure your peanut butter and any mix-ins are vegan-friendly for a fully dairy-free, vegan version of this No-Bake Caramel Cookies Recipe.
Why do my cookies turn out too soft or crumbly?
This usually happens if the cookies haven’t chilled long enough or if the mixture wasn’t thick enough before scooping. Ensuring you boil the caramel for the full 2 minutes and allowing sufficient refrigeration time will help the cookies hold together beautifully.
Can I skip the chocolate chips and nuts?
Definitely! The chocolate chips and nuts are optional add-ins that enhance flavor and texture, but the cookies are delicious on their own with just the core ingredients. Feel free to tailor the recipe to your taste preferences.
Final Thoughts
There’s truly something magical about this No-Bake Caramel Cookies Recipe — it brings together simplicity and indulgence in a way that feels special yet effortless. Whether you’re making them for a family gathering, a last-minute dessert, or just to treat yourself, these cookies never fail to delight. Dive in, give them a try, and prepare to fall in love with a new favorite that’s as easy as it is delicious!
“`
Print
No-Bake Caramel Cookies Recipe
- Prep Time: 15 minutes
- Cook Time: 10 minutes
- Total Time: 1 hour 25 minutes
- Yield: 24 servings
- Category: Dessert
- Method: Stovetop
- Cuisine: American
- Diet: Vegetarian
Description
These No-Bake Caramel Cookies are a quick and easy treat perfect for satisfying your sweet tooth without turning on the oven. Made with a rich caramel base, creamy peanut butter, oats, and optional chocolate chips and nuts, they offer a delicious mix of chewy and crunchy textures. Ideal for a simple homemade dessert or snack, these cookies set firmly in the refrigerator, delivering a delightful caramel peanut butter flavor in every bite.
Ingredients
Wet Ingredients
- 1 cup unsalted butter
- 1/2 cup milk
- 1 teaspoon vanilla extract
- 1 cup creamy peanut butter
Dry and Mix-ins
- 1 cup brown sugar, packed
- 1/2 cup granulated sugar
- 3 cups quick oats
- 1 cup chocolate chips (optional)
- 1/2 cup chopped nuts (optional)
Instructions
- Melt the Butter: In a medium saucepan, melt 1 cup of unsalted butter over medium heat, stirring occasionally until fully melted.
- Add Sugars and Milk: Add 1 cup of packed brown sugar and 1/2 cup granulated sugar to the melted butter. Pour in 1/2 cup milk and stir continuously until sugars dissolve and the mixture reaches a gentle boil.
- Boil the Mixture: Let the mixture boil for about 2 minutes while stirring constantly to develop a rich caramel flavor. Then remove from heat.
- Incorporate Vanilla: Stir in 1 teaspoon vanilla extract into the hot caramel mixture for added depth of flavor.
- Add Quick Oats: Gradually stir in 3 cups of quick oats, ensuring they are well-coated with the caramel mixture.
- Incorporate Peanut Butter: Add 1 cup of creamy peanut butter and mix thoroughly until the mixture becomes thick and sticky.
- Add Chocolate Chips and Nuts (Optional): Fold in 1 cup chocolate chips and 1/2 cup chopped nuts if desired for extra texture and taste.
- Prepare the Baking Sheet: Line a baking sheet with parchment paper to prevent sticking.
- Scoop the Mixture: Drop spoonfuls of the cookie mixture onto the prepared sheet, spacing them evenly.
- Flatten the Cookies: Gently press each cookie down with the back of a fork or fingers to flatten slightly.
- Chill the Cookies: Refrigerate the baking sheet for 30 minutes to 1 hour, allowing the cookies to firm up.
- Check for Firmness: Ensure cookies are set but retain a slightly soft center. Refrigerate longer if needed.
- Transfer to a Plate: Once firm, move the cookies to a serving plate. They are ready to eat immediately or can be left to rest for a few hours for enhanced flavor.
- Storing Leftovers: Store leftover cookies in an airtight container at room temperature for up to one week.
Notes
- Use quick oats for best texture; old-fashioned oats can make the cookies too chewy.
- Adjust the chilling time depending on your refrigerator and desired firmness.
- Peanut butter can be substituted with almond or sunflower butter for variation.
- For a vegan version, substitute butter with coconut oil, milk with a plant-based alternative, and use vegan chocolate chips.
- These cookies do not contain eggs or flour, making them suitable for those with some dietary restrictions, but check individual ingredient labels if necessary.


