
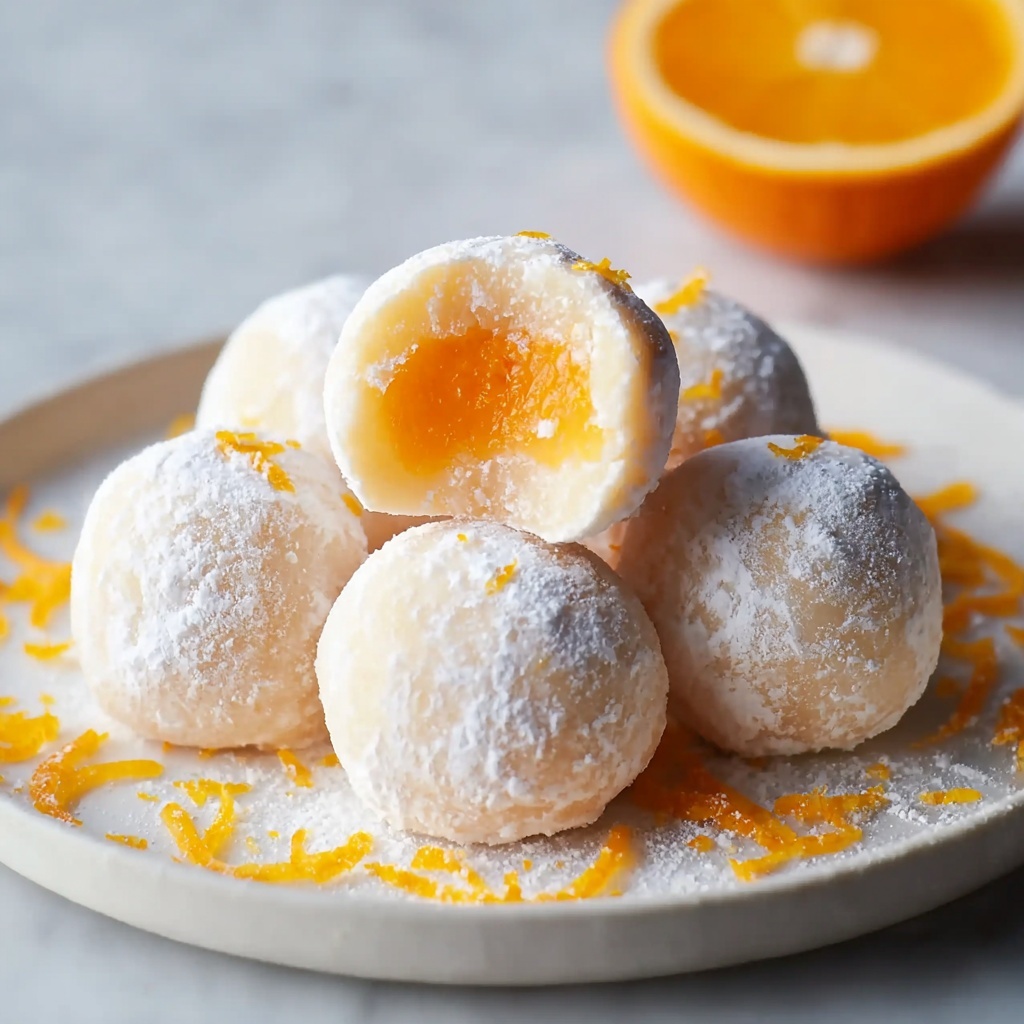
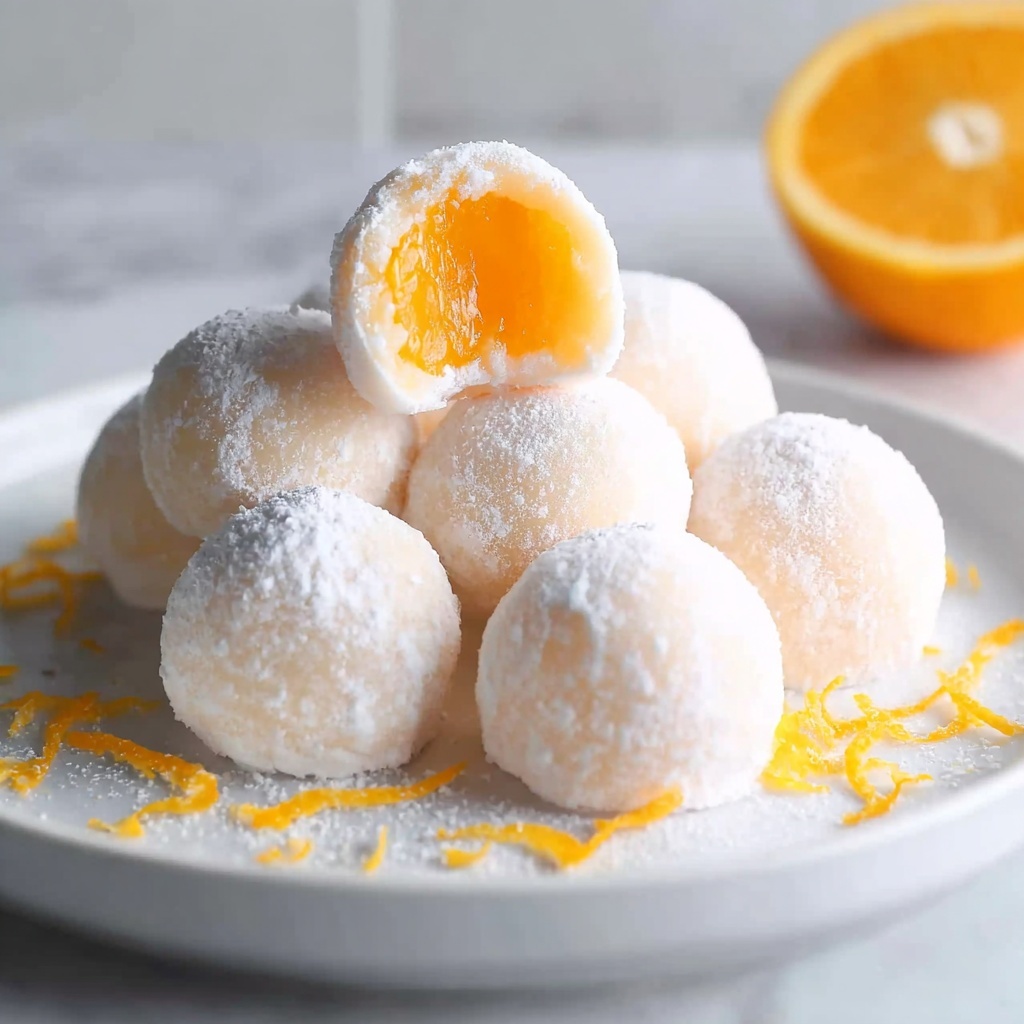
If you have a sweet tooth and a love for all things citrusy and creamy, then you are absolutely going to adore this Irresistible Orange Creamsicle Truffles Recipe. These little bites are a celebration of vibrant orange zest paired perfectly with the smooth, luscious cream cheese and the sweetness of white chocolate. Every bit bursts with nostalgic flavors reminiscent of that classic creamsicle treat, but in a delightfully bite-sized form. Whether you’re looking for a charming dessert to wow your guests or a personal indulgence, these truffles deliver pure joy in each morsel.
Ingredients You’ll Need
Crafting these truffles requires a handful of simple ingredients, each playing a crucial role in building flavor, texture, and that unmistakable creamy orange glow. Here’s what you’ll gather to make this recipe shine:
- Vanilla wafers, 1 cup: Provides a light, sweet base with a delicate crunch when crushed, forming the perfect truffle foundation.
- Cream cheese, 1 cup, softened: Brings rich creaminess and helps bind the truffles together effortlessly.
- Powdered sugar, 1 cup: Adds sweetness and smooth texture, ensuring every bite melts softly on your tongue.
- Orange zest, 2 tablespoons: Bursts with fresh citrus aroma and flavor—this is the heart of the creamsicle magic.
- Vanilla extract, 1 teaspoon: Deepens the overall flavor with a warm, familiar sweetness.
- White chocolate chips, 1 cup: Creates a smooth, creamy coating that complements the orange-cream filling perfectly.
- Coconut oil, 1 tablespoon: Helps melt the chocolate to a silky consistency for easy dipping and a glossy finish.
How to Make Irresistible Orange Creamsicle Truffles Recipe
Step 1: Mix the Base Ingredients
Start by combining the crushed vanilla wafers with softened cream cheese, powdered sugar, freshly grated orange zest, and vanilla extract in a mixing bowl. Stir everything until you get a smooth, well-blended mixture that holds together nicely. This blend is where the creamy texture and zesty flavor start to come alive.
Step 2: Shape the Truffles
Next, roll the mixture into small, bite-sized balls. The size is up to you, but about one inch in diameter works perfectly for that melt-in-your-mouth feel. Place each ball gently onto a baking sheet lined with parchment paper to prevent sticking and mess.
Step 3: Chill to Firm Up
Pop the baking sheet with your truffle balls into the fridge for at least 30 minutes. This chilling step is essential because it firms them up, making the next step of coating much easier and neater. Plus, it lets the flavors meld beautifully.
Step 4: Prepare the Chocolate Coating
While your truffles are chilling, melt the white chocolate chips along with coconut oil in a microwave-safe bowl. Heat in short bursts, stirring between intervals to ensure a smooth, creamy dip. The coconut oil gives the coating a lovely shine and silky texture.
Step 5: Dip the Truffles
Take each chilled truffle and immerse it fully into the melted chocolate. Use a fork or dipping tool to lift it out and gently shake off any excess coating. Place the chocolate-covered truffles back onto the parchment-lined sheet. This step creates the wonderful crisp shell that contrasts the creamy center.
Step 6: Chill Again to Set
Finally, place your dipped truffles back into the refrigerator until the chocolate hardens completely. This chilling seals in freshness and ensures a satisfyingly crisp outer layer.
Step 7: Enjoy Your Creation
Now the moment you’ve been waiting for: serve these delightful beauties to yourself and loved ones. Try not to eat them all at once—they’re that good!
How to Serve Irresistible Orange Creamsicle Truffles Recipe
Garnishes
To elevate your presentation, sprinkle a little extra orange zest or finely chopped candied orange peel on top of the warm chocolate before it sets. This adds a fresh pop of color and enhances that zingy creamsicle vibe.
Side Dishes
These truffles pair wonderfully with a light cup of herbal tea or a sparkling citrus cocktail. Their rich, creamy flavor balances beautifully with subtle, refreshing drinks that won’t overpower the orange notes.
Creative Ways to Present
For a festive touch, arrange truffles in decorative paper cups or stack them neatly on a tiered dessert tray. You could even dust them lightly with edible glitter to add a playful sparkle that will delight guests at any party.
Make Ahead and Storage
Storing Leftovers
If you’re lucky enough to have leftovers, keep them stored in an airtight container in the refrigerator. They stay fresh for about a week, maintaining that perfect balance of creamy inside and crisp chocolate outside.
Freezing
Planning ahead? Place your truffles in a single layer on a baking sheet and freeze until solid. Then transfer them into a freezer-safe container. They keep well frozen for up to two months—just thaw gently in the fridge before serving.
Reheating
These truffles are best enjoyed chilled, so there’s no need to reheat. If the chocolate dulls in the fridge, allow them to sit at room temperature for a few minutes for the best flavor and texture experience.
FAQs
Can I use other types of cookies instead of vanilla wafers?
Absolutely! While vanilla wafers give a clean, sweet base, you could experiment with graham crackers or even shortbread for a slightly different texture and flavor. Just make sure they’re crushed finely for smooth truffles.
Is it necessary to use coconut oil with the chocolate?
Coconut oil isn’t mandatory but highly recommended. It helps the white chocolate melt smoothly and results in a shiny finish. If you don’t have it, you can try using vegetable oil, but coconut oil adds a subtle complementary flavor.
Can these truffles be made dairy-free?
For a dairy-free version, use a vegan cream cheese alternative and ensure your white chocolate chips are dairy-free. This swap still gives you that creamy, dreamy texture without compromising flavor.
How long do these truffles last at room temperature?
Because of the cream cheese, it’s best not to leave them out longer than a couple of hours. Keeping them refrigerated ensures they stay fresh and safe to eat.
Can I add other flavors or mix-ins?
Definitely! A pinch of cinnamon or a splash of orange liqueur can deepen the flavor. You might also try finely chopped nuts for crunch, just be mindful it will change the smooth texture.
Final Thoughts
I truly hope you give this Irresistible Orange Creamsicle Truffles Recipe a try soon. These little truffles are more than just a dessert—they’re a celebration of bright, creamy flavors you can enjoy year-round. They’re perfect for sharing (or not!), guaranteed to bring smiles around the table. Trust me, once you make them, they’ll quickly become a favorite go-to treat in your recipe collection.
Print
Irresistible Orange Creamsicle Truffles Recipe
- Prep Time: 15 minutes
- Cook Time: 10 minutes
- Total Time: 1 hour
- Yield: 24 servings
- Category: Dessert
- Method: No-Cook
- Cuisine: American
Description
These Irresistible Orange Creamsicle Truffles combine creamy, tangy orange zest with a smooth white chocolate coating, creating a delightful no-bake treat perfect for any occasion. Easy to prepare and bursting with nostalgic Creamsicle flavor, these truffles are a crowd-pleaser.
Ingredients
Truffle Base
- 1 cup vanilla wafers, crushed
- 1 cup cream cheese, softened
- 1 cup powdered sugar
- 2 tablespoons orange zest
- 1 teaspoon vanilla extract
Coating
- 1 cup white chocolate chips
- 1 tablespoon coconut oil
Instructions
- Mix the base ingredients: In a bowl, combine the crushed vanilla wafers, softened cream cheese, powdered sugar, orange zest, and vanilla extract. Stir well until the mixture is smooth and fully incorporated.
- Form the truffles: Shape the mixture into small, bite-sized balls and arrange them on a baking sheet lined with parchment paper to prevent sticking.
- Chill the truffles: Place the baking sheet in the refrigerator for 30 minutes to allow the truffles to firm up and hold their shape.
- Melt the coating: In a microwave-safe bowl, melt the white chocolate chips together with the coconut oil in short intervals, stirring between each, until the mixture is smooth and glossy.
- Dip the truffles: Using a fork or dipping tool, coat each chilled truffle completely in the melted white chocolate mixture, allowing excess to drip off before placing them back on the parchment-lined sheet.
- Set the chocolate: Return the coated truffles to the refrigerator and chill until the white chocolate is fully hardened and set, approximately 15–20 minutes.
- Serve and enjoy: Once set, the truffles are ready to be served as a delicious, creamy, and zesty dessert treat.
Notes
- For easier dipping, refrigerate the truffle balls until very firm before coating in chocolate.
- You can substitute orange zest with lemon or lime zest for a citrus twist.
- Store leftover truffles in an airtight container in the refrigerator for up to one week.
- Allow the truffles to come to room temperature for a few minutes before serving for the best texture and flavor.
- Use high-quality white chocolate for a smoother, richer coating.


