If you’re looking for a dish that perfectly balances sweet, savory, and a little bit of spice, you have to try this Honey Butter Garlic Chicken Tenders Recipe. These crispy chicken tenders coated in a golden panko crust and then drenched in a luscious honey butter garlic sauce create a mouthwatering harmony that’s impossible to resist. Whether you’re feeding a hungry family or craving a satisfying snack, this recipe is a guaranteed crowd-pleaser that brings warmth and comfort to your table in just 30 minutes.
Ingredients You’ll Need
The beauty of this recipe lies in its simplicity. Each ingredient plays an essential role, from the crispy panko breadcrumbs that give the chicken that perfect crunch to the rich honey butter garlic sauce that seals the deal with incredible flavor and shine.
- Chicken tenders (1 ½ lbs): Choose tender, evenly sized pieces for quick, even cooking and juicy bites.
- All-purpose flour (1 cup): Acts as the first layer to help the coating stick to the chicken.
- Garlic powder (1 tsp): Gives that subtle background garlic flavor to the flour mix.
- Onion powder (1 tsp): Adds depth and a hint of sweetness to the coating.
- Paprika (½ tsp): Brings a gentle smokiness and beautiful color to the flour mixture.
- Salt and pepper (to taste): Enhances and balances all the flavors perfectly.
- Buttermilk (1 cup): Tenderizes the chicken and helps layers stick while adding a slight tang.
- Panko breadcrumbs (2 cups): Provides the signature extra-crunchy texture everyone loves.
- Olive oil (2 tbsp): For frying, it keeps the coating crisp without overpowering flavors.
- Unsalted butter (3 tbsp): The creamy base for the honey butter garlic sauce.
- Honey (2 tbsp): Adds sweet notes that complement the savory garlic beautifully.
- Minced garlic (3 cloves): Gives the sauce its fragrant, punchy garlic flavor.
- Soy sauce (1 tsp, optional): Brings an umami boost for those who want a deeper flavor profile.
- Crushed red pepper flakes (½ tsp, optional): Adds a light spicy kick to balance the sweetness.
How to Make Honey Butter Garlic Chicken Tenders Recipe
Step 1: Prepare the Coating
Start by mixing the flour, garlic powder, onion powder, paprika, salt, and pepper in a shallow bowl. This seasoning blend will form the first crucial layer that flavors every bite of chicken.
Step 2: Set Up Your Dipping Stations
In one bowl, pour the buttermilk. In a separate shallow bowl, spread out the panko breadcrumbs. Having everything ready helps the coating process go smoothly and ensures each tender is perfectly crusted.
Step 3: Coat the Chicken Tenders
Dip each chicken tender first into the flour mixture, ensuring it’s fully coated. Next, dunk it into the buttermilk so the panko will stick better, then press it gently but firmly into the panko breadcrumbs for that signature crunch.
Step 4: Cook the Chicken to Golden Perfection
Heat olive oil in a large skillet over medium heat. Once hot, add the chicken tenders in batches to avoid crowding. Cook each side for 3-4 minutes until they develop a gorgeous golden-brown crust and are cooked through. Drain on paper towels to remove any excess oil and maintain crispiness.
Step 5: Make the Honey Butter Garlic Sauce
In a small pan, melt unsalted butter over medium heat. Add minced garlic and cook until fragrant, about 1-2 minutes. Stir in honey, soy sauce (if using), and red pepper flakes (if using). Let it simmer for 2-3 minutes until the sauce slightly thickens, becoming glossy and irresistible.
Step 6: Coat the Chicken in Sauce
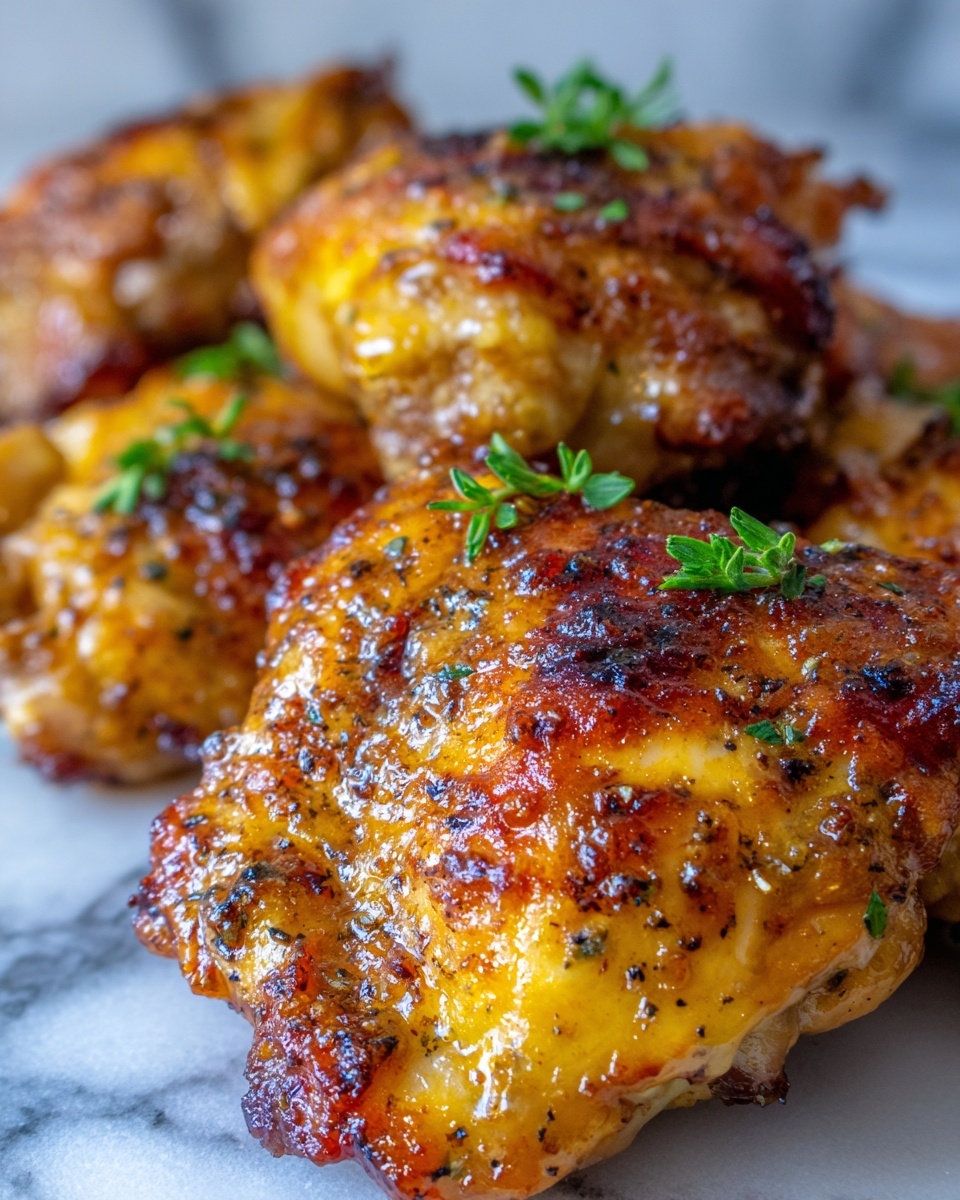
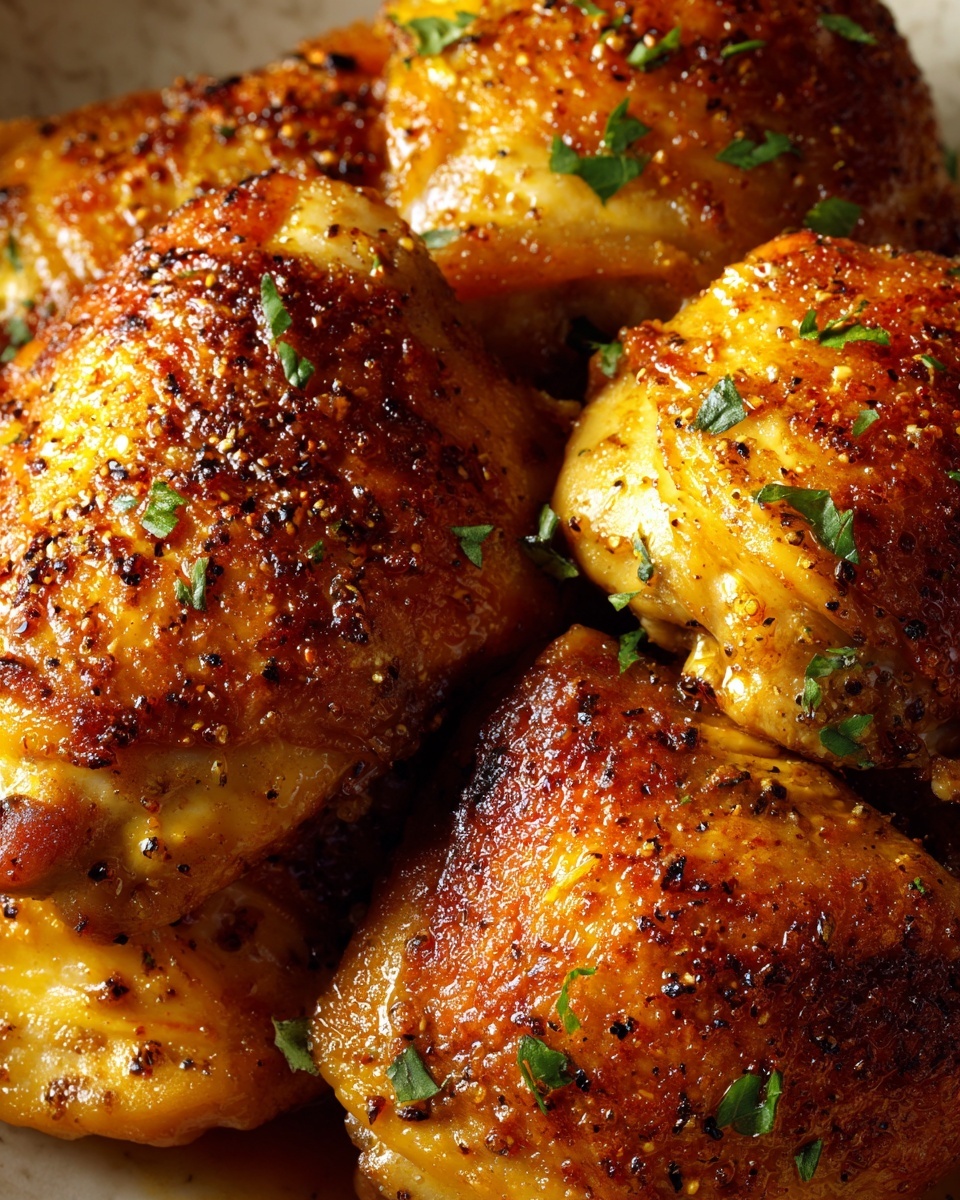
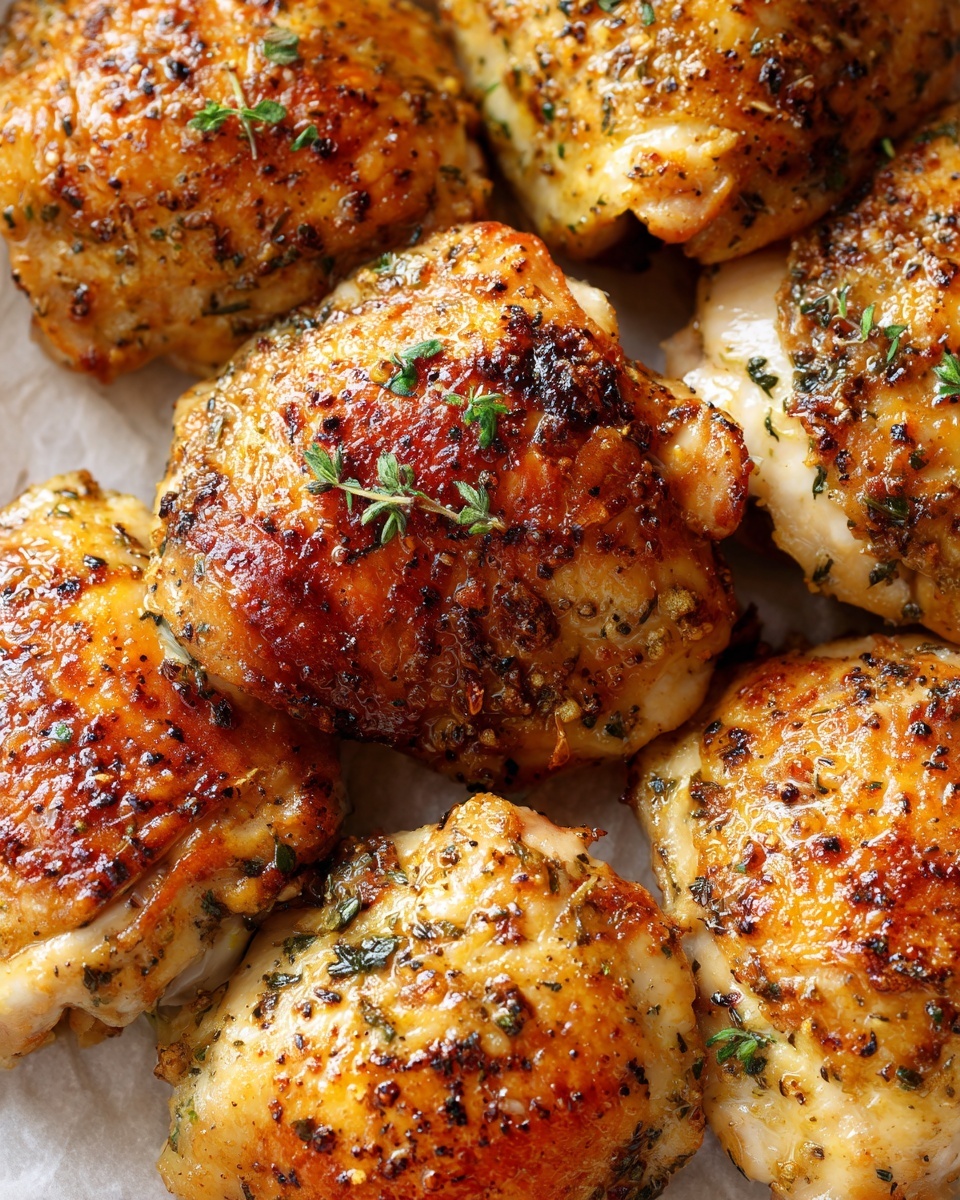
Once all chicken tenders are cooked, pour the honey butter garlic sauce over them or toss gently so every tender is coated evenly. This step transforms the crunchy chicken into a sticky, flavorful delight anyone will adore.
How to Serve Honey Butter Garlic Chicken Tenders Recipe
Garnishes
Fresh herbs like chopped parsley or cilantro add a lovely burst of color and freshness that contrasts perfectly with the rich sauce. A sprinkle of sesame seeds also adds crunch and a nutty note that elevates presentation and flavor.
Side Dishes
Serve these chicken tenders alongside crispy fries, a refreshing salad, or even steamed veggies for a balanced meal. Creamy coleslaw or garlic mashed potatoes also make excellent companions for a comforting dinner.
Creative Ways to Present
For a fun twist, arrange the tenders on a platter with individual cups of dipping sauces like ranch, spicy mayo, or extra honey butter garlic sauce. Serving them in small sandwiches or wraps with fresh lettuce and tomato can turn this recipe into an exciting lunch or picnic option.
Make Ahead and Storage
Storing Leftovers
Place leftover chicken tenders in an airtight container and refrigerate for up to 3 days. Keeping the sauce separate helps maintain the crisp texture of the tenders when reheated.
Freezing
To freeze, lay the cooked tenders flat on a parchment-lined tray and freeze until solid. Then transfer to a freezer-safe bag or container. They will keep well for up to 2 months and make for a fantastic quick meal anytime.
Reheating
Reheat frozen or refrigerated chicken tenders in an oven or toaster oven at 350°F (175°C) for about 10-15 minutes to restore the crispiness. Avoid microwaving as it can turn the coating soggy. Add extra honey butter garlic sauce after reheating to refresh their flavor.
FAQs
Can I use chicken breasts instead of chicken tenders?
Absolutely! You can cut chicken breasts into strips to mimic tenders, though cooking times may vary slightly depending on thickness. Just be sure they’re cooked through and juicy inside.
Is there a way to make this recipe gluten-free?
Yes, substitute regular all-purpose flour and panko breadcrumbs with gluten-free versions. Ensure the other ingredients are gluten-free as well to keep this Honey Butter Garlic Chicken Tenders Recipe safe for gluten-sensitive diners.
Can I bake the chicken tenders instead of frying?
Definitely! For a lighter option, bake coated chicken tenders at 400°F (200°C) for 15-20 minutes, flipping halfway, until golden and cooked through. Then toss in the sauce as usual to maintain that signature flavor.
What can I use instead of buttermilk?
If you don’t have buttermilk, mix 1 cup of regular milk with 1 tablespoon of lemon juice or white vinegar and let it sit for 5 minutes. This homemade substitute works beautifully for tenderizing the chicken.
Is the soy sauce necessary in the honey butter garlic sauce?
Soy sauce is optional but recommended if you love an umami boost that balances the sweetness and garlic. Feel free to omit it for a milder, sweeter sauce version.
Final Thoughts
This Honey Butter Garlic Chicken Tenders Recipe is one of those dishes you’ll find yourself craving again and again. The combination of crispy chicken with the sweet, buttery garlic sauce feels like an instant hug for your taste buds. Give it a try, and I promise your friends and family will be asking for seconds in no time!
Print
Honey Butter Garlic Chicken Tenders Recipe
- Prep Time: 10 minutes
- Cook Time: 20 minutes
- Total Time: 30 minutes
- Yield: 4 servings
- Category: Main Course
- Method: Frying
- Cuisine: American
Description
Crispy and flavorful Honey Butter Garlic Chicken Tenders, coated in seasoned flour and panko breadcrumbs, pan-fried to golden perfection and tossed in a luscious honey butter garlic sauce. Perfect for a quick and indulgent meal that serves the entire family in just 30 minutes.
Ingredients
Chicken and Coating
- 1 ½ lbs chicken tenders (or chicken breasts cut into strips)
- 1 cup all-purpose flour
- 1 tsp garlic powder
- 1 tsp onion powder
- ½ tsp paprika
- Salt and pepper, to taste
- 1 cup buttermilk (or milk)
- 2 cups panko breadcrumbs
- 2 tbsp olive oil (for frying)
Honey Butter Garlic Sauce
- 3 tbsp unsalted butter
- 2 tbsp honey
- 3 cloves garlic, minced
- 1 tsp soy sauce (optional)
- ½ tsp crushed red pepper flakes (optional)
Instructions
- Prepare the Chicken: In a shallow bowl, combine the all-purpose flour, garlic powder, onion powder, paprika, salt, and pepper to create a flavorful flour mixture for coating the chicken.
- Prepare Wet and Dry Coatings: Pour the buttermilk into another shallow bowl. In a third shallow bowl, spread out the panko breadcrumbs for the final coating.
- Coat the Chicken: Dip each chicken tender into the seasoned flour mixture, ensuring an even coat. Then, dip into the buttermilk to moisten, followed by pressing into the panko breadcrumbs until fully coated.
- Cook the Chicken: Heat the olive oil in a large skillet over medium heat. Once hot, add the coated chicken tenders in batches and fry for 3-4 minutes per side, or until they are golden brown and fully cooked through.
- Drain Excess Oil: Transfer the cooked tenders onto a paper towel-lined plate to absorb and drain any excess oil from frying.
- Make the Honey Butter Garlic Sauce: In a small pan over medium heat, melt the unsalted butter. Add the minced garlic and sauté for 1-2 minutes until fragrant. Stir in the honey, soy sauce (if using), and crushed red pepper flakes (if using). Cook for another 2-3 minutes until the sauce thickens slightly.
- Coat the Chicken in Sauce: Drizzle the honey butter garlic sauce over the cooked chicken tenders or toss the tenders in the sauce to ensure an even coating of sweet and savory flavor.
- Serve: Serve immediately with your favorite dipping sauce or side dishes and enjoy this irresistible dish while hot.
Notes
- For extra crispiness, use chicken tenders rather than thicker cuts.
- Buttermilk helps tenderize the chicken; if none is available, milk with a splash of lemon juice can be a substitute.
- The soy sauce and red pepper flakes in the sauce are optional but add depth of flavor and a hint of heat.
- Use a thermometer to ensure chicken reaches an internal temperature of 165°F for safety.
- Leftovers can be reheated in a skillet or oven to maintain crispiness.

