If you have ever marveled at the delicate, crispy egg rolls served in your favorite Asian restaurants and wished you could capture that magic at home, then you are in for a treat with this Homemade Egg Roll Wrappers Recipe. This recipe transforms a handful of simple pantry staples into silky, thin wrappers that give your egg rolls the perfect balance of crispness and chewiness. Making your own wrappers might sound intimidating, but it is surprisingly easy and rewarding—once you try it, you’ll never want to reach for store-bought egg roll wrappers again!
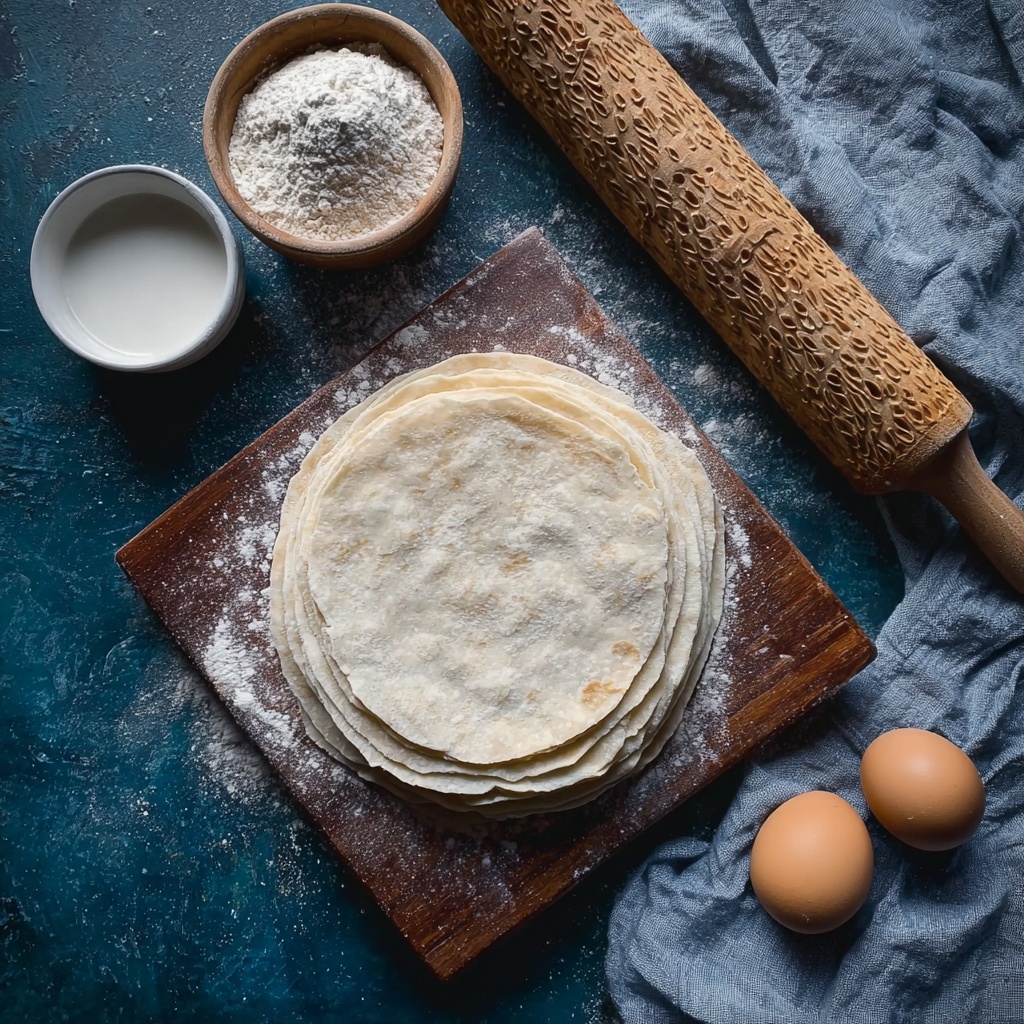
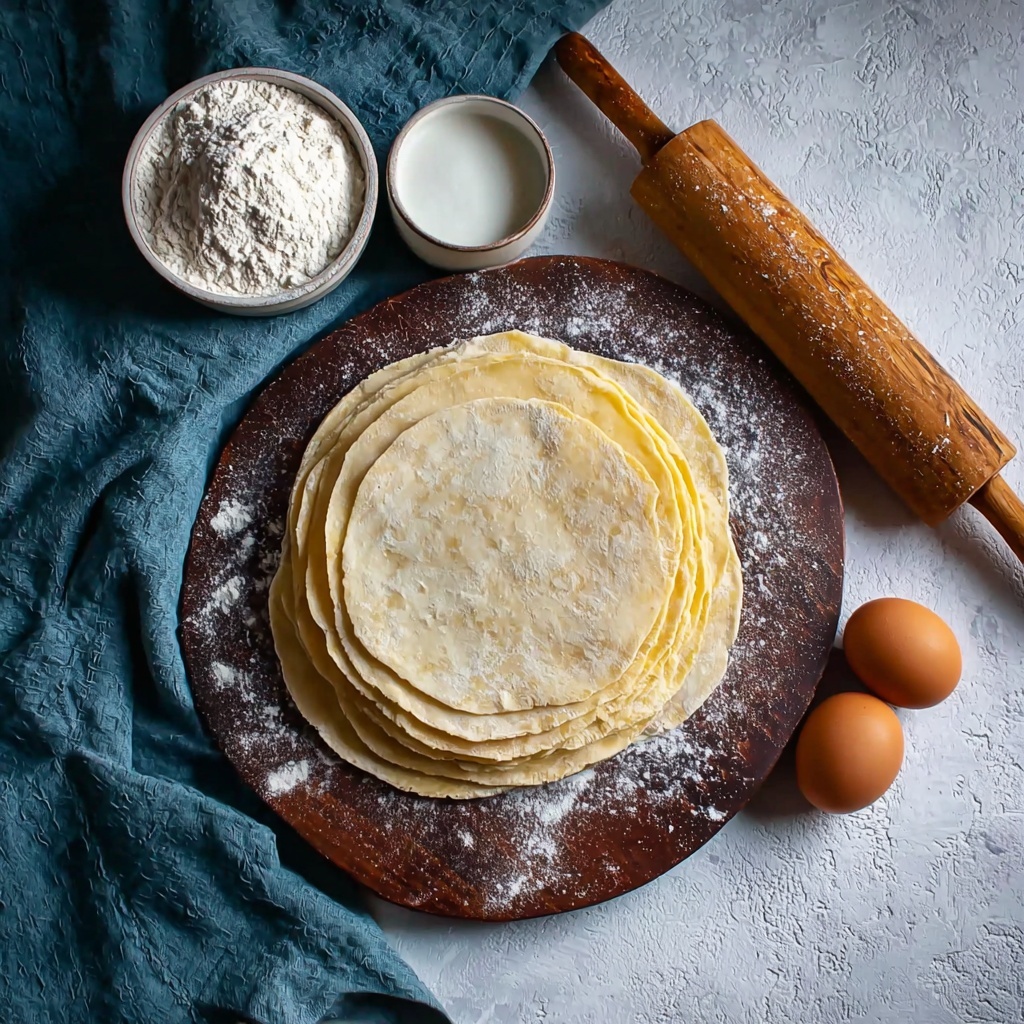
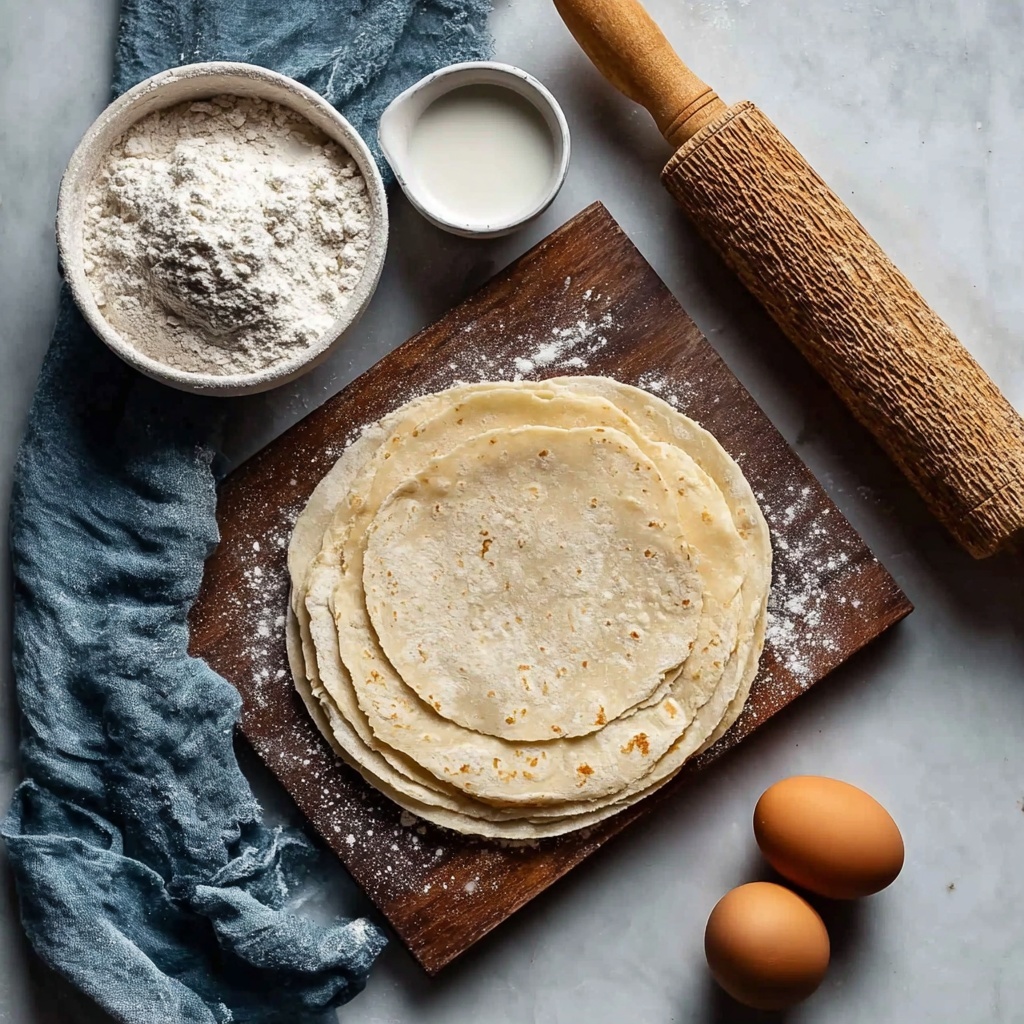
Ingredients You’ll Need
These few ingredients are the heart and soul of your Homemade Egg Roll Wrappers Recipe. Each one plays a vital role in creating that smooth, flexible, and light texture that makes every bite delightful.
- All-purpose flour: The base ingredient providing the structure and chewiness to the wrappers.
- Baking powder: A tiny amount gives a subtle lightness, making the wrappers more tender.
- Salt: Enhances flavor balance without overpowering the delicate wrapper taste.
- Water: The key to forming the batter; it hydrates the flour and controls the batter’s consistency for the ideal thin sheet.
How to Make Homemade Egg Roll Wrappers Recipe
Step 1: Whisk Together Dry Ingredients
Start by combining the all-purpose flour, baking powder, and salt in a mixing bowl. Whisking them thoroughly ensures even distribution of leavening and seasoning throughout the batter, which is crucial for a consistent texture.
Step 2: Add Water and Mix to a Smooth Batter
Now pour in the water and whisk until the batter becomes smooth and fairly liquid—this is completely normal. To avoid lumps and achieve that silky finish, it’s a great idea to pass the batter through a fine sieve. This step might feel a bit fussy, but it makes a noticeable difference in the final appearance of your wrappers.
Step 3: Heat Your Pan to Just the Right Temperature
Heat a non-stick crêpe pan over low-medium heat carefully. The temperature should be moderate so the batter cooks quickly but doesn’t dry out or burn—this control is essential for soft yet resilient wrappers.
Step 4: Brush the Batter into an 8-Inch Circle
Using a pastry brush, dip it into the batter and apply it to the pan’s surface in a circular motion to create an approximately 8-inch diameter circle. You’ll need to dip the brush multiple times—around 12 to 15—to build up an even, thin layer that resembles painting a delicate canvas.
Step 5: Cook Briefly Until Set, About 15-20 Seconds
The batter cooks very fast, usually in just 15 to 20 seconds. Be mindful not to overcook the wrapper, as it will become brittle and crack when you roll it later. You want it just set enough to hold together but still supple.
Step 6: Lift the Wrapper Gently from the Pan
Use a spatula to carefully loosen one edge, then lift the entire wrapper with your hands and transfer it to a plate. Handling gently helps maintain its shape without tearing.
Step 7: Wipe the Pan and Repeat for More Wrappers
Clean the pan with a paper towel before making each new wrapper to prevent any leftover batter from affecting the texture. Repeat the brushing and cooking steps until all your batter is used up, building your stack of perfectly thin wrappers.
Step 8: Use Immediately or Store Properly
These Homemade Egg Roll Wrappers Recipe are best used the same day because they dry out quickly and can stick together. If needed, cover them with plastic wrap and keep at room temperature for up to 12 hours for the freshest results.
How to Serve Homemade Egg Roll Wrappers Recipe
Garnishes
When serving your egg rolls wrapped in these homemade creations, fresh garnishes like thinly sliced scallions, shredded carrots, or a sprinkle of toasted sesame seeds add a pop of color and a hint of extra flavor. They bring a lovely contrast to the wrappers’ crispness and complement the filling beautifully.
Side Dishes
To complete your meal, pair your egg rolls with classic dipping sauces such as sweet chili, soy-ginger, or hoisin sauce. Light Asian slaws or simple steamed vegetables make excellent side dishes, balancing the rich taste and texture of the crispy rolls.
Creative Ways to Present
For a fun twist, slice your egg rolls into bite-sized pinwheels arranged on a platter with colorful dipping sauces in small bowls. You can also wrap other fillings—think grilled vegetables, shrimp, or even dessert-style with banana and chocolate—to showcase the versatility of your Homemade Egg Roll Wrappers Recipe.
Make Ahead and Storage
Storing Leftovers
If you have unused wrappers, store them on a plate covered tightly with plastic wrap at room temperature for up to 12 hours. Keep them from stacking too thickly to avoid sticking together; placing parchment sheets between wrappers can help.
Freezing
While freshly made is best, you can freeze these wrappers by stacking them with parchment paper between each layer, then wrapping tightly in plastic wrap and placing them in a freezer-safe bag. They keep well for up to one month and thaw quickly at room temperature before use.
Reheating
When ready to use, gently warm frozen or refrigerated wrappers on a dry non-stick pan over low heat for a few seconds on each side until pliable. Avoid overheating as they can dry out or crack easily.
FAQs
Can I substitute any ingredients in this Homemade Egg Roll Wrappers Recipe?
The recipe is quite simple and all ingredients serve a purpose, so substitutions may affect texture. For a gluten-free version, consider experimenting with specialty flours, but results will vary.
Why is the batter for the wrappers so thin?
The thin batter is key to producing delicate, paper-thin wrappers that cook quickly and stay tender yet firm enough to hold fillings without tearing.
What’s the best pan to use for cooking these wrappers?
A non-stick crêpe pan or skillet with a smooth surface and even heat distribution is ideal. It prevents sticking and helps you control the cooking time more precisely.
How do I prevent the wrappers from sticking together?
Allow each wrapper to cool slightly before stacking, and use parchment or wax paper between them. Keeping them covered with plastic wrap helps retain moisture without making them sticky.
Can I make these wrappers in advance?
You can prepare them up to 12 hours ahead and store at room temperature properly covered. For longer storage, freezing is recommended to maintain freshness and flexibility.
Final Thoughts
Now that you have the secret to perfect, tender homemade egg roll wrappers right at your fingertips, I hope you’ll dive into this Homemade Egg Roll Wrappers Recipe with excitement and confidence. There is a special joy in transforming simple ingredients into something truly delightful and versatile. So roll up your sleeves, get that pan heating, and savor every delicious moment of making and enjoying your egg rolls from scratch!
Print
Homemade Egg Roll Wrappers Recipe
- Prep Time: 5 minutes
- Cook Time: 8 minutes
- Total Time: 13 minutes
- Yield: 14 wrappers
- Category: Appetizer
- Method: Stovetop
- Cuisine: Chinese
Description
This recipe provides a simple and quick way to make homemade egg roll wrappers from scratch using basic pantry ingredients. The thin, delicate wrappers are perfect for making fresh egg rolls, and the method involves pan-cooking thin crepe-like layers that cook in seconds to achieve the ideal texture for rolling.
Ingredients
Egg Roll Wrappers Ingredients
- 1 cup all-purpose flour
- 1/8 tsp baking powder
- 1/8 tsp salt
- 3/4 cup plus 1 tbsp water
Instructions
- Whisk Dry Ingredients: Combine the all-purpose flour, baking powder, and salt in a mixing bowl and whisk together until evenly mixed.
- Add Water: Pour the water into the dry mixture and whisk until you achieve a very liquid batter. If lumps persist, strain the batter through a fine mesh sieve to ensure smoothness for better-looking wrappers.
- Heat the Pan: Preheat a non-stick crepe pan over low to medium heat. It’s crucial that the pan is not too hot to avoid burning the thin wrappers.
- Brush the Wrapper: Using a pastry brush dipped into the batter, quickly brush a thin, circular layer approximately 8 inches (20 cm) in diameter onto the pan. Repeat brushing around 12-15 times to create an even layer, similar to painting a canvas.
- Cook: Allow the batter to cook for 15-20 seconds. Do not overcook as it will cause the wrapper to dry and crack, making it difficult to roll later.
- Lift the Wrapper: Carefully use a spatula to lift one edge of the wrapper, then peel it off the pan with your hands and transfer it to a plate.
- Clean the Pan: Wipe the pan with a clean kitchen paper towel to remove any residual batter before repeating the process with the remaining batter.
- Storage: Use the wrappers the same day for best results, as they dry out quickly and tend to stick together. If needed, cover the plate with plastic wrap and store them at room temperature for up to 12 hours.
Notes
- Use a non-stick crepe pan for even cooking and easy removal.
- Brush on a thin, even layer to ensure wrappers are delicate and pliable.
- Do not overcook wrappers to prevent cracking during rolling.
- Straining batter improves smoothness and final appearance.
- Best used fresh but can be stored covered at room temperature for up to 12 hours.
- Clean the pan between wrappers to avoid burning residual batter.


