
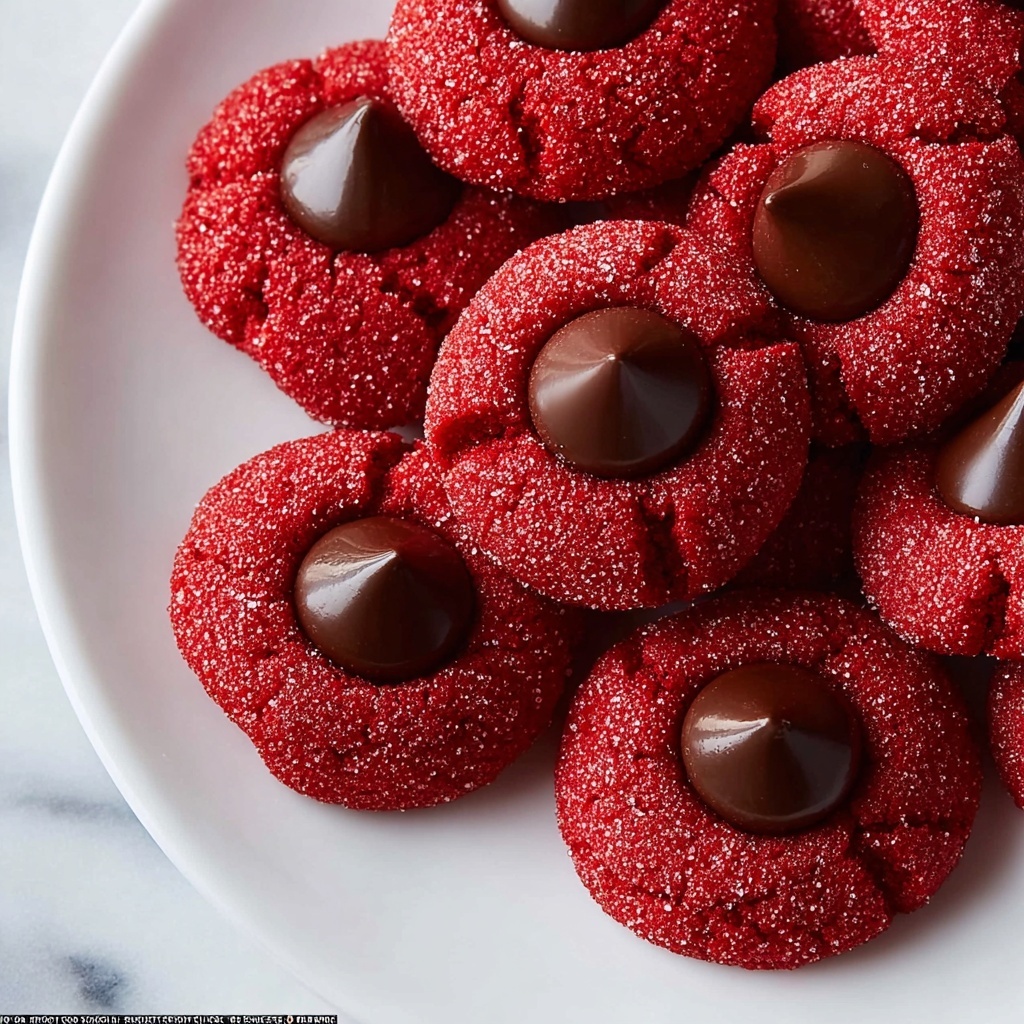
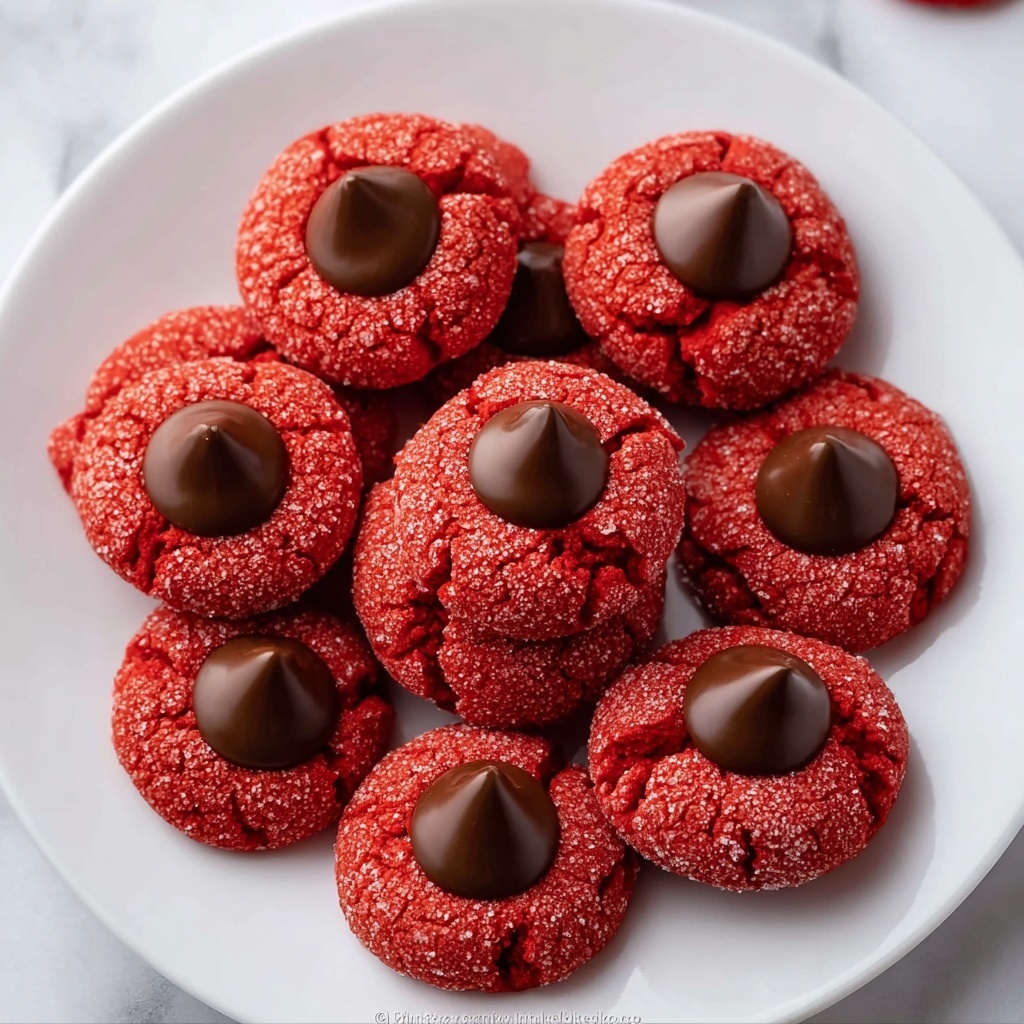
If you’ve ever wanted to impress friends with a stunning and delicious treat, the Hershey’s Red Velvet Blossoms Cookies Recipe is your golden ticket. These cookies take classic red velvet to a whole new level by pairing soft, cocoa-kissed dough coated in sparkling red sanding sugar with a melting Hershey’s chocolate kiss at the center. They are soft, slightly chewy, with just the right hint of chocolate and vanilla, making every bite a festive celebration. Whether you’re making them for a holiday party or an anytime sweet craving, this recipe is bound to become a beloved staple in your baking repertoire.
Ingredients You’ll Need
Getting the perfect texture and vibrant color in these cookies is all about the right ingredients. Each one plays a crucial role, from creating the soft crumb to the hint of cocoa to the festive red coating.
- 7 tbsp butter (salted or unsalted): Softened butter adds richness and moisture for tender cookies.
- ½ cup brown sugar: Gives a deep, caramel-like sweetness and chewiness.
- 2 tbsp granulated sugar: Helps balance sweetness and provides structure.
- 1 tsp vanilla extract: Enhances all the other flavors with warm, aromatic notes.
- 1 large egg yolk: Binds ingredients while contributing to richness.
- ¼ tsp red food coloring gel: Creates that iconic bold red hue without altering texture.
- 1 cup all-purpose flour: The backbone of the dough, giving it form.
- 1 tbsp cocoa powder: Adds the subtle chocolate undertone that complements the Hershey’s kiss.
- ½ tsp baking powder: Helps the cookies rise and stay soft.
- ¼ tsp salt: Balances sweetness and deepens flavor.
- ¼ cup red sanding sugar: Coats the cookies with sparkle and a pleasant slight crunch.
- 18 Hershey chocolate kisses: The irresistible melting center that makes these blossoms truly special.
How to Make Hershey’s Red Velvet Blossoms Cookies Recipe
Step 1: Preheat and Prepare Your Baking Sheet
Start by heating your oven to 350°F (180°C) and lining a large baking sheet with parchment paper. This setup ensures even baking and prevents the cookies from sticking or burning, setting you up for success from the get-go.
Step 2: Cream Butter and Sugars
Using a stand mixer or hand mixer, beat the softened butter with both brown and granulated sugar until the mixture is smooth and creamy. This process is key because well-creamed butter and sugar creates tiny air pockets that help your cookies stay light and tender.
Step 3: Add Egg Yolk, Vanilla, and Color
Next, mix in the large egg yolk, vanilla extract, and the red food coloring until everything is combined evenly. The red food coloring gives these cookies their signature look, while the yolk and vanilla continue to build that rich, flavorful base.
Step 4: Incorporate Dry Ingredients
Gently fold in the all-purpose flour, cocoa powder, baking powder, and salt. Mix just until no dry flour bits remain—be careful not to overwork the dough or the cookies might turn tough instead of tender and soft.
Step 5: Shape and Coat with Sanding Sugar
Divide the dough into 18 equal portions, rolling each into a ball. Then roll each dough ball in the red sanding sugar generously, so they shimmer with a festive glow once baked. This coating adds a delightful texture contrast and eye-catching sparkle.
Step 6: Bake the Cookies
Place the sugar-coated dough balls on your prepared baking sheet with a little space between each one, and bake for about 10 minutes. You’ll know they’re ready when the edges look set but the centers remain soft and slightly underbaked—it’s this softness that makes them irresistible.
Step 7: Add the Hershey’s Kisses
The moment you pull the cookies from the oven, gently press a Hershey chocolate kiss into the center of each cookie. The residual heat will soften the chocolate just enough to meld perfectly without losing its shape.
Step 8: Cool the Cookies
Allow your cookies to rest on the baking sheet for 10 minutes so they firm up and the chocolate sets nicely, then transfer them to a cooling rack to finish cooling completely. Patience here rewards you with the perfect texture and presentation.
How to Serve Hershey’s Red Velvet Blossoms Cookies Recipe
Garnishes
While the red sanding sugar and chocolate kiss make these cookies stand out beautifully on their own, you can take it up a notch by dusting a tiny bit of powdered sugar around the plate or adding a sprinkle of edible glitter for a party-worthy touch. Fresh mint leaves nearby create a lovely color contrast and freshness.
Side Dishes
These cookies pair fabulously with a tall glass of cold milk, creamy hot chocolate, or even a scoop of vanilla ice cream for a delightful dessert duo. If serving at a gathering, consider offering coffee or tea to balance the sweetness perfectly.
Creative Ways to Present
Serve your Hershey’s Red Velvet Blossoms Cookies Recipe in decorative tins or tied up in a clear bag with a ribbon for thoughtful gifts. For a festive display, arrange them on tiered dessert stands, or build a cookie centerpiece by stacking them in a pyramid shape. The eye-catching red and chocolate combination is sure to be a conversation starter.
Make Ahead and Storage
Storing Leftovers
Once your cookies have cooled completely, store them in an airtight container at room temperature. They will stay fresh and soft for up to 5 days, perfect for making ahead of time before a party or event.
Freezing
If you want to keep these delicious treats longer, freeze the unbaked dough balls coated in sanding sugar on a tray until solid, then transfer to a freezer-safe container or bag. You can also freeze fully baked cookies layered with parchment paper for up to 3 months. When ready, thaw at room temperature for several hours.
Reheating
To enjoy these cookies warm, pop them in the microwave for about 10 seconds or heat briefly in a preheated 300°F oven for 5 minutes. This softly melts the center kiss and revives that fresh-baked softness.
FAQs
Can I use regular chocolate chips instead of Hershey’s Kisses?
While Hershey’s Kisses are what give these cookies their signature look and a perfect melting center, you can definitely experiment with chocolate chips if needed. Just know the presentation and texture will be slightly different but still delicious.
Is red food coloring necessary for the recipe?
The red food coloring is what makes these cookies truly stand out as red velvet blossoms. If you skip it, the cookies will still taste great but will lack the classic vibrant red appeal.
Can I make these cookies gluten-free?
Absolutely! Substitute the all-purpose flour for a 1-to-1 gluten-free baking flour blend. The texture may vary slightly but it will still be delicious and festive.
Why is the dough coated in red sanding sugar?
Rolling the dough balls in red sanding sugar before baking adds a sparkling, festive crunch to the cookie exterior which contrasts beautifully with the soft center and enhances the overall visual appeal.
Can these cookies be made vegan?
With some recipe modifications like using vegan butter, egg replacers, and vegan chocolate kisses, you could adapt this recipe to be vegan. It might take a few trials to perfect, but the result can still be wonderfully tasty.
Final Thoughts
If you’re ready to fill your kitchen with incredible aromas and your gatherings with smiles, the Hershey’s Red Velvet Blossoms Cookies Recipe is a must-try. Combining gorgeous color, tender sweetness, and that iconic melting chocolate kiss, these cookies are as fun to make as they are to eat. Trust me, once you try this recipe, it’s going to be your go-to treat for holidays and special moments alike. So grab your ingredients and bake up a batch of joy today!
Print
Hershey’s Red Velvet Blossoms Cookies Recipe
- Prep Time: 10 minutes
- Cook Time: 10 minutes
- Total Time: 25 minutes
- Yield: 18 cookies
- Category: Dessert
- Method: Baking
- Cuisine: American
Description
Hershey’s Red Velvet Blossoms Cookies are soft and tender red velvet cookies coated with sparkling red sanding sugar and topped with a signature Hershey chocolate kiss. These festive treats combine the classic flavors of red velvet cake with a buttery cookie base and a melty chocolate center, perfect for holiday gatherings or anytime you want a delightful homemade dessert.
Ingredients
Cookie Dough
- 7 tbsp butter (salted or unsalted), softened
- ½ cup brown sugar
- 2 tbsp granulated sugar
- 1 tsp vanilla extract
- 1 large egg yolk
- ¼ tsp red food coloring gel
- 1 cup all-purpose flour
- 1 tbsp cocoa powder
- ½ tsp baking powder
- ¼ tsp salt
Coating & Topping
- ¼ cup red sanding sugar
- 18 Hershey chocolate kisses
Instructions
- Preheat and Prepare Baking Sheet: Heat the oven to 350°F (180°C) and line a large baking sheet with parchment paper to prevent sticking and ensure easy cleanup.
- Mix Butter and Sugars: In a stand mixer, beat the softened butter with the brown sugar and granulated sugar until the mixture is smooth, creamy, and well combined, which creates a light and fluffy base for the cookies.
- Add Wet Ingredients: Mix in the egg yolk, vanilla extract, and red food coloring gel until the dough is evenly colored and all ingredients are fully incorporated.
- Incorporate Dry Ingredients: Add the flour, cocoa powder, baking powder, and salt to the wet mixture. Mix gently just until no dry flour remains to avoid overworking the dough and keep the cookies tender.
- Shape and Coat Dough Balls: Scoop the dough into 18 equal portions, roll each portion into a ball, and then coat each ball thoroughly with red sanding sugar for a sparkling exterior.
- Arrange on Baking Sheet: Place the coated dough balls on the prepared baking sheet, spacing them apart to allow for spreading during baking.
- Bake Cookies: Bake the cookies for 10 minutes until they are set around the edges but still soft in the center, ensuring a chewy texture.
- Add Chocolate Kisses: Immediately after removing the cookies from the oven, press one Hershey chocolate kiss into the center of each cookie while they are still warm, so the chocolate slightly melts into the cookie.
- Cool Cookies: Let the cookies rest on the baking sheet for 10 minutes to firm up, then transfer them to a cooling rack to cool completely before serving.
Notes
- Use gel food coloring for vibrant color without thinning the dough.
- Ensure butter is softened but not melted for best texture.
- Do not overmix the dough once flour is added to prevent tough cookies.
- Press the chocolate kisses into the cookies immediately after baking for proper melting and adhesion.
- Store cookies in an airtight container at room temperature for up to 5 days.
- For a festive variation, try white chocolate kisses or different colored sanding sugars.


