Gooey Peanut Butter Lava Cupcakes Recipe
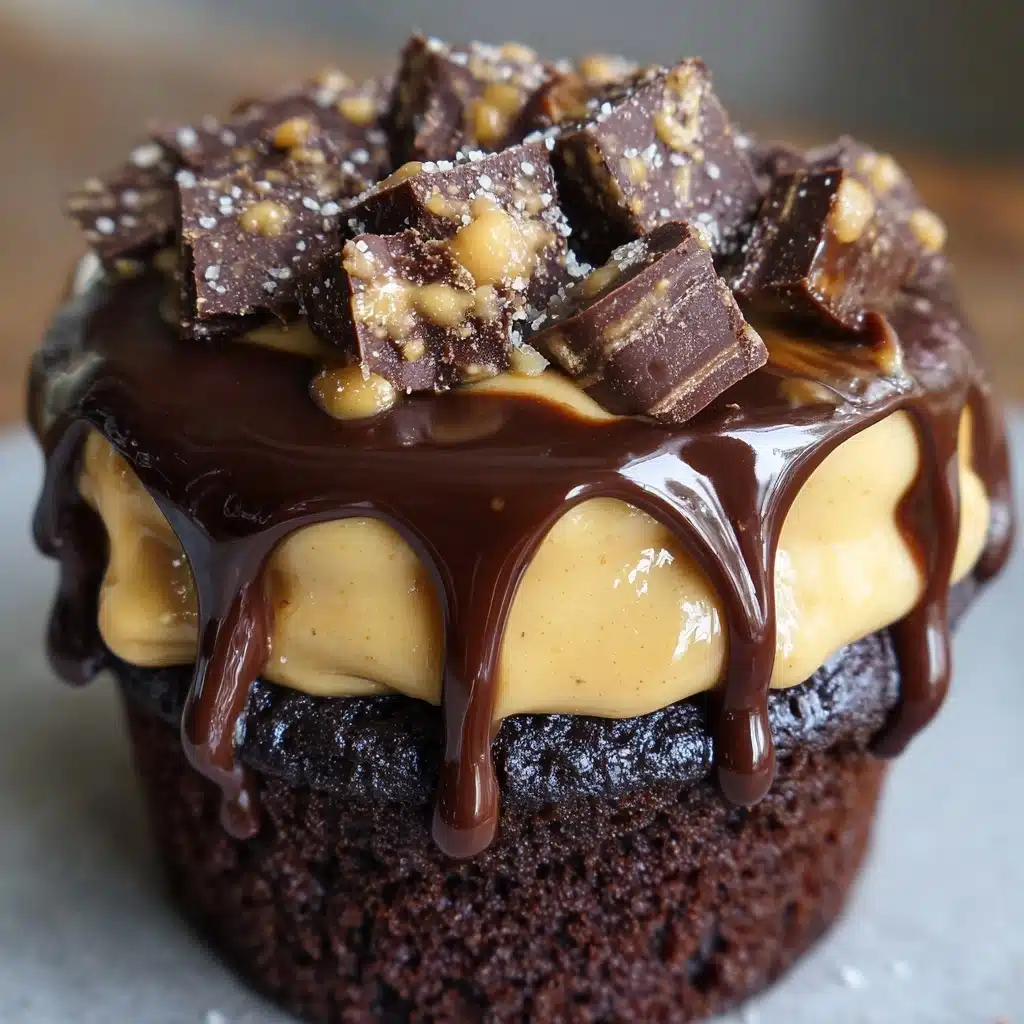
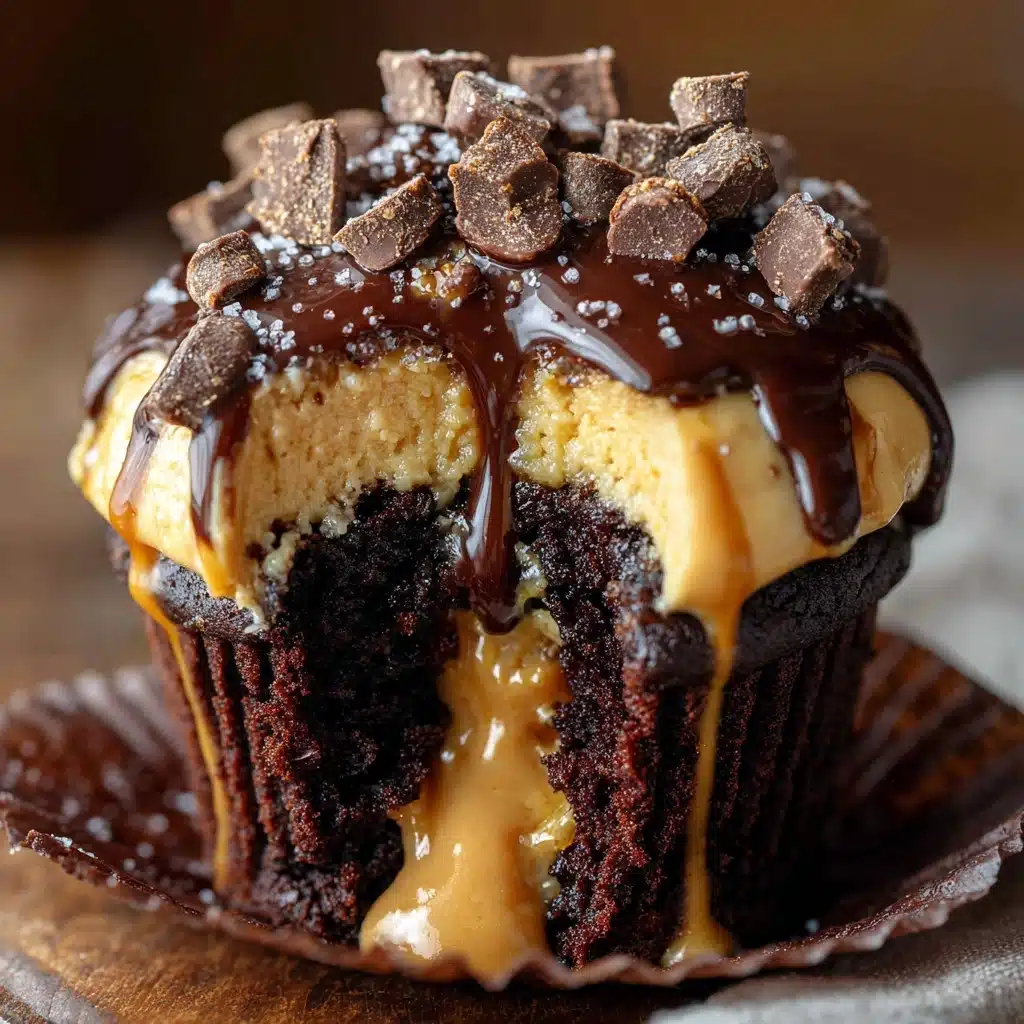
If you’re hunting for a decadent treat that puts peanut butter center stage, these Gooey Peanut Butter Lava Cupcakes are about to become your new obsession. Imagine biting into a soft, chocolatey cupcake only to discover a river of warm, luscious peanut butter flowing from the inside. Every bite truly delivers all the best parts of a peanut butter cup, but with a surprise molten twist. Whether you’re baking for a crowd or whipping up something special just because, this dessert brings joy wherever it goes. Prepare for wows at every single “ooze” of that gooey peanut butter center!
Ingredients You’ll Need
The beauty of Gooey Peanut Butter Lava Cupcakes is how each ingredient, though simple, adds another delicious layer—from the richness of cocoa to that signature molten peanut butter middle. Here’s what makes the magic happen, with a few quick tips to bring out the very best flavors and textures.
- All-purpose flour: Creates structure so your cupcakes are soft, fluffy, and rise just right.
- Unsweetened cocoa powder: Delivers deep chocolate flavor and helps give that dark, gorgeous crumb.
- Baking powder: A must for lift and tenderness in every bite.
- Salt: Enhances and balances the sweet and chocolatey notes.
- Unsalted butter (softened): Ensures a rich texture and evenly creamy batter—let it come to room temp for best results!
- Granulated sugar: Sweetens and helps with that delightfully tender crumb.
- Large eggs: Add richness and bind the ingredients together for that cake-like feel.
- Vanilla extract: A splash of warmth that ties all the flavors together.
- Milk: Keeps the cupcakes extra moist and balanced.
- Creamy peanut butter: The star of your gooey lava center—opt for smooth, not natural, for the best melt.
- Powdered sugar: Sweetens and smooths out the peanut butter filling while keeping it fluffy.
- Semi-sweet chocolate chips (optional): Sprinkle for even more chocolate indulgence and a little melty crumb on top.
How to Make Gooey Peanut Butter Lava Cupcakes
Step 1: Prep the Pan and Preheat
Before anything else, preheat your oven to 350°F (175°C). Line a 12-cup muffin tin with cupcake liners—this makes for super easy cleanup and keeps the cupcakes perfectly shaped with extra gooey centers intact!
Step 2: Mix the Dry Ingredients
In a medium bowl, whisk together the flour, cocoa powder, baking powder, and salt. This ensures everything gets evenly distributed, so no one gets a surprise salty or bitter bite.
Step 3: Cream Butter and Sugar
In a large bowl, use an electric mixer to cream the softened butter and granulated sugar until it’s pale, light, and fluffy. This step is key for creating that soft and airy cupcake texture that perfectly houses the gooey peanut butter lava.
Step 4: Add Eggs and Vanilla
Crack in the eggs, one at a time, mixing well after each addition. Then, blend in the vanilla extract. You’ll notice the mixture getting silky and smooth—exactly what we want!
Step 5: Combine Wet and Dry
Add the dry ingredients into your wet mixture gradually, alternating with the milk (start and finish with dry). Stir gently and only until combined. Overmixing can lead to denser cupcakes, so just a few gentle turns will do the job.
Step 6: Make the Peanut Butter Filling
In a small bowl, blend the creamy peanut butter with powdered sugar until the mixture is smooth and scoopable. If you want an extra molten lava center, pop this filling in the fridge to chill while you prep the batter—it melts slower and gives you a bigger gooey payoff!
Step 7: Assemble the Cupcakes
Spoon about a tablespoon of cupcake batter into each liner. Add a heaping teaspoon of your peanut butter mixture right in the center, avoiding the edges. Then, cover with another spoonful of batter, so your liners are about three-quarters full. This layering guarantees that “lava” effect inside every Gooey Peanut Butter Lava Cupcake.
Step 8: Add Toppings and Bake
Sprinkle on chocolate chips if you’re feeling extra (who isn’t?). Slide the pan into the oven and bake for 16 to 18 minutes. You want the edges set but the centers just a bit soft—the signature of a molten filling lurking below!
Step 9: Cool Slightly and Serve Warm
Let the cupcakes cool in the tin for about 5 minutes. Then transfer to a wire rack. Serve while still a little warm for the full gooey lava experience—this is where the magic happens! Every cupcake promises a river of decadent peanut butter goodness.
How to Serve Gooey Peanut Butter Lava Cupcakes
Garnishes
Top your Gooey Peanut Butter Lava Cupcakes with a dusting of powdered sugar, a sprinkle of flaky sea salt, or a drizzle of warm chocolate sauce. For extra wow, add a few roasted peanuts or mini chocolate chips over the warm tops before serving for a showstopping finish.
Side Dishes
These cupcakes already steal the spotlight, but a scoop of vanilla or coffee ice cream takes them truly over the top. For a lighter touch, pair with fresh strawberries or sliced bananas—the fruit perfectly complements the rich chocolate and creamy peanut butter center.
Creative Ways to Present
Turn dessert into an experience by serving each Gooey Peanut Butter Lava Cupcake in its own ramekin and presenting them on individual plates. Dress up the plates with chocolate or caramel drizzle and a dollop of whipped cream. For parties, try mini versions for a sweet bite-size treat that bursts with that irresistible lava every time.
Make Ahead and Storage
Storing Leftovers
If you end up with any leftovers (it’s rare!), store your cooled cupcakes in an airtight container at room temperature for up to two days. For longer freshness, keep them in the fridge; just be sure to warm them slightly to enjoy that signature melting center again.
Freezing
Yes, you can freeze Gooey Peanut Butter Lava Cupcakes! Wrap each cooled cupcake tightly in plastic wrap, then place them in a freezer-safe bag or container. They’ll keep well for up to two months. Thaw in the fridge overnight before reheating for a treat whenever cravings strike.
Reheating
To revive that gooey core, microwave each cupcake for about 10–15 seconds. The center melts to perfection, just like when they first emerged from the oven. If you’re heating several at once, lower your microwave power slightly and check every 10 seconds for the ideal molten middle.
FAQs
Can I use natural peanut butter for the filling?
For best results, stick to regular creamy peanut butter. Natural styles often separate or turn oily during baking, which can make the filling less gooey and more runny. The classic stuff keeps your lava just right!
What’s the best way to get a really gooey center?
Chill your peanut butter filling before adding it to the batter. A cold center melts slower as the cupcakes bake, giving you that perfect molten river every single time. Serve warm for maximum gooeyness.
Do I need to use cupcake liners?
Liners help keep everything tidy and make it easier to remove the cupcakes with their precious lava centers intact. If you’re out of liners, generously grease your tin and run a knife around each cupcake to help release them carefully.
Can I make Gooey Peanut Butter Lava Cupcakes gluten free?
Absolutely! Swap the all-purpose flour for your favorite 1:1 gluten-free baking flour blend. Check your cocoa powder and other ingredients for hidden gluten, and you’re good to go.
Can I double the recipe for a crowd?
Go for it! Double all ingredients and use two muffin tins or bake in batches. The recipe scales beautifully, and the more Gooey Peanut Butter Lava Cupcakes you have, the more smiles you’ll see!
Final Thoughts
I can’t wait for you to experience these Gooey Peanut Butter Lava Cupcakes for yourself! Every bite is a little bit of dessert magic: fudgy chocolate, irresistibly molten peanut butter, and just the right balance of sweetness. Whether you share them or keep them all to yourself, these cupcakes are pure joy—be prepared to bake them again and again!
Print
Gooey Peanut Butter Lava Cupcakes Recipe
- Total Time: 38 minutes
- Yield: 12 cupcakes 1x
- Diet: Vegetarian
Description
Indulge in these decadent Gooey Peanut Butter Lava Cupcakes for the ultimate sweet treat. Rich chocolate cupcakes with a molten peanut butter center, these are a must-try for any dessert lover.
Ingredients
Cupcake Batter:
- 1 cup all-purpose flour
- 1/2 cup unsweetened cocoa powder
- 1 teaspoon baking powder
- 1/4 teaspoon salt
- 1/2 cup unsalted butter, softened
- 3/4 cup granulated sugar
- 2 large eggs
- 1 teaspoon vanilla extract
- 1/2 cup milk
Peanut Butter Filling:
- 1/2 cup creamy peanut butter
- 1/4 cup powdered sugar
Optional Topping:
- 1/4 cup semi-sweet chocolate chips
Instructions
- Preheat the Oven: Preheat the oven to 350°F (175°C) and line a muffin tin with 12 cupcake liners.
- Prepare Dry Ingredients: In a medium bowl, whisk together flour, cocoa powder, baking powder, and salt.
- Mix Wet Ingredients: In a large bowl, cream softened butter and granulated sugar. Add eggs one at a time, then mix in vanilla extract. Gradually add dry ingredients and milk, alternating, until just combined.
- Make Peanut Butter Filling: Mix peanut butter with powdered sugar until smooth.
- Assemble Cupcakes: Spoon cupcake batter into liners, add a dollop of peanut butter filling, cover with more batter. Top with chocolate chips if desired.
- Bake: Bake for 16–18 minutes until edges are set but centers are slightly soft. Cool for 5 minutes in the pan before transferring to a wire rack.
- Serve: Enjoy warm for a gooey center.
Notes
- For a more molten center, chill the peanut butter filling before use.
- Best enjoyed warm; reheat in the microwave for 10–15 seconds if needed.
- Prep Time: 20 minutes
- Cook Time: 18 minutes
- Category: Dessert
- Method: Baking
- Cuisine: American
Nutrition
- Serving Size: 1 cupcake
- Calories: 290
- Sugar: 18 g
- Sodium: 140 mg
- Fat: 16 g
- Saturated Fat: 6 g
- Unsaturated Fat: 8 g
- Trans Fat: 0 g
- Carbohydrates: 32 g
- Fiber: 2 g
- Protein: 5 g
- Cholesterol: 45 mg
