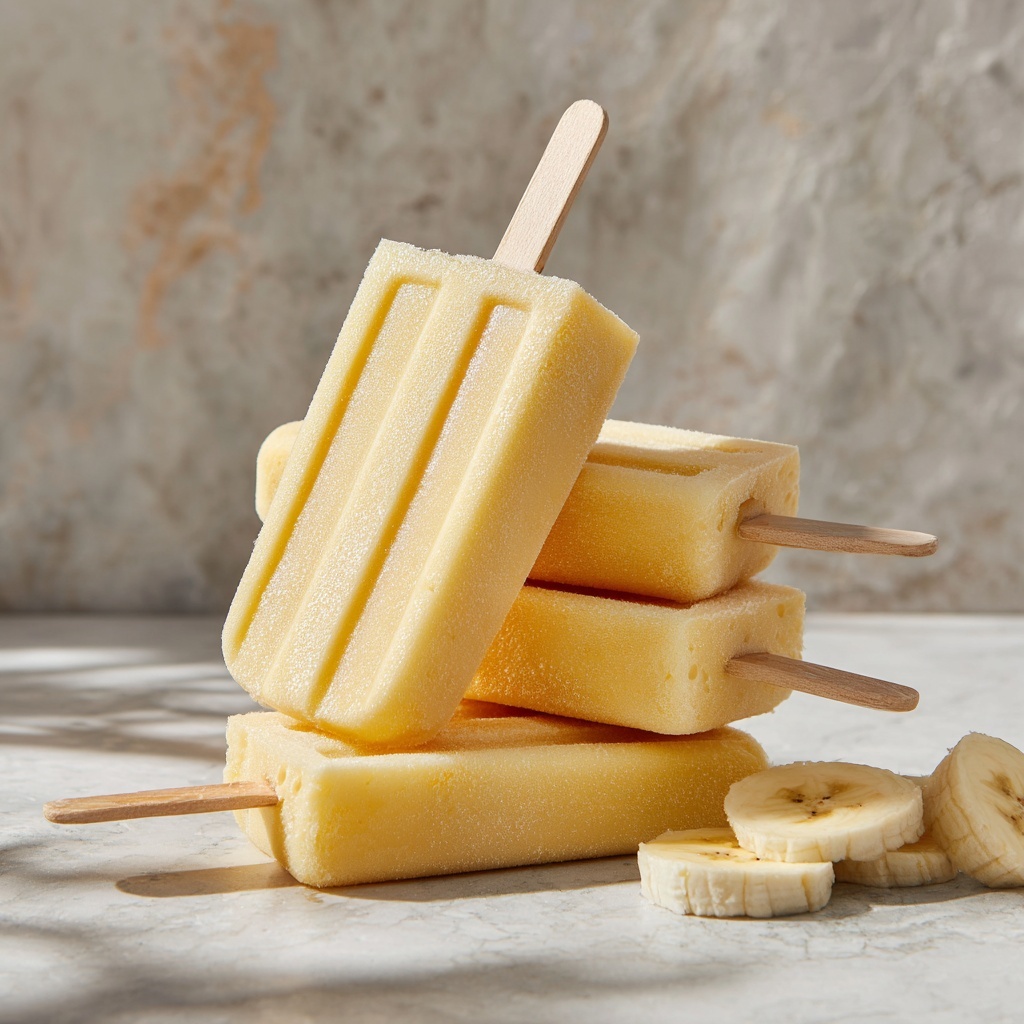
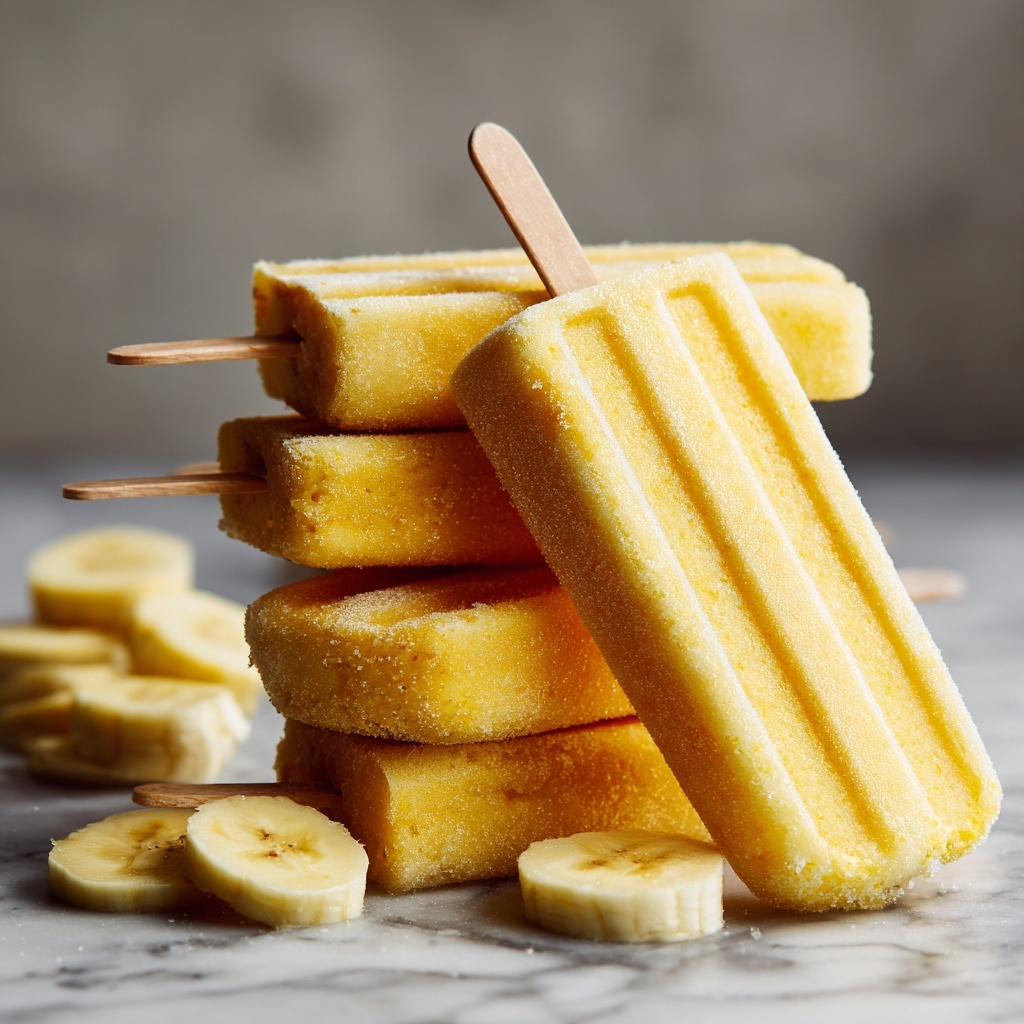
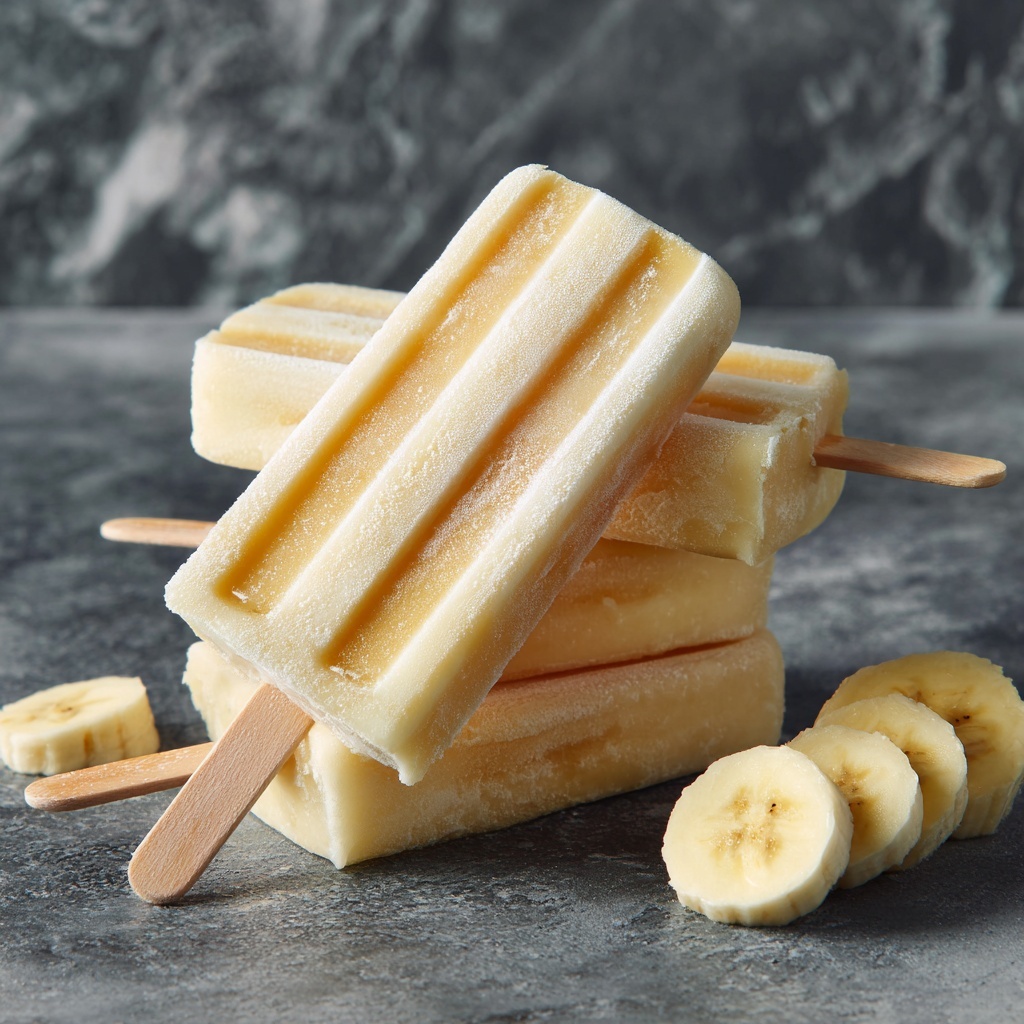
If you’re searching for a luscious summer treat that feels like a hug in frozen form, the Creamy Banana Pudding Popsicles Recipe is about to become your new obsession. Imagine the rich sweetness of ripe bananas blended effortlessly with velvety banana cream pudding, all wrapped up in a delightfully cold and creamy popsicle you can enjoy anytime. This recipe transforms classic banana pudding flavors into a refreshing, handheld delight that’s perfect for cooling off on a warm day or impressing guests with a nostalgic twist. Let’s dive into how you can whip up these irresistible popsicles with ease and bring a little sunshine to your dessert game.
Ingredients You’ll Need
The magic behind this Creamy Banana Pudding Popsicles Recipe lies in its simple but carefully selected ingredients. Each one plays a vital role in creating the perfect balance of creaminess, flavor, and texture, turning an everyday dessert into an exceptional frozen treat.
- 2 ripe bananas: The star ingredient adding natural sweetness and a smooth, creamy base.
- 1 (3.4 oz) box instant banana cream pudding mix: Packs in intense banana flavor and thickens the popsicles beautifully.
- 1 1/2 cups cold milk: Provides the liquid foundation for a silky texture; whole milk works best for richness.
- 1/2 cup heavy cream: Adds indulgent creaminess and smooth mouthfeel.
- 1/2 teaspoon vanilla extract: Enhances the banana flavor with a warm, aromatic touch.
- 1/2 cup crushed vanilla wafer cookies (optional): For those craving a bit of texture and nostalgic crunch inside their popsicles.
- Whipped cream and extra cookie crumbs (optional, for garnish): To elevate presentation and add a dreamy finishing touch.
How to Make Creamy Banana Pudding Popsicles Recipe
Step 1: Prepare the Base Mixture
Start by combining those perfectly ripe bananas, the instant banana cream pudding mix, cold milk, heavy cream, and vanilla extract either in a blender or a mixing bowl. Blend or whisk everything until the mixture is completely smooth and creamy. This creamy base is what gives these popsicles their luscious texture and punchy banana flavor that everyone will love.
Step 2: Add Some Fun Texture
If you’re in the mood to mix things up, gently fold in the crushed vanilla wafer cookies. This little addition adds a delightful crunch and a subtle cookie flavor that perfectly complements the creaminess. It’s completely optional but highly recommended if you want a popsicle with a surprise bite.
Step 3: Fill the Molds and Freeze
Pour your luscious pudding mixture into popsicle molds, leaving a tiny bit of space at the top to accommodate expansion during freezing. Insert the sticks, then pop those molds into the freezer. Let them freeze for at least six hours or until they’re fully solid. Patience here is key because the wait rewards you with the perfect creamy texture.
Step 4: Unmold and Enjoy
To easily release the popsicles, briefly run the outside of the molds under warm water for a few seconds—this loosen loosens them without melting the popsicles themselves. If you’re feeling fancy, top each popsicle with some whipped cream and sprinkle a few extra cookie crumbs on top before serving. It adds a charming, homemade look and extra flavor that’s hard to resist.
How to Serve Creamy Banana Pudding Popsicles Recipe
Garnishes
While the popsicles are delicious on their own, simple garnishes such as whipped cream and a few crushed vanilla wafer crumbs take the flavor and presentation up a notch. You can even drizzle a little caramel or honey on top for an added treat that looks impressive on any dessert table.
Side Dishes
Pair these Creamy Banana Pudding Popsicles with fresh berries or a warm slice of pound cake for a delightful contrast of temperatures and textures. They also work wonderfully alongside a light and tangy fruit salad to refresh your palate between bites.
Creative Ways to Present
For a fun twist, try layering crushed cookies inside the popsicle molds before pouring in your mixture to create a visually appealing layered effect. Alternatively, serve them in small dessert glasses with a dollop of whipped cream and a short spoon for an elegant popsicle parfait experience.
Make Ahead and Storage
Storing Leftovers
If you happen to have any leftover popsicles, keep them tightly covered in the freezer to prevent ice crystals from forming. Using airtight containers or resealable freezer bags works great for maintaining their creamy texture.
Freezing
These popsicles freeze beautifully, so you can prepare a batch ahead of time. Just make sure they’re fully frozen before covering or transferring to storage containers. They’ll keep well for up to two weeks without losing taste or texture.
Reheating
No reheating needed here—these popsicles are meant to be enjoyed cold! If you want a softer bite, simply let them sit at room temperature for a couple of minutes before eating.
FAQs
Can I make the popsicles dairy-free?
Absolutely! Swap out the milk and heavy cream for almond or oat milk, and use a non-dairy whipped topping for garnish. The texture will be slightly different but still delicious.
What if I don’t have popsicle molds?
No popsicle molds? No problem. You can use small paper cups and wooden sticks or even silicone muffin cups. Just make sure to freeze until solid and carefully remove before serving.
Can I use fresh banana pudding instead of instant mix?
Instant pudding mix is preferred because it thickens nicely and sets well in the freezer. Using fresh banana pudding might not firm up as much, so the popsicles could be softer or icy.
Is it okay to add extra sugar?
Ripe bananas and pudding mix provide plenty of sweetness, so additional sugar is usually unnecessary. However, if you want a sweeter treat, a small amount of honey or maple syrup can be mixed in.
How long do these popsicles last in the freezer?
For best taste and texture, enjoy within two weeks. After that, they might develop freezer burn or lose some creaminess.
Final Thoughts
There’s something incredibly satisfying about making a dessert that’s both simple and unforgettable, and this Creamy Banana Pudding Popsicles Recipe hits that sweet spot perfectly. Whether you’re treating yourself on a hot day or sharing with friends and family, these popsicles offer a nostalgic flavor packed with fresh ingredients and creamy goodness. Give this recipe a try—your taste buds will thank you, and you’ll have a go-to summer favorite in your freezer all season long.
Print
Creamy Banana Pudding Popsicles Recipe
- Prep Time: 10 minutes
- Cook Time: 0 minutes
- Total Time: 6 hours 10 minutes
- Yield: 6 popsicles
- Category: Dessert
- Method: Freezing
- Cuisine: American
- Diet: Vegetarian
Description
Creamy Banana Pudding Popsicles are a delightful frozen treat combining ripe bananas with instant banana cream pudding, milk, and cream for a smooth, luscious texture. These easy-to-make popsicles capture the classic flavors of banana pudding in a refreshing, handheld form, perfect for hot summer days or a fun dessert option.
Ingredients
Main Ingredients
- 2 ripe bananas
- 1 (3.4 oz) box instant banana cream pudding mix
- 1 1/2 cups cold milk
- 1/2 cup heavy cream
- 1/2 teaspoon vanilla extract
Optional Ingredients
- 1/2 cup crushed vanilla wafer cookies
- Whipped cream for garnish
- Extra cookie crumbs for garnish
Instructions
- Prepare the base mixture: In a blender or mixing bowl, combine the ripe bananas, banana cream pudding mix, cold milk, heavy cream, and vanilla extract. Blend or whisk thoroughly until the mixture is smooth and all ingredients are fully combined, ensuring a creamy texture without lumps.
- Add texture (optional): If desired, gently fold in the crushed vanilla wafer cookies. This will add a pleasant crunch and extra flavor to the popsicles, making them more enjoyable.
- Fill the molds: Pour the prepared mixture into popsicle molds, leaving some space at the top to allow for expansion during freezing. Insert the popsicle sticks into the molds securely.
- Freeze: Place the molds in the freezer and let them freeze for at least 6 hours or until completely solid. This step is crucial for the popsicles to set properly and achieve the perfect frozen consistency.
- Unmold the popsicles: To release the popsicles from the molds easily, run the molds under warm water for a few seconds. This loosens the popsicles without melting them.
- Garnish and serve: If you like, top the popsicles with whipped cream and sprinkle extra cookie crumbs before serving. This adds a decorative touch and enhances the overall flavor experience.
Notes
- For a dairy-free version, substitute almond or oat milk and use a non-dairy whipped topping.
- You can layer crushed cookies in the mold before pouring the mixture for a layered effect.
