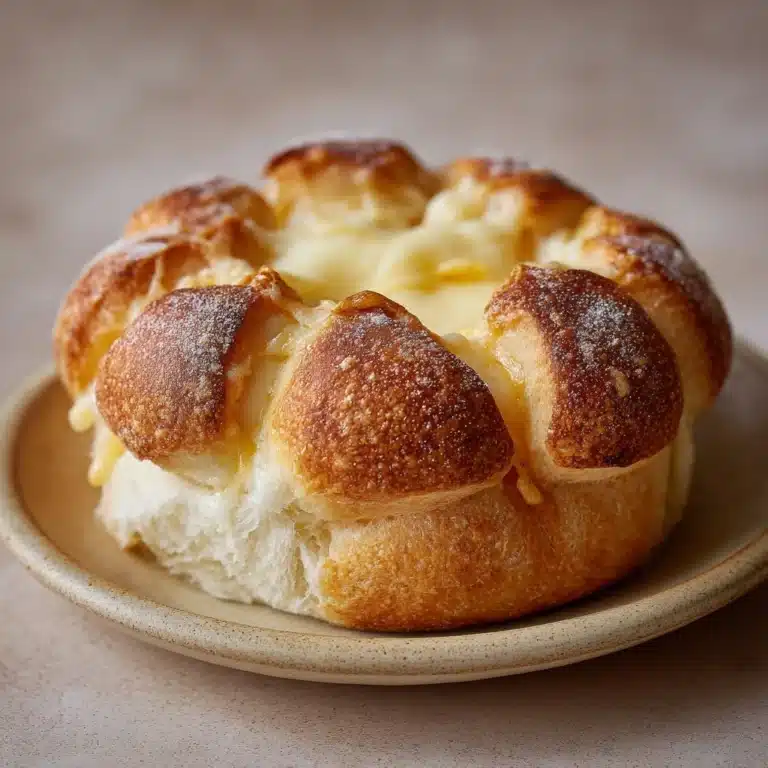
Classic Butter Croissants Recipe
Few things in life can compare to the moment you tear open a freshly baked, golden Classic Butter Croissant and reveal its tender, buttery layers within. This recipe walks you through every step to achieve that flaky, Parisian bakery magic at home—from creating a supple dough to mastering the art of lamination. If you’ve ever dreamed of impressing friends or family over breakfast or brunch, these Classic Butter Croissants are the golden ticket, baking up with crisp exteriors, soft pillowy centers, and irresistible aroma.
Ingredients You’ll Need

Ingredients You’ll Need
Don’t let the short list of ingredients fool you: each one plays a starring role in transforming basic pantry staples into a stunning Classic Butter Croissant. Added with care, these essentials deliver the melt-in-your-mouth texture, rich flavor, and that perfect golden glow.
- All-purpose flour: Provides the sturdy yet delicate structure needed for those iconic croissant layers.
- Granulated sugar: Adds a whisper of sweetness that balances the richness of the butter and encourages browning.
- Active dry yeast: Lifts and aerates the dough, giving each croissant its irresistible puffiness.
- Salt: Brings out the best in every ingredient and ensures your croissants taste full and balanced, not bland.
- Warm whole milk (110°F): Activates the yeast and contributes to the luxurious crumb of the pastry.
- Unsalted butter (softened): Adds moisture and flavor in the dough itself—make sure to let it come to room temperature.
- Unsalted butter (cold, for laminating): The real star for flakiness; cold, high-quality butter gives the croissants those classic, shattering layers.
- Egg (beaten, for egg wash): The secret to an enviably glossy, golden finish!
How to Make Classic Butter Croissants
Step 1: Make the Dough
Begin by bringing together the flour, sugar, yeast, and salt in a large bowl or the bowl of a stand mixer. This base will quickly come to life as you slowly drizzle in the warm milk and drop in the softened butter. Mix until you see a soft dough pull together, then knead—either by hand or machine—for about five minutes to develop just enough gluten for structure without making it tough. Once the dough is smooth, shape it into a rectangle, wrap tightly, and pop it in the fridge to chill for at least one hour. This initial chill keeps the dough easy to handle later.
Step 2: Prepare the Butter Block
While your dough rests, focus on the lamination butter. Take your cold butter and, between sheets of parchment, shape it into a 6×6-inch square. A rolling pin helps here, and don’t be shy about squaring the edges with your hands. The key is butter that’s firm yet pliable—it should bend a bit but not melt. Return it to the fridge to stay cold while you’re working on the next step.
Step 3: Encasing the Butter
With both dough and butter chilled, you’re ready for the classic “butter envelope” move! On a well-floured work surface, roll the dough into a 10×20-inch rectangle. Place your chilled butter square in the center of the dough, then fold the dough over the butter from each side, sealing the edges tightly. This is what sets Classic Butter Croissants apart—the butter is completely encased, destined to form stunning layers.
Step 4: Rolling and Folding (Lamination)
Roll your butter-filled dough out into another long rectangle. Next, perform a book fold: fold one third of the dough over the middle, then fold the other side over to create neat thirds. Like a love letter to yourself! Wrap and chill the dough for 30 minutes—this is crucial to prevent the butter from melting into the dough. Repeat this roll, fold, and chill sequence two more times for a total of three folds. This process gives you the signature flaky layers of Classic Butter Croissants.
Step 5: Shaping the Croissants
After your last chill, roll the dough into a generous 10×20-inch rectangle. Using a sharp knife or pizza cutter, slice long, skinny triangles; keep the base around four inches wide for that bakery-style look. Working one by one, gently stretch each triangle, then roll it tightly from the base toward the tip to create the classic croissant shape. Arrange them on a parchment-lined baking sheet, leaving enough space for them to rise.
Step 6: Proof and Bake
Loosely cover your croissants and let them rise at room temperature until noticeably puffy—about 1.5 to 2 hours. They won’t double in size, but you should see them swell charmingly. Preheat your oven to 375°F while they proof. When ready, gently brush each croissant with the beaten egg for that irresistible sheen. Bake for 18 to 22 minutes, rotating the pan once for even color, until they’re deeply golden and irresistibly fragrant. Allow to cool slightly—the hardest part!—before diving in.
How to Serve Classic Butter Croissants
Garnishes
A Classic Butter Croissant hardly needs much, but a swipe of fruit preserves or a dusting of powdered sugar can add a delightful twist. For something a bit special, try a hint of honey, citrus zest, or even a light drizzle of warm chocolate. Let your imagination (and tastebuds) lead the way!
Side Dishes
Pairing is half the fun. These croissants are blissful alongside a silky latte or café au lait. For a more robust breakfast, enjoy them with fresh fruit, creamy scrambled eggs, or a little artisanal cheese. For brunch guests, a side salad of peppery greens balances their buttery richness.
Creative Ways to Present
Classic Butter Croissants shine at any gathering. Stack them tall on a rustic wooden board for a market-fresh look, or nestle them in a basket lined with a pretty linen napkin. For extra elegance, offer a make-your-own spread bar—with jams, salted butter, fresh fruit, or smoked salmon—for a memorable, interactive experience.
Make Ahead and Storage
Storing Leftovers
If you somehow have leftovers (unlikely, but just in case!), keep Classic Butter Croissants fresh by storing them in an airtight container at room temperature for up to two days. They’ll remain tender, but the flaky crust may soften slightly—still delicious for snacking or turning into decadent croissant French toast.
Freezing
For longer storage, shape the croissants, then freeze them before their final proof. Arrange on a baking sheet, freeze until solid, and transfer them to a zip-top bag. When the craving strikes, thaw overnight in the fridge, proof as usual, and bake up a batch of Classic Butter Croissants that taste almost as fresh as the day you made them.
Reheating
To restore their glorious crispness, reheat croissants in a 325°F oven for 5 to 7 minutes. This refreshes the layers without over-baking. Avoid the microwave if possible—it can make them soggy and rob them of their signature snap.
FAQs
Why does the butter need to be cold for lamination?
Cold butter is essential for creating those many, shattering layers inside a Classic Butter Croissant. If the butter softens too much, it can melt into the dough and prevent the layers from developing, resulting in heartbreakingly dense or greasy pastries.
Can I use a different type Breakfast
All-purpose flour gives the best balance of tenderness and strength here. If you use bread flour, the result will be chewier; cake flour may not have enough structure. Stick to all-purpose for the most classic texture.
What’s the secret to super flaky croissants?
Besides using quality European-style butter, chilling the dough thoroughly between each fold is key. Don’t rush the process—the extra time in the fridge prevents the butter from melting and creates clear, defined layers that separate beautifully as the croissants bake.
Can croissant dough be made in advance?
Absolutely! You can prepare and laminate the dough the day before, then keep it wrapped in the fridge overnight. Shape and proof the Classic Butter Croissants the next day for perfect timing with your breakfast or brunch plans.
How do I prevent croissants from unrolling during baking?
When shaping, be sure to roll the triangles tightly without stretching the dough too much, and always place the tip of the triangle underneath the croissant on the baking sheet. This gives each pastry extra support as it rises and bakes.
Final Thoughts
Few kitchen accomplishments are more satisfying than pulling a tray of homemade Classic Butter Croissants from the oven, their crisp layers and buttery aroma filling the air. I hope you’ll give this recipe a try and share the results with your favorite people—the only thing better than a croissant is the chance to enjoy it together!
Print
Classic Butter Croissants Recipe
- Total Time: 10 hours
- Yield: 12 croissants 1x
- Diet: Vegetarian
Description
Indulge in the rich, buttery goodness of these classic butter croissants. This recipe guides you through creating flaky, tender pastries that are perfect for a luxurious breakfast or anytime treat.
Ingredients
Dough:
- 4 cups all-purpose flour
- 1/2 cup granulated sugar
- 2 1/4 teaspoons active dry yeast
- 1 tablespoon salt
- 1 1/4 cups warm whole milk (110°F)
- 1/2 cup unsalted butter (softened)
Lamination:
- 1 1/4 cups unsalted butter (cold, for laminating)
Egg Wash:
- 1 egg (beaten)
Instructions
- Dough Preparation: In a large bowl or stand mixer, combine flour, sugar, yeast, and salt. Gradually add warm milk and softened butter, mixing until a soft dough forms. Knead for 5 minutes, then chill for 1 hour.
- Lamination: Shape cold butter into a square. Roll out dough, enclose butter, fold, and chill. Repeat this process twice more.
- Shaping Croissants: Roll out dough, cut into triangles, and roll each into a croissant shape.
- Baking: Let croissants rise, brush with egg wash, and bake at 375°F for 18–22 minutes.
Notes
- For best results, use European-style butter for laminating.
- Croissants can be shaped and frozen before proofing; thaw overnight in the fridge and rise before baking.
- Prep Time: 1 hour
- Cook Time: 20 minutes
- Category: Breakfast
- Method: Baking
- Cuisine: French
Nutrition
- Serving Size: 1 croissant
- Calories: 320
- Sugar: 5g
- Sodium: 240mg
- Fat: 20g
- Saturated Fat: 13g
- Unsaturated Fat: 6g
- Trans Fat: 0g
- Carbohydrates: 28g
- Fiber: 1g
- Protein: 5g
- Cholesterol: 70mg


