
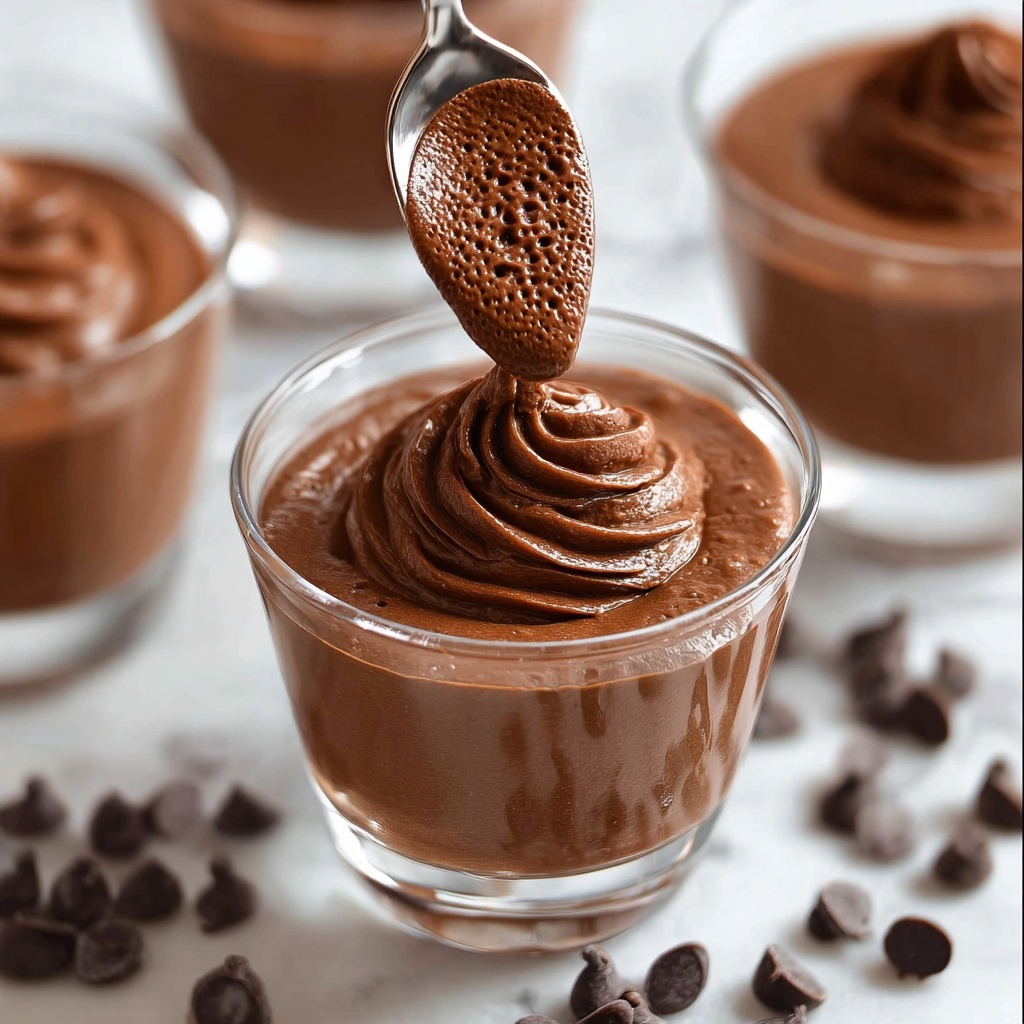
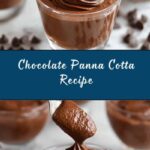
The Chocolate Panna Cotta Recipe is a luscious, silky dessert that feels both indulgent and refreshingly light. This creamy treat combines the richness of dark chocolate with a smooth, melt-in-your-mouth texture, making it an irresistible finale to any meal. Whether you’re looking to impress dinner guests or simply treat yourself after a long day, this recipe blends simplicity and elegance perfectly. It’s vegan-friendly with an option for using gelatin, and the subtle coconut undertones add a tropical twist that elevates the classic panna cotta experience.
Ingredients You’ll Need
Gathering these few simple but essential ingredients is all it takes to create a dessert that’s dense with flavor and beautifully creamy in texture. Each one plays a key role—from the cocoa powder bringing depth to the chocolate, to the agar agar ensuring that perfect delicate set.
- 1 1/2 cups full-fat coconut milk: Adds a rich creaminess and subtle coconut flavor that makes this panna cotta extra smooth.
- 1/2 cup milk of choice (dairy or non-dairy): Balances the richness, helps create the perfect consistency, and keeps the dessert light.
- 1/4 cup unsweetened cocoa powder: Boosts the chocolate intensity without overpowering the softness of the dessert.
- 1/2 cup dark chocolate chips or chopped dark chocolate: Melts into a velvety texture and creates a deeply satisfying chocolate flavor.
- 1/4 cup maple syrup or sweetener of choice: Provides natural sweetness, complementing the rich dark chocolate beautifully.
- 1 teaspoon pure vanilla extract: Adds warmth and a subtle aromatic layer that rounds out the flavors.
- 2 teaspoons agar agar powder (or 1 packet unflavored gelatin for non-vegan): This is the key setting agent, transforming the mixture into that characteristic panna cotta firmness.
- Pinch of salt: Enhances all the flavors, especially boosting the chocolate’s richness.
How to Make Chocolate Panna Cotta Recipe
Step 1: Combine the Base Ingredients
Start by whisking together the coconut milk, your choice of milk, cocoa powder, and maple syrup in a medium saucepan. This step ensures the cocoa is evenly dispersed, so your panna cotta will have a consistent chocolate flavor throughout.
Step 2: Add the Setting Agent
Place the saucepan over medium heat and sprinkle in the agar agar powder, whisking continuously. This step is crucial for activating the agar agar so that your panna cotta will set to just the right firmness—silky yet solid enough to hold its shape.
Step 3: Incorporate Dark Chocolate
Once you see steam rising from the mixture, add in the dark chocolate chips or chopped dark chocolate. Stir gently until fully melted and combined into a smooth, glossy chocolate base that promises irresistibility in every spoonful.
Step 4: Simmer to Activate Agar Agar
Bring the mixture to a gentle boil, then lower the heat and let it simmer for 2 to 3 minutes. Keep whisking as this activates the agar agar completely, which is vital for setting your panna cotta properly.
Step 5: Final Flavor Touches
Remove the saucepan from the heat and stir in the pure vanilla extract along with a tiny pinch of salt. These subtle additions elevate the dessert by balancing sweetness and enhancing the chocolate’s complexity.
Step 6: Pour and Chill
Pour the luscious chocolate mixture into ramekins or silicone molds. Let them cool at room temperature for about 15 minutes before transferring them to the fridge for at least 4 hours. Patience here rewards you with that perfect creamy set.
Step 7: Serve with Style
Before serving, run a thin knife around the edges of each mold and gently invert onto dessert plates for an elegant presentation—or simply serve directly in ramekins for a cozy touch. Either way, you’re in for a rich, silky delight.
How to Serve Chocolate Panna Cotta Recipe

Garnishes
The beauty of this Chocolate Panna Cotta Recipe is how wonderfully it pairs with fresh, simple garnishes. Think bright red raspberries or sliced strawberries for a tangy contrast, a dollop of whipped coconut cream for extra indulgence, or a sprinkle of toasted coconut flakes for texture and visual appeal.
Side Dishes
If you want to turn your panna cotta into an entire dessert experience, serve it alongside crunchy biscotti, crisp almond tuile, or a small bowl of fruit compote. These add delightful flavors and textures that complement the smoothness of the panna cotta beautifully.
Creative Ways to Present
Experiment with layering the panna cotta with alternating layers of fruit puree or crushed cookies for a striking parfait effect. Alternatively, serve mini panna cottas in elegant shot glasses for a party-friendly dessert that’s as charming to look at as it is delicious to taste.
Make Ahead and Storage
Storing Leftovers
Leftover Chocolate Panna Cotta Recipe keeps wonderfully in the refrigerator for up to 3 days. Store each portion covered with plastic wrap or in airtight containers to maintain its delicate texture and prevent absorption of other fridge odors.
Freezing
Freezing panna cotta is generally not recommended because it can affect the silky texture, making it grainy upon thawing. For the best experience, enjoy this dessert fresh after chilling.
Reheating
This dessert is best served cold, so reheating is not advised. If you do want it softer, let it sit at room temperature for about 10 minutes before serving to soften just slightly without losing that perfect set.
FAQs
Can I use regular gelatin instead of agar agar?
Absolutely! The recipe offers the option to use one packet of unflavored gelatin for a non-vegan version, which works wonderfully to set the panna cotta with a smooth texture. Just follow the same steps as you would for agar agar.
Is this recipe dairy-free?
Yes, by using full-fat coconut milk and a plant-based milk for the liquid portion, this Chocolate Panna Cotta Recipe can be completely dairy-free and vegan-friendly if you choose agar agar as the setting agent.
How rich is this dessert?
Despite its indulgent look and flavor, this panna cotta is surprisingly light and silky thanks to the coconut milk base and minimal sweetener. It’s decadent in taste but not heavy on the stomach.
Can I make this panna cotta ahead of time for a party?
Yes, in fact, it’s perfect for making ahead! Prepare and refrigerate at least 4 hours or overnight. This frees you up to focus on hosting while still offering a stunning dessert that feels like you’ve spent hours crafting it.
What should I do if my panna cotta doesn’t set properly?
If your panna cotta is too soft or runny, it might be due to the agar agar not being activated well. Make sure to bring the mixture to a gentle boil and simmer for the full 2 to 3 minutes while whisking. If using gelatin, ensure it’s fully dissolved before pouring.
Final Thoughts
If you’re looking for a dessert that feels both special and effortlessly achievable, this Chocolate Panna Cotta Recipe is a fantastic choice. It’s rich, silky, and beautifully chocolatey, yet subtle enough to satisfy any sweet craving without overwhelming. Give it a try—you’ll soon have a new favorite dessert to share with loved ones, guaranteed to impress and indulge with every spoonful.
Print
Chocolate Panna Cotta Recipe
- Prep Time: 10 minutes
- Cook Time: 10 minutes
- Total Time: 4 hours 20 minutes
- Yield: 4 servings
- Category: Dessert
- Method: Stovetop
- Cuisine: Italian-inspired
- Diet: Vegan
Description
This rich and creamy Chocolate Panna Cotta recipe is a luscious, dairy or vegan-friendly dessert that blends coconut milk and dark chocolate into a velvety treat. Perfectly set with agar agar or gelatin, it offers a smooth texture with a deep chocolate flavor, sweetened naturally with maple syrup, and accented by vanilla. Ideal for an elegant finish to any meal.
Ingredients
Liquid Base
- 1 1/2 cups full-fat coconut milk (or heavy cream)
- 1/2 cup milk of choice (dairy or non-dairy)
Chocolate and Sweeteners
- 1/4 cup unsweetened cocoa powder
- 1/2 cup dark chocolate chips or chopped dark chocolate
- 1/4 cup maple syrup or sweetener of choice
Thickening and Flavoring
- 2 teaspoons agar agar powder (or 1 packet unflavored gelatin for non-vegan)
- 1 teaspoon pure vanilla extract
- Pinch of salt
Instructions
- Mix Ingredients: In a medium saucepan, whisk together the coconut milk, milk of choice, cocoa powder, and sweetener until fully combined, ensuring the cocoa powder is evenly distributed.
- Add Thickener: Place the saucepan over medium heat and stir in the agar agar powder (or gelatin for a non-vegan version), whisking frequently to prevent clumps and promote even dissolution.
- Melt Chocolate: Once the mixture begins to steam gently, add the dark chocolate pieces and stir continuously until the chocolate is completely melted and the mixture is smooth.
- Simmer: Bring the mixture to a gentle boil, then reduce the heat and let it simmer for 2-3 minutes while whisking constantly. This step activates the agar agar to ensure proper setting.
- Flavoring: Remove the saucepan from heat, then stir in the vanilla extract and a pinch of salt to enhance the chocolate flavor.
- Pour Into Molds: Pour the mixture evenly into 4 ramekins or silicone molds, preparing them for setting.
- Chill: Allow the panna cotta to cool at room temperature for 15 minutes, then refrigerate for at least 4 hours, or until fully set and firm to the touch.
- Serve: To serve, run a knife around the edges of each mold and invert onto a plate for an elegant presentation, or serve directly in the ramekins for a rustic look.
Notes
- Agar agar powder is used for a vegan version; gelatin is for non-vegan and may produce a slightly different texture.
- You can substitute maple syrup with honey or any preferred liquid sweetener.
- Ensure constant whisking during heating to prevent the mixture from sticking or burning.
- If using non-dairy milk, select a full-fat version for the creamiest texture.
- For easier unmolding, lightly oil the ramekins or molds prior to pouring in the mixture.