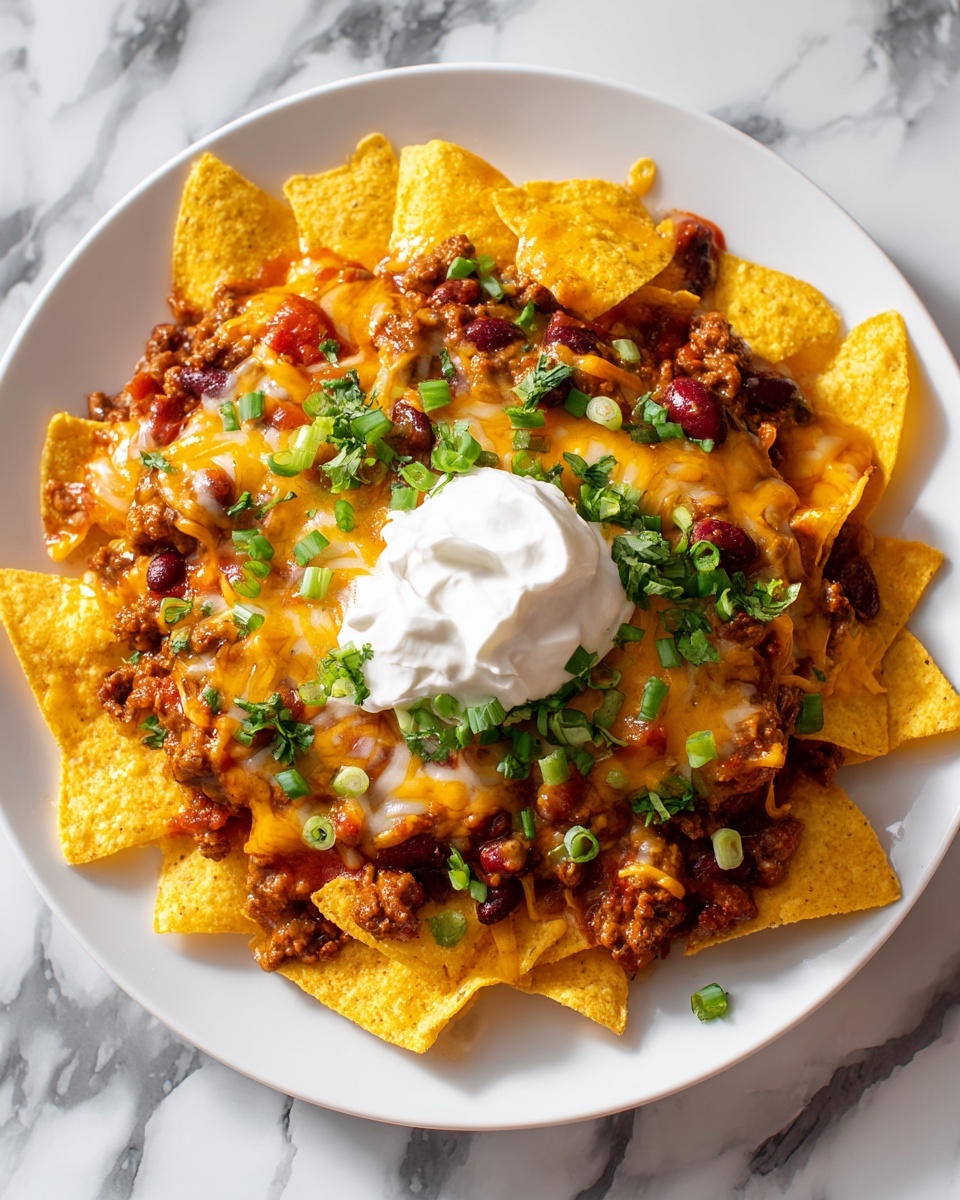
If you are craving a snack that brings together bold flavors, satisfying textures, and that unmistakable comfort food vibe, this Chili Cheese Nachos Recipe is about to become your go-to. Imagine layers of crispy, salty tortilla chips smothered in hearty chili and topped with gooey, melted cheddar and Monterey Jack cheese, just waiting to be devoured. Topped off with fresh, zesty fixings like sour cream, jalapeños, green onions, and diced tomatoes, these nachos deliver a spectacular party hit or game day treat that never fails to impress. Simple to prepare yet oh-so-flavorful, this Chili Cheese Nachos Recipe is pure snack-time magic you’ll want to share with everyone you know.
Ingredients You’ll Need
Every ingredient in this Chili Cheese Nachos Recipe has a role to play in creating layers of flavor, texture, and color. From the crunchy chips to the rich, meaty chili and the melty cheese blend, each element complements the others perfectly.
- Tortilla chips (1 bag, 10–12 oz): Opt for sturdy, restaurant-style chips that hold up under toppings without getting soggy.
- Prepared chili (2 cups): Use your favorite homemade or canned chili; it adds heartiness and a spicy kick.
- Shredded cheddar cheese (2 cups): Sharp cheddar brings a tangy richness that melts beautifully.
- Shredded Monterey Jack cheese (1 cup): This cheese melts smoothly and balances the sharp cheddar with creaminess.
- Sour cream (½ cup): Adds cool, tangy contrast that cuts through the richness.
- Sliced jalapeños (¼ cup): Fresh or pickled jalapeños give that signature spicy pop.
- Chopped green onions (¼ cup): Adds freshness and subtle onion flavor with a crisp bite.
- Chopped fresh cilantro (¼ cup): Bright herbaceous notes bring vibrancy and depth.
- Small tomato, diced (1): Juicy, colorful bursts that lighten and freshen every bite.
- Avocado, diced (optional, 1): Creamy richness that’s perfect for balancing out the spice.
How to Make Chili Cheese Nachos Recipe
Step 1: Preheat and Prepare the Base
Start by preheating your oven to 375°F (190°C) to ensure it’s ready for melting all that glorious cheese. Spread out your tortilla chips evenly on a large baking sheet or any oven-safe platter you prefer—this forms the crispy foundation of your nachos.
Step 2: Layer on the Chili
Warm your prepared chili if it’s cold, then spoon it generously over the tortilla chips. This step infuses the snack with that signature hearty, savory flavor that gives Chili Cheese Nachos Recipe its soul.
Step 3: Add the Cheeses
Sprinkle the shredded cheddar and Monterey Jack cheeses evenly over the chili-topped chips. Don’t be shy here as the gooey, melted cheese is one of the star attractions, creating that irresistible, bubbly, golden topping everyone loves.
Step 4: Bake to Perfection
Place your loaded nachos in the oven and bake for 8 to 10 minutes, or until you see the cheese melted and bubbly, lightly golden in spots. This step ensures every chip is covered with luscious cheese and warm chili.
Step 5: Top and Serve Hot
Once out of the oven, it’s time to add the fresh toppings that bring brightness and texture: dollops of sour cream, a scattering of sliced jalapeños, a sprinkle of chopped green onions and cilantro, plus the diced tomatoes and optional avocado. Serve immediately to enjoy the best melt and freshness in every bite.
How to Serve Chili Cheese Nachos Recipe

Garnishes
Toppings truly elevate the Chili Cheese Nachos Recipe. Sour cream adds a cool creaminess that perfectly balances the spicy chili and jalapeños. Green onions and cilantro deliver bursts of vibrant, herbal freshness, while diced tomatoes and avocado lend juiciness and buttery smoothness that make each bite multi-dimensional and exciting.
Side Dishes
For a complete Tex-Mex feast, serve these chili cheese nachos with sides like a crisp mixed greens salad, fresh guacamole, or a simple pico de gallo. Beans and rice on the side can turn your snack into a more substantial meal, while a cold cerveza or limey margarita complements the flavors brilliantly.
Creative Ways to Present
Make your nachos extra special by layering them in a deep platter for better topping distribution that lets every chip shine. Or try individual serving-sized portions in small cast iron skillets for a festive, restaurant-style vibe. Adding colorful bowls of extra fixings like salsa and guac will encourage everyone to customize their own perfect bite.
Make Ahead and Storage
Storing Leftovers
If you have any leftovers (though that might be tough), store them in an airtight container in the refrigerator. Keeping the chips separate if you can will help them stay crisp longer. The nachos themselves should be eaten within 2 days for the best taste and texture.
Freezing
Freezing assembled nachos isn’t recommended because the chips will lose their crunch and the toppings won’t reheat well. However, you can freeze the chili separately in a freezer-safe container for up to 3 months and use it whenever the craving hits.
Reheating
To reheat leftover chili cheese nachos, spread them on a baking sheet and heat in a preheated oven at 350°F (175°C) until the cheese melts again and the chips crisp up. Avoid microwaving if possible to keep the nachos from becoming soggy.
FAQs
Can I use a different type of cheese?
Absolutely! While cheddar and Monterey Jack are classic for chili cheese nachos, you can experiment with pepper jack for extra spice or even mozzarella for a gooey stretch. Just be sure to choose cheeses that melt well.
Is it okay to use canned chili?
Yes! Canned chili is a convenient shortcut that works great in this recipe. Choose your favorite brand or variety, whether beef, turkey, or vegetarian, to save time without sacrificing flavor.
How spicy are these nachos?
The spiciness largely depends on the chili and jalapeños you use. If you prefer milder versions, use less jalapeños or remove the seeds, and pick a mild chili. You can always add hot sauce afterward if you want more kick.
Can I make this recipe gluten-free?
Definitely. Most tortilla chips are naturally gluten-free, but always check the packaging. Also ensure your chili ingredients, especially canned varieties, are gluten-free. This makes the Chili Cheese Nachos Recipe accessible to those with gluten sensitivities.
What can I use instead of sour cream?
If you want a dairy-free alternative, Greek yogurt is a great substitute that adds similar creaminess and tang. You can also try guacamole or a drizzle of crema for a different but delicious twist.
Final Thoughts
There’s nothing quite like gathering around a platter of hot, cheesy, chili-loaded tortilla chips that make you smile with every bite. This Chili Cheese Nachos Recipe is simple, unforgettable, and perfect for sharing whether it’s game day, a cozy night in, or anytime you want a deliciously satisfying snack. Trust me, once you try it, you’ll understand why it’s a favorite for so many. So grab those ingredients and get ready to wow your taste buds with every crunchy, cheesy, spicy bite!
Print
Chili Cheese Nachos Recipe
- Prep Time: 10 minutes
- Cook Time: 10 minutes
- Total Time: 20 minutes
- Yield: 6 servings
- Category: Appetizer, Snack
- Method: Baking
- Cuisine: American, Tex-Mex
- Diet: Gluten Free
Description
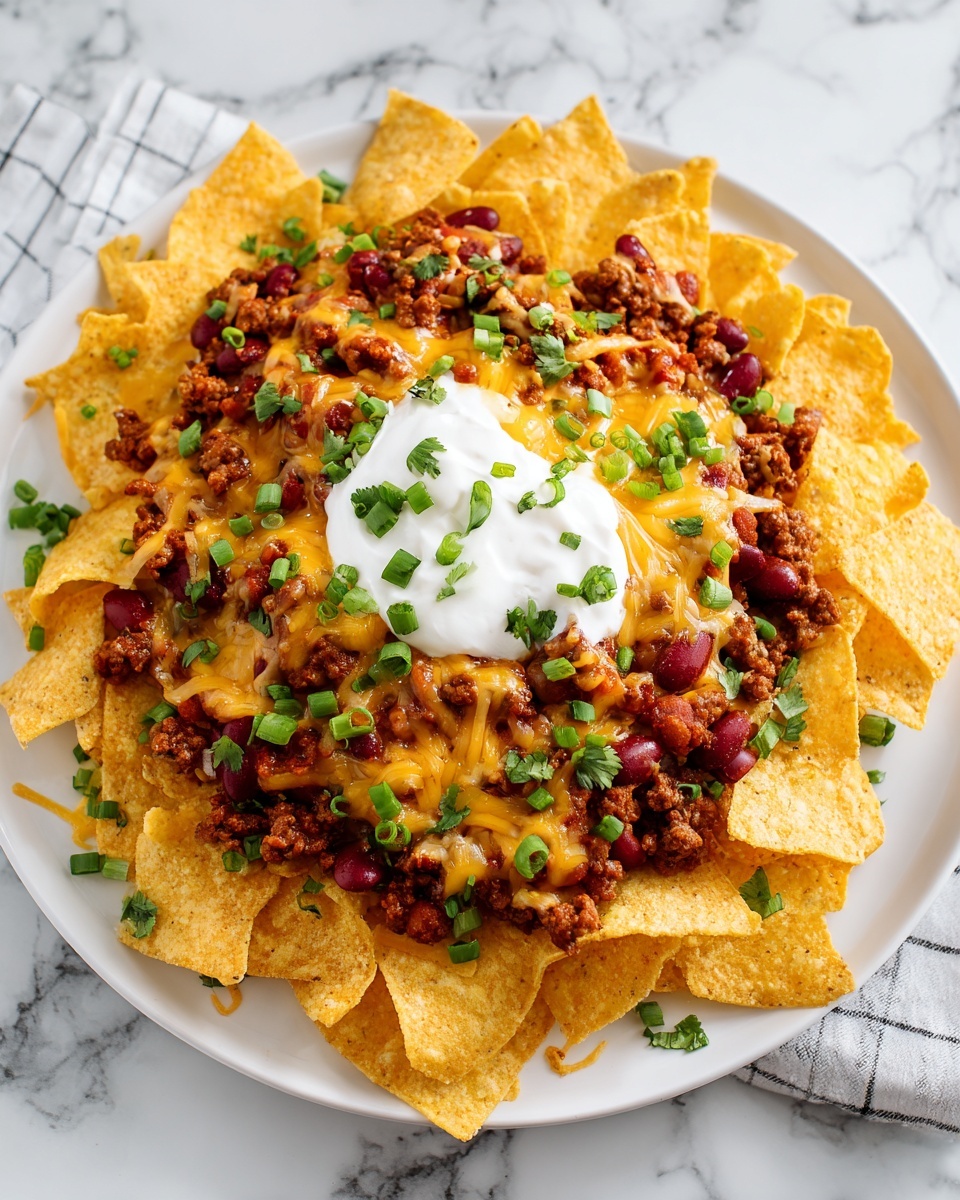
Chili cheese nachos are the ultimate party or game day snack, loaded with layers of crispy tortilla chips, hearty chili, and gooey melted cheese. Topped with your favorite fixings like sour cream, jalapeños, and green onions, these nachos are crowd-pleasing, satisfying, and super easy to make. Serve them hot and watch them disappear!
Ingredients
Base
- 1 bag (10–12 oz) tortilla chips
Chili and Cheese
- 2 cups prepared chili (homemade or canned)
- 2 cups shredded cheddar cheese
- 1 cup shredded Monterey Jack cheese
Toppings
- ½ cup sour cream
- ¼ cup sliced jalapeños (fresh or pickled)
- ¼ cup chopped green onions
- ¼ cup chopped fresh cilantro
- 1 small tomato, diced
- 1 avocado, diced (optional)
Instructions
- Preheat the oven: Preheat your oven to 375°F (190°C) to ensure it is hot enough to melt the cheese thoroughly without burning the chips.
- Arrange tortilla chips: Spread the tortilla chips evenly on a large baking sheet or an oven-safe platter to create a uniform base for layering.
- Add chili: Spoon the prepared chili evenly over the tortilla chips. Use either homemade or canned chili, depending on your preference.
- Top with cheese: Generously sprinkle both the shredded cheddar and Monterey Jack cheeses evenly over the chili-covered chips to ensure a gooey, melted topping.
- Bake: Place the baking sheet in the preheated oven and bake for 8–10 minutes, or until the cheese is melted and bubbly.
- Add fresh toppings: Remove the nachos from the oven and immediately top with sour cream, sliced jalapeños, chopped green onions, cilantro, diced tomato, and diced avocado if using, to enhance flavor and texture.
- Serve hot: Serve the nachos immediately while they are hot and the cheese is still gooey for the best taste and texture experience.
Notes
- Use your favorite homemade or canned chili—beef, turkey, or vegetarian varieties all work well.
- For easier serving and better flavor distribution, build nachos in layers by repeating chips, chili, and cheese before baking.
- You can briefly broil the nachos for extra melted cheese on top; watch carefully to prevent burning.


