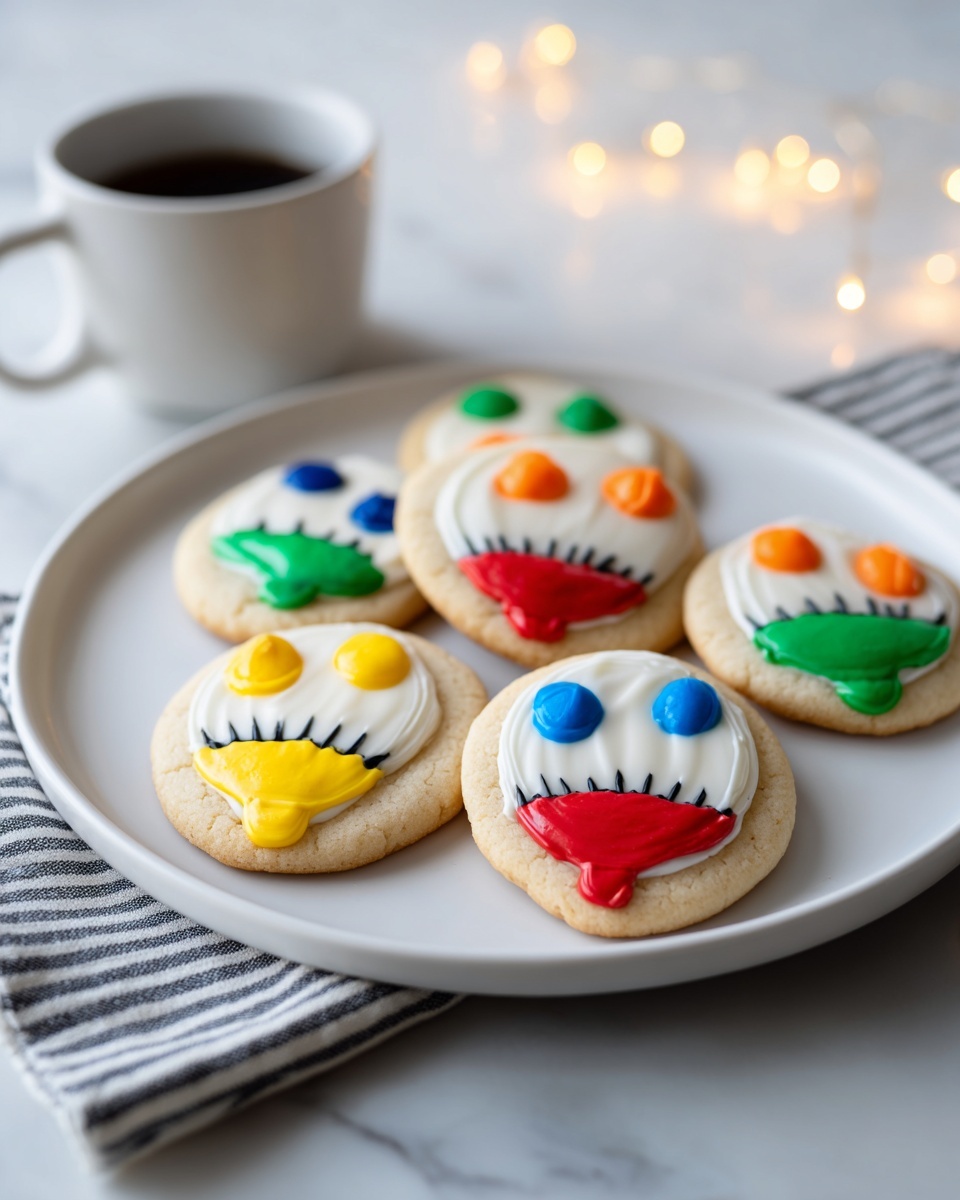
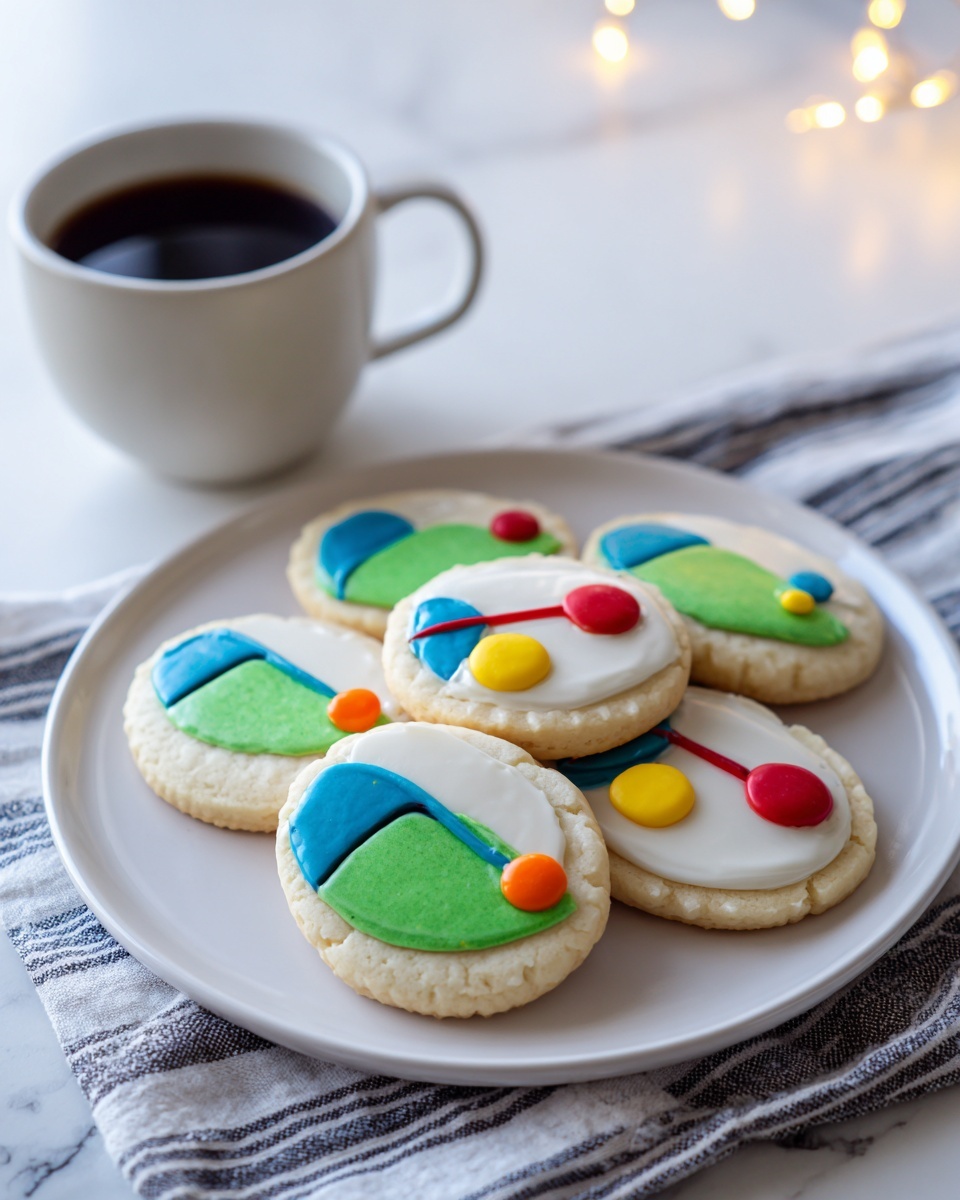
If you’ve ever wanted to create cookies that capture the magic of holiday cheer, the Christmas Lights Royal Icing Sugar Cookies Recipe is your new best friend. These delightful treats combine a buttery, melt-in-your-mouth sugar cookie base with vibrant royal icing decorations that mimic colorful Christmas lights strung across your favorite cookies. They’re perfect for sharing, gifting, or simply brightening your festive celebrations. The joy of piping that glossy, smooth icing and watching your designs come to life is truly one of the most rewarding parts of holiday baking.
Ingredients You’ll Need
Gathering simple, quality ingredients is the secret behind these irresistible cookies. Each element plays an essential role—from the creamy butter that assures tenderness, to the vibrant gel colors that bring your decorations to life. Here’s what you’ll need:
- All-purpose flour: The sturdy base giving your cookies perfect structure and chew.
- Baking powder: Helps the cookies rise just enough for a delicate crumb.
- Salt: Enhances the sweetness and balances the flavors.
- Unsalted butter (softened): Adds richness and that coveted melt-in-your-mouth texture.
- Granulated sugar: Sweetness and slight crunch in every bite.
- Large egg: Brings moisture and binds ingredients together perfectly.
- Milk: Adds a touch of tenderness and helps the dough come together.
- Vanilla extract: Delivers warm, comforting aroma and depth.
- Almond extract (optional): A subtle, nutty note that makes the flavor wonderfully complex.
- Meringue powder: Essential for stiffening the royal icing to hold your intricate designs.
- Powdered sugar (sifted): The sweet, silky base of your royal icing.
- Water: To adjust the icing’s consistency just right for piping and flooding.
- Gel food coloring (black and assorted colors): To bring your “lights” and “wires” to vivid, festive life.
- Small round piping tips or squeeze bottles: Precision tools to decorate like a pro.
How to Make Christmas Lights Royal Icing Sugar Cookies Recipe
Step 1: Prepare the Cookie Dough
Start by preheating your oven to 375°F (190°C). In a medium bowl, whisk together the dry ingredients: flour, baking powder, and salt. Then, in a larger bowl, cream the softened butter with granulated sugar until it’s light and fluffy—a process that takes a few minutes but is so worth it for that airy cookie texture. Beat in the egg, milk, vanilla, and almond extract if you’re using it, for a subtle pop of flavor. Gradually fold in the dry mixture until everything forms a smooth dough, ready to be rolled out.
Step 2: Cut and Bake Your Cookies
Roll your dough on a lightly floured surface to about 1/4-inch thickness—thin enough to bake evenly but thick enough to hold the icing decoration. Use cookie cutters shaped like light bulbs, circles, or any festive holiday shapes that inspire you. Arrange the shapes on parchment-lined baking sheets for clean removal. Bake them between 8 and 10 minutes, just until the edges show a hint of golden brown. Let your cookies cool completely—this step ensures your royal icing won’t melt or run.
Step 3: Make the Royal Icing
In a large mixing bowl, combine meringue powder, sifted powdered sugar, and water. Beat on low speed for about 7 to 10 minutes until you see those firm, glossy peaks emerge—this is what makes your icing pipe and hold shapes beautifully. Divide the icing into separate bowls and tint each with your gel colors: black for the “wires” and assorted bright colors to resemble Christmas lights. Adjust the thickness by adding a few drops of water if needed—thicker for outlining, thinner for flooding.
Step 4: Decorate Your Cookies
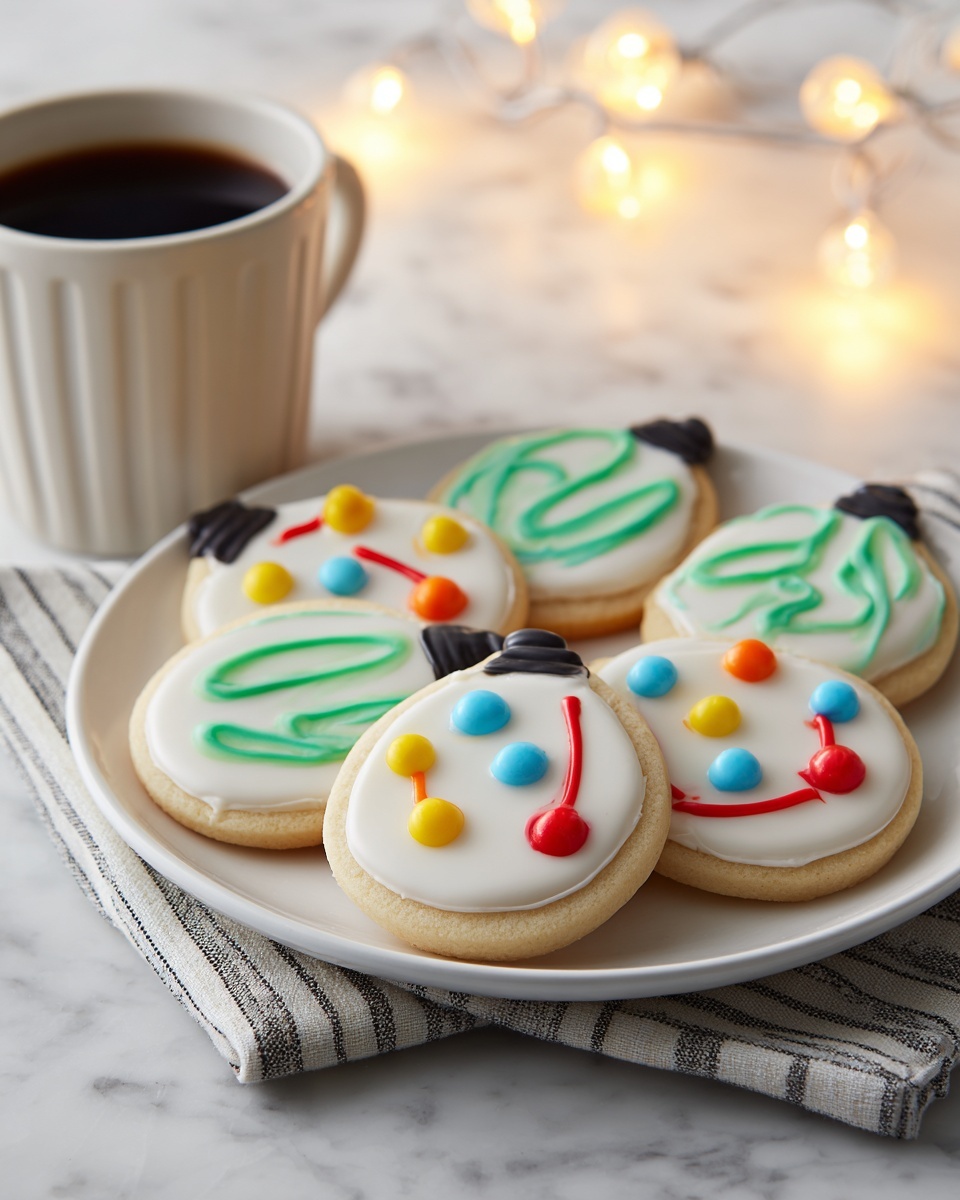
Begin by outlining and flooding your cookies with white royal icing as a base. Patience is key here—let each cookie dry for several hours or ideally overnight so your base layer is set and smooth. Next, use the black icing to pipe the delicate wire string that the lights will hang from. Finally, add tiny colorful icing dots along the wire to mimic glowing Christmas lights—each dot a little burst of holiday joy. Allow all your designs to dry completely before stacking or packaging.
How to Serve Christmas Lights Royal Icing Sugar Cookies Recipe
Garnishes
These cookies are already showstoppers but feel free to add a sprinkle of edible glitter or shimmering sugar dust just before the frosting sets for an extra festive sparkle. Tiny nonpareils or silver dragees can add imaginative texture and accentuate the “light bulbs” beautifully.
Side Dishes
Pair your Christmas Lights Royal Icing Sugar Cookies with a warm cup of spiced hot cocoa or a rich eggnog for that quintessential holiday indulgence. For parties, a platter alongside fresh fruit or creamy cheeses creates a delightful balance against the sugary sweetness.
Creative Ways to Present
Presentation can turn these beauties into unforgettable gifts or centerpiece displays. Arrange cookies on a tiered platter interlaced with fairy lights for extra charm, or wrap them individually in cellophane tied with ribbons, perfect for sharing the holiday spirit. A decorated cookie jar filled with these cookies makes a festive and practical gift anytime during the season.
Make Ahead and Storage
Storing Leftovers
Your Christmas Lights Royal Icing Sugar Cookies Recipe results are best stored in an airtight container at room temperature. This keeps the edges crisp and the icing firm for up to a full week, making them perfect for enjoying or gifting throughout the holiday season.
Freezing
If you want to get ahead of your holiday baking, freeze undecorated cookies after baking and cooling fully. Wrap them tightly to avoid freezer burn. When you’re ready to decorate, thaw at room temperature before starting the royal icing fun. Decorated cookies freeze well too when packed carefully between layers of parchment paper, extending their festive freshness.
Reheating
These sugar cookies are best enjoyed at room temperature to keep their tender texture. If you prefer a warm cookie, pop them in a low oven (about 300°F) for a few minutes, but avoid microwaving as it may soften the icing and make them sticky.
FAQs
Can I use regular egg whites instead of meringue powder for the royal icing?
While fresh egg whites can be used, meringue powder is a safer and more convenient option because it’s pasteurized and helps achieve the perfect consistency. It also increases shelf life and reduces contamination risk.
How do I prevent the colors in royal icing from bleeding?
Allow each layer or color to dry completely before adding the next. Using gel food coloring instead of liquid ensures more vibrant colors without adding extra moisture that causes bleeding.
Can I make the dough ahead of time?
Absolutely. You can make the dough and refrigerate it for up to 3 days. This rest period actually helps develop flavors. Just bring it to room temperature before rolling out.
What if my royal icing is too thick or too thin?
Add small amounts of water to thin it for flooding or stiffen it with more powdered sugar for outlining. Finding the right consistency is key for professional-looking decorations.
Are these cookies suitable for kids to decorate?
Definitely! Decorating these sugar cookies is a fun activity for kids, just supervise piping and handling of tools. You can also pre-cut the shapes and let children use colorful icing and sprinkles to express their creativity safely.
Final Thoughts
There is something magical about creating the Christmas Lights Royal Icing Sugar Cookies Recipe from scratch. From mixing your buttery dough to carefully piping each colorful light, this recipe offers a joyful, hands-on way to celebrate the season. These cookies are more than just treats—they’re sweet memories in the making. So grab your apron, gather your ingredients, and start crafting your own little string of sweet holiday lights to share and savor!
Print
Christmas Lights Royal Icing Sugar Cookies Recipe
- Prep Time: 45 minutes
- Cook Time: 10 minutes
- Total Time: 55 minutes (plus drying time)
- Yield: 24 cookies
- Category: Dessert
- Method: Baking
- Cuisine: American
- Diet: Vegetarian
Description
Celebrate the holiday season with these festive Christmas Lights Royal Icing Sugar Cookies. Soft, buttery sugar cookies are topped with vibrant royal icing shaped like colorful Christmas lights strung on a black icing wire, perfect for cookie exchanges, parties, or gift-giving. Easy to make and decorate, these classic treats bring cheerful holiday spirit to any gathering.
Ingredients
For the Sugar Cookies:
- 2 3/4 cups all-purpose flour
- 1 teaspoon baking powder
- 1/2 teaspoon salt
- 1 cup unsalted butter, softened
- 3/4 cup granulated sugar
- 1 large egg
- 1 tablespoon milk
- 1 teaspoon vanilla extract
- 1/4 teaspoon almond extract (optional)
For the Royal Icing:
- 3 tablespoons meringue powder
- 4 cups powdered sugar, sifted
- 6 tablespoons water (more as needed)
- Gel food coloring (black and assorted bright colors)
- Small round piping tips or squeeze bottles
Instructions
- Make the Sugar Cookies: Preheat your oven to 375°F (190°C). In a medium bowl, whisk together the flour, baking powder, and salt. In a large mixing bowl, cream the softened butter and granulated sugar until light and fluffy. Beat in the egg, milk, vanilla, and almond extract if using. Gradually add the dry ingredients and mix just until combined.
- Shape and Bake: Roll the dough out on a lightly floured surface to about 1/4-inch thickness. Use cookie cutters shaped like light bulbs, circles, or favorite holiday shapes to cut the dough. Transfer the shapes onto a parchment-lined baking sheet. Bake for 8 to 10 minutes, or until the edges just begin to turn golden. Remove from oven and let cookies cool completely on a wire rack before decorating.
- Make the Royal Icing: In a large bowl, combine meringue powder, sifted powdered sugar, and water. Beat on low speed for 7 to 10 minutes until stiff peaks form. Divide the icing into smaller bowls, tint with gel food coloring—using black for the wire and bright colors for the lights. Adjust icing consistency by adding a few drops of water for outlining or flooding as needed.
- Decorate the Cookies: Outline and flood each cookie with white royal icing to create the base layer. Allow this base coat to dry completely for several hours or overnight to prevent color bleeding. Use black icing to pipe a string of wire across the cookies. Dot along the wire with the colored icings to mimic glowing Christmas lights. Let the decorated cookies dry fully before stacking or storing in an airtight container.
Notes
- Allow each layer of icing to dry completely before adding additional colors to avoid bleeding.
- Store decorated cookies in an airtight container at room temperature for up to 1 week.
- Perfect for holiday cookie exchanges, gift giving, or festive party treats.
