
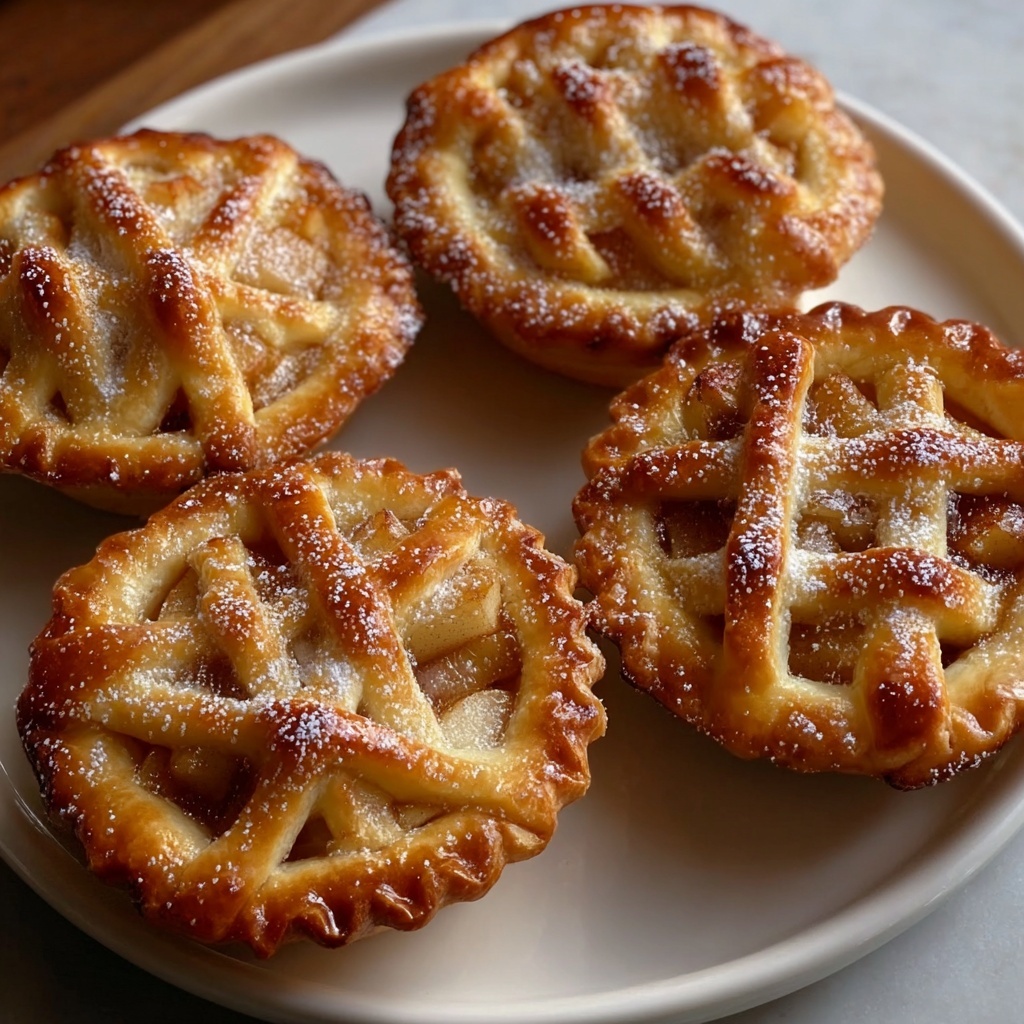
If you’re looking for a charming, delicious treat to share with friends or savor as a cozy snack, this Mini Apple Pies Recipe is your new best friend. These little delights pack the perfect balance of sweet, tart apples and warm cinnamon inside a flaky, buttery crust. They’re incredibly fun to make and even more satisfying to eat. Prepare to be tempted by that golden-brown exterior and the comforting aroma that fills your kitchen as these miniature pies bake to perfection.
Ingredients You’ll Need
Every ingredient here plays a vital role in bringing this Mini Apple Pies Recipe to life. From the crisp apples that give it fresh flavor to the buttery crust that bakes up golden and flaky, these simple, thoughtful ingredients work together to create a nostalgic dessert everyone will adore.
- 2 large apples, peeled, cored, and diced: Choose firm, tart apples like Granny Smith for that perfect balance of sweetness and texture.
- 1/4 cup granulated sugar: Sweetens the fruit filling just right without overpowering the natural apple flavor.
- 1/2 teaspoon ground cinnamon: Adds warmth and depth, a classic spice pairing with apples.
- 1 tablespoon all-purpose flour: Helps thicken the apple filling so it’s perfectly succulent and not runny.
- 1 tablespoon lemon juice: Brightens the filling, preventing the apples from browning and adding freshness.
- 1 teaspoon vanilla extract: Brings a subtle sweetness and enhances all the other flavors.
- 1 package refrigerated pie crusts: Makes shaping mini pies a breeze with its flaky texture and buttery taste.
- 1 egg, beaten (for egg wash): Creates a shiny, inviting golden crust once baked.
- 1 tablespoon unsalted butter, cut into small pieces: Melts into the filling for extra richness and silkiness.
- Turbinado sugar for sprinkling (optional): Adds a delightful crunch and sparkle on top of each mini pie.
How to Make Mini Apple Pies Recipe
Step 1: Preheat and prepare
Begin by preheating your oven to 375°F (190°C) and lining a baking sheet with parchment paper; this ensures your mini pies bake evenly and don’t stick.
Step 2: Mix the filling
In a medium bowl, stir together diced apples, sugar, cinnamon, flour, lemon juice, and vanilla extract. This simple blend creates a luscious apple filling that’s both flavorful and holds together beautifully inside the crust.
Step 3: Cut out the dough circles
Roll out the refrigerated pie crusts on a lightly floured surface. Use a round cookie cutter or a glass rim about 4 inches wide to cut out dough circles. These will form the perfect size base for your mini pies.
Step 4: Add filling and butter
Place a tablespoon of the apple mixture onto the center of each dough circle. Dot each with a small piece of butter to add richness and help create a luscious, golden filling.
Step 5: Seal the pies
Brush the edges of each dough circle with beaten egg, fold it over the filling to make a neat half-moon shape, and press edges firmly with a fork to seal in all that tasty goodness.
Step 6: Prepare for baking
Transfer the mini pies to the lined sheet. Brush the tops with remaining beaten egg and sprinkle with turbinado sugar, if using, for a beautiful sparkle and crunch.
Step 7: Vent and bake
Cut small slits in the top crust of each pie to let steam escape during baking. Pop them in the oven and bake for 20 to 25 minutes until the crusts turn golden and the apple filling bubbles enticingly.
Step 8: Cool and enjoy
Remove the pies from the oven and let them cool slightly on a wire rack to allow the filling to set, making them easier and more enjoyable to eat.
How to Serve Mini Apple Pies Recipe

Garnishes
These mini wonders are stunning on their own, but a scoop of vanilla ice cream, a drizzle of caramel sauce, or a dusting of powdered sugar can elevate your serving to an irresistible dessert experience.
Side Dishes
Pair your mini apple pies with a warm cup of spiced chai tea or freshly brewed coffee to complement the sweet, cinnamony flavor. For a seasonal feast, serve alongside roasted autumn veggies or a sharp cheddar cheese plate to balance the sweetness.
Creative Ways to Present
Arrange the mini pies on a rustic wooden board lined with parchment paper for a charming, casual feel. Or display them in pretty cupcake liners for a fun twist at parties and gatherings. You can even serve them in individual mini pie dishes for an elegant touch.
Make Ahead and Storage
Storing Leftovers
Store any leftover mini apple pies in an airtight container at room temperature for up to two days. For longer freshness, refrigerate them where they will keep well for up to four days without losing their flakiness.
Freezing
To save your pies for later, freeze unbaked mini pies placed on a tray until firm, then transfer to freezer bags. Bake from frozen, adding a few extra minutes to baking time. Baked pies can also be wrapped tightly and frozen for up to two months.
Reheating
Reheat your mini pies in a 350°F (175°C) oven for about 10 minutes to bring back their warmth and crispness. Avoid microwaving if possible, as it can make the crust soggy.
FAQs
Can I use other types of apples in this recipe?
Absolutely! While tart apples like Granny Smith provide a great balance, you can mix in sweeter varieties like Fuji or Honeycrisp for a more nuanced flavor. Just be sure to use firm apples so the texture holds up.
Is it necessary to use refrigerated pie crusts?
Refrigerated pie crusts make the process quick and easy, but if you prefer, you can absolutely use homemade pie dough for an even more buttery and flaky crust.
Can I make the filling ahead of time?
Yes! Prepare the apple filling a day in advance and store it in the fridge. Just stir it again before assembling to redistribute the juices and spices.
How do I prevent the crust from getting soggy?
Adding the small touch of flour in the filling and the dot of butter helps absorb excess moisture. Also, cutting vents in the crust allows steam to escape, which keeps the crust crisp.
Are these mini apple pies suitable for freezing after baking?
Definitely. After baking and cooling, wrap each pie tightly and freeze. When you want to enjoy them, thaw in the fridge overnight and warm gently in the oven.
Final Thoughts
This Mini Apple Pies Recipe is a heartwarming classic that’s perfect for any occasion, whether it’s a cozy weekend treat or a charming addition to a festive spread. Making and sharing these little pies is like passing along a bit of love, wrapped in golden, buttery crusts filled with tender, spiced apples. I can’t wait for you to try making them yourself and savor every delightful bite.
Print
Mini Apple Pies Recipe
- Prep Time: 20 minutes
- Cook Time: 25 minutes
- Total Time: 45 minutes
- Yield: 8 mini apple pies
- Category: Dessert
- Method: Baking
- Cuisine: American
Description
These Mini Apple Pies are a delightful handheld dessert perfect for any occasion. Made with a sweet cinnamon-spiced apple filling wrapped in flaky refrigerated pie crusts, then baked to golden perfection, these pies are easy to prepare and sure to impress with their classic flavor and charming presentation.
Ingredients
Apple Filling
- 2 large apples, peeled, cored, and diced
- 1/4 cup granulated sugar
- 1/2 teaspoon ground cinnamon
- 1 tablespoon all-purpose flour
- 1 tablespoon lemon juice
- 1 teaspoon vanilla extract
Pie Crust & Finishing
- 1 package refrigerated pie crusts (usually contains 2 crusts)
- 1 egg, beaten (for egg wash)
- 1 tablespoon unsalted butter, cut into small pieces
- Turbinado sugar for sprinkling (optional)
Instructions
- Preheat Oven: Preheat the oven to 375°F (190°C). Line a baking sheet with parchment paper to prevent sticking and make cleanup easier.
- Prepare Apple Filling: In a medium-sized bowl, combine the diced apples, granulated sugar, ground cinnamon, all-purpose flour, lemon juice, and vanilla extract. Stir well to evenly coat the apples with the mixture.
- Cut Dough Circles: On a lightly floured surface, roll out the refrigerated pie crusts. Use a round cookie cutter or the rim of a glass about 4 inches in diameter to cut circles from the dough.
- Add Filling: Place about one tablespoon of the apple mixture in the center of each dough circle. Dot each filling portion with a small piece of unsalted butter for richness.
- Seal Mini Pies: Brush the edges of the dough circles with the beaten egg to help seal. Fold the dough over the filling to form a half-moon shape and press the edges firmly with a fork to seal completely.
- Prepare for Baking: Transfer the sealed mini pies to the lined baking sheet. Brush the tops with the remaining beaten egg and, if desired, sprinkle with turbinado sugar for added crunch and sweetness.
- Create Steam Vents: Cut small slits on top of each pie to allow steam to escape during baking, preventing sogginess and ensuring an even cook.
- Bake Pies: Bake in the preheated oven for 20-25 minutes, or until the pies are golden brown and the filling is bubbly and cooked through.
- Cool and Serve: Remove the mini pies from the oven and let them cool slightly on a wire rack before serving to allow the filling to set and avoid burning your mouth.
Notes
- Using tart apples like Granny Smith will give a nice balance of sweet and tangy flavor.
- The flour in the filling helps thicken the juices so the pies are not soggy.
- Brushing with egg wash gives the crust a beautiful golden shine.
- Turbinado sugar adds a delightful crunch and sparkling texture on top—optional but recommended.
- Ensure the slits on top are large enough for steam to escape to prevent filling leakage.
- Mini pies can be made ahead and reheated in the oven for a few minutes before serving.


