Pumpkin-Shaped Rice Krispie Treats Recipe
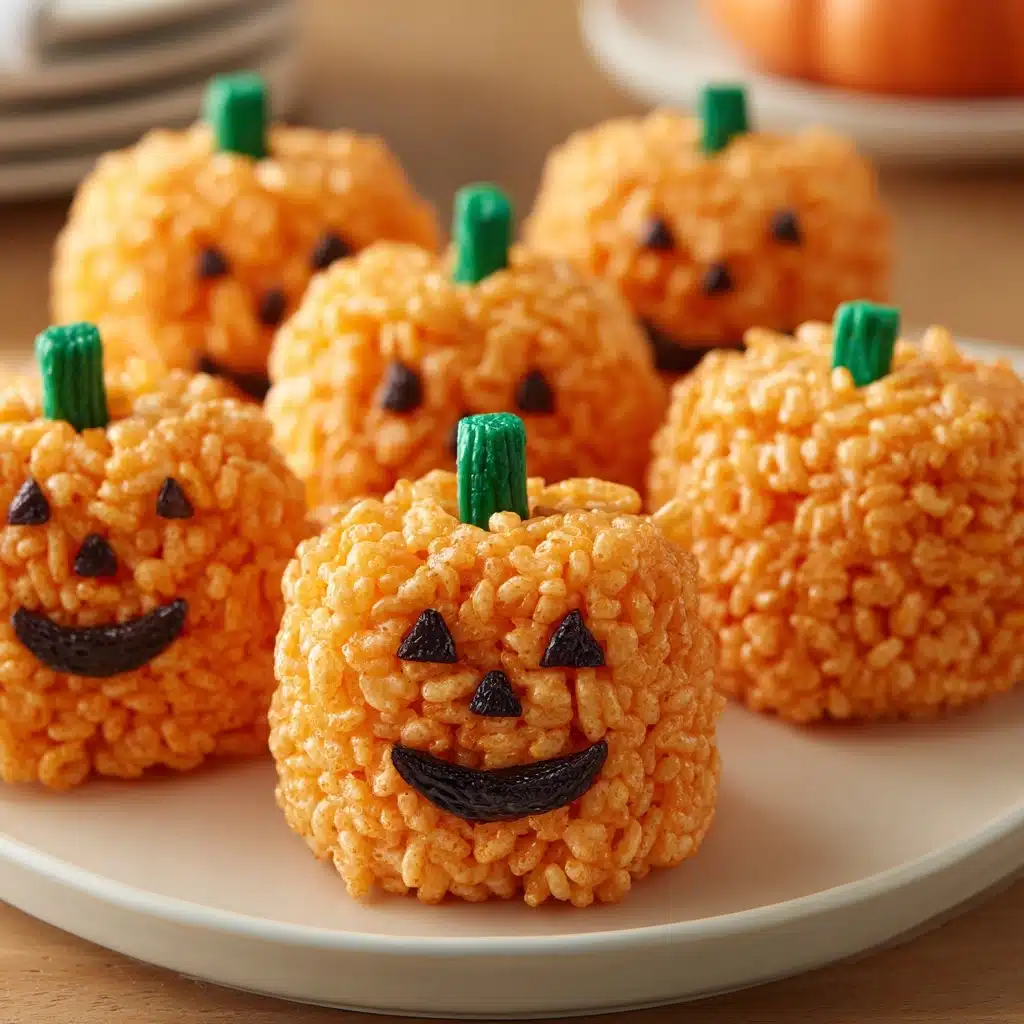
If you’re searching for a show-stopping fall or Halloween treat, these Pumpkin-Shaped Rice Krispie Treats are guaranteed to steal the spotlight. Perfectly chewy, marshmallowy, and adorably festive, each little pumpkin is as much fun to make as it is to eat. Whether you’re whipping up a batch with kids or surprising friends at a party, these treats deliver pure seasonal joy in every bite, combining classic comfort with playful holiday magic. Trust me, once you try them, you’ll want to make Pumpkin-Shaped Rice Krispie Treats a new autumn tradition!
Ingredients You’ll Need
The beauty of Pumpkin-Shaped Rice Krispie Treats is that you probably already have most of what you’ll need in your pantry. Each ingredient is chosen for its crucial role: buttery richness, fluffy chew, that irresistible crispy crunch, festive coloring, and the cutest edible stems!
- Rice Krispies cereal: Provides the signature crispy texture; make sure your cereal is fresh for the best crunch.
- Mini marshmallows: Melt into gooey goodness and bind everything together—fresh marshmallows give the fluffiest results.
- Unsalted butter: Adds richness and smoothness for perfectly tender treats—don’t skip it!
- Orange gel food coloring: Creates that bright, pumpkin-orange finish; gel color works best for vivid, even coloring without adding extra moisture.
- Green M&M’s or Tootsie Rolls (for stems): Complete your pumpkins with edible stems; both options are delicious and fun!
- Non-stick cooking spray: Keeps sticky hands at bay and makes shaping your pumpkins a breeze.
How to Make Pumpkin-Shaped Rice Krispie Treats
Step 1: Melt the Butter
Start by placing a large saucepan on medium heat and adding all of your unsalted butter. Let it melt gently, stirring occasionally. The butter will infuse every bite of your Pumpkin-Shaped Rice Krispie Treats with a creamy base that’s totally irresistible. Don’t let it brown—just melt until smooth.
Step 2: Melt the Marshmallows
Pour in the mini marshmallows and stir constantly, making sure all the marshmallows melt down into a glossy, silky pool. The key here is patience—keep stirring until every last mini marshmallow is liquid. This sticky mixture is the heart of any Rice Krispie treat, gluing everything together for that perfect chewy bite.
Step 3: Add Orange Color
Remove the pan from the heat, then squeeze in your orange gel food coloring. Stir well until the marshmallow mixture turns a bold, even shade of orange—think pumpkin patch on a perfect fall day! This step turns a classic recipe into those super-cute Pumpkin-Shaped Rice Krispie Treats everyone will ooh and aah over.
Step 4: Mix in the Rice Krispies
Now pour your Rice Krispies cereal into the orange marshmallow mix. Use a sturdy spatula to fold and mix until every last cereal piece is thickly coated. Working quickly gives you the best texture for shaping—do your best to combine without crushing the cereal for maximum crunch.
Step 5: Shape the Pumpkins
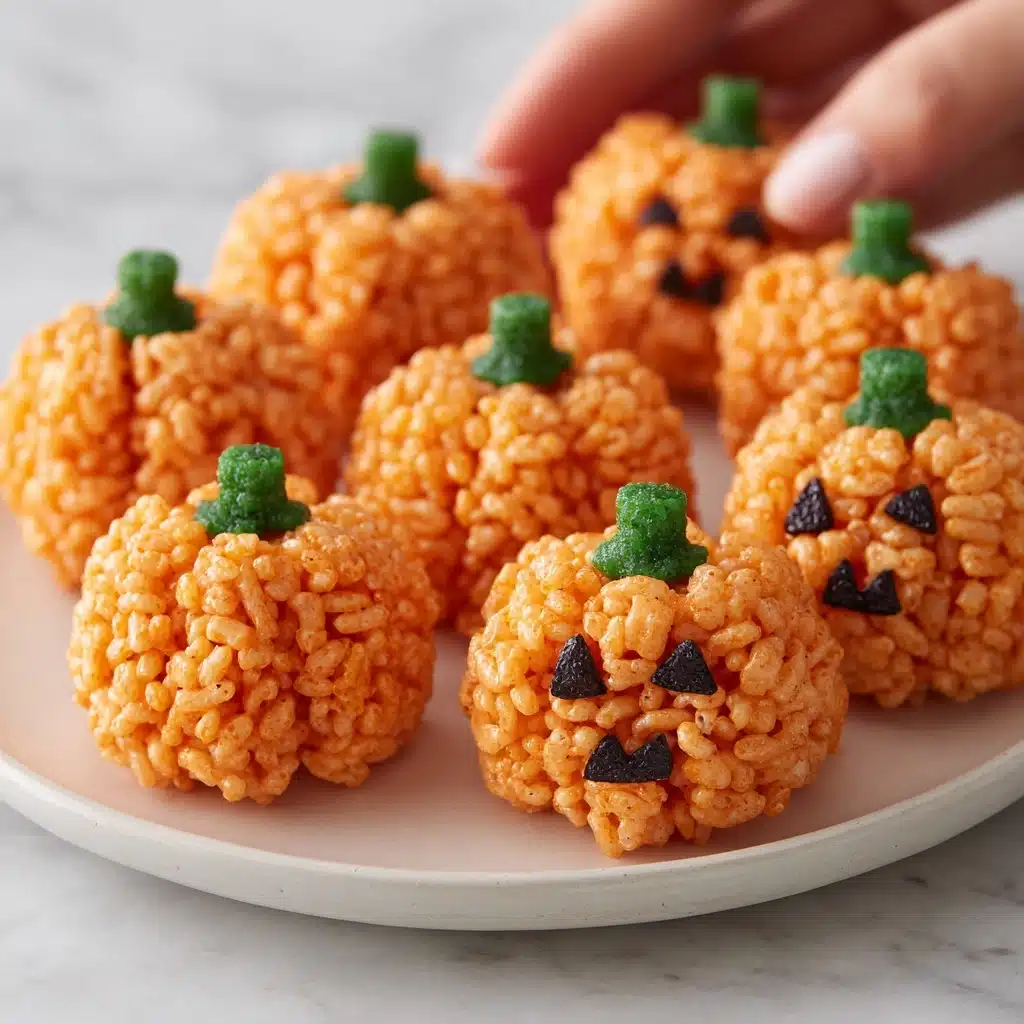
Spritz your hands liberally with non-stick cooking spray (trust me on this), then grab handfuls of the warm mixture. Gently form into small balls, about the size of a clementine, and place them on a tray lined with wax paper. Work while the mixture is still warm—it makes shaping those Pumpkin-Shaped Rice Krispie Treats much easier!
Step 6: Add the Stems
While the treats are still a bit soft, gently press a green M&M or a short piece of Tootsie Roll into the top of each pumpkin. Press just enough to anchor the “stem” but not so deep that it disappears. The pops of green are what truly bring these Pumpkin-Shaped Rice Krispie Treats to life!
Step 7: Let Cool and Set
Leave your finished pumpkins on the tray at room temperature for about half an hour, letting them cool and set completely. Once they’re firm, they’re ready to be gobbled up or displayed as the centerpiece of your snack table.
How to Serve Pumpkin-Shaped Rice Krispie Treats
Garnishes
For an extra flourish, try drawing faces on your pumpkins with melted chocolate or a black edible marker, creating charming jack-o’-lanterns. A dusting of edible glitter or a sprinkle of autumn-themed sprinkles can make your Pumpkin-Shaped Rice Krispie Treats twinkle like magic. Don’t forget a few extra green M&M’s scattered nearby to play up the harvest vibe!
Side Dishes
Pair these sweet treats with mugs of hot apple cider, pumpkin spice lattes, or a cinnamon hot chocolate for the ultimate autumn snack break. If you want more variety, serve alongside caramel apples, popcorn balls, or bite-sized fudge squares for a festive treat board everyone will adore.
Creative Ways to Present
Arrange your Pumpkin-Shaped Rice Krispie Treats on a rustic wooden platter surrounded by mini decorative pumpkins or fall leaves for a beautiful centerpiece. Wrap individual pumpkins in clear gift bags tied with twine for classroom parties or Halloween favors. Or, pile them high in a pumpkin-shaped bowl for a show-stopping dessert table display!
Make Ahead and Storage
Storing Leftovers
Once your treats are cooled and set, store them in an airtight container at room temperature. Use parchment or wax paper between layers to keep them from sticking together. They’ll stay perfectly chewy and delightful for up to three days—although they rarely last that long in my house!
Freezing
Good news: you can absolutely freeze Pumpkin-Shaped Rice Krispie Treats! For best results, wrap each one individually in plastic wrap, then place all the wrapped pumpkins in a freezer-safe zip-top bag. They’ll keep for about a month without losing flavor or texture. Thaw at room temperature before serving.
Reheating
If your treats get a little firm, just pop them on a plate and microwave for about 5–10 seconds. This little zap will revive that soft, chewy texture you love in a fresh Pumpkin-Shaped Rice Krispie Treats batch. Be careful not to overheat, or the chocolate stems might melt!
FAQs
How do I keep the Rice Krispie mixture from sticking to my hands?
Always spray your hands generously with non-stick cooking spray before shaping. If you run out, a little bit of butter or oil rubbed onto your palms works in a pinch. This simple step is a lifesaver for mess-free pumpkin sculpting!
Can I use standard marshmallows instead of mini marshmallows?
Absolutely! Large marshmallows work just as well, though you’ll want to chop them up a bit for even melting. The key is to measure by weight—10 ounces of any size marshmallow will do the trick for Pumpkin-Shaped Rice Krispie Treats.
What can I use instead of food coloring?
If you want a natural option, try a splash of carrot or pumpkin juice for subtle orange coloring, or skip the color entirely for classic treats with a pumpkin twist. Gel coloring is recommended, though, for the most vibrant and festive result!
Can I make these gluten free?
Yes! Just use gluten-free crispy rice cereal and check your marshmallow and candy brands to confirm they’re gluten free. This simple substitution means everyone can enjoy Pumpkin-Shaped Rice Krispie Treats, gluten sensitivities or not.
How do I add faces to make jack-o’-lanterns?
You can use an edible black marker or pipe melted chocolate onto the cooled pumpkins to draw fun or spooky faces. This is a crowd-pleasing touch for Halloween parties, and kids love creating their own edible jack-o’-lanterns!
Final Thoughts
There’s something so satisfying about pulling together a batch of Pumpkin-Shaped Rice Krispie Treats—they deliver big smiles with minimal effort, and the festive results are sure to delight. Whether you’re sharing with your family, kids, or neighbors, I hope these sweet little pumpkins become your favorite fall treat too. Give them a try, and watch them disappear!
Print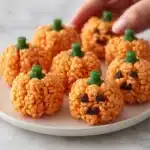
Pumpkin-Shaped Rice Krispie Treats Recipe
- Total Time: 20 minutes
- Yield: 12 pumpkin-shaped treats 1x
- Diet: Vegetarian
Description
These adorable Pumpkin-Shaped Rice Krispie Treats are perfect for Halloween or any fall gathering. Easy to make and fun to decorate, these festive treats will delight both kids and adults alike.
Ingredients
Ingredients:
- 6 cups Rice Krispies cereal
- 1 package (10 oz) mini marshmallows
- 3 tablespoons unsalted butter
- Orange gel food coloring
- Green M&M’s or Tootsie Rolls (for stems)
- Non-stick cooking spray
Instructions
- In a large saucepan over medium heat, melt the butter. Add the mini marshmallows and stir continuously until melted and smooth.
- Remove from heat and stir in orange gel food coloring until evenly blended. Add the Rice Krispies cereal and mix well until fully coated.
- Lightly spray your hands with non-stick cooking spray, then shape the mixture into small balls to resemble pumpkins. While the treats are still warm, gently press a green M&M or a small piece of Tootsie Roll into the top center of each ball to form the pumpkin stem.
- Allow the treats to cool and set completely before serving.
Notes
- You can use a black edible marker or melted chocolate to draw jack-o’-lantern faces for a fun Halloween twist.
- Use gloves to avoid staining your hands with food coloring.
- Prep Time: 10 minutes
- Cook Time: 10 minutes
- Category: Dessert
- Method: Stovetop
- Cuisine: American
Nutrition
- Serving Size: 1 treat
- Calories: 130
- Sugar: 10g
- Sodium: 95mg
- Fat: 3g
- Saturated Fat: 2g
- Unsaturated Fat: 0.5g
- Trans Fat: 0g
- Carbohydrates: 25g
- Fiber: 0g
- Protein: 1g
- Cholesterol: 10mg
