Chocolate-covered Christmas Cake Puffs Recipe
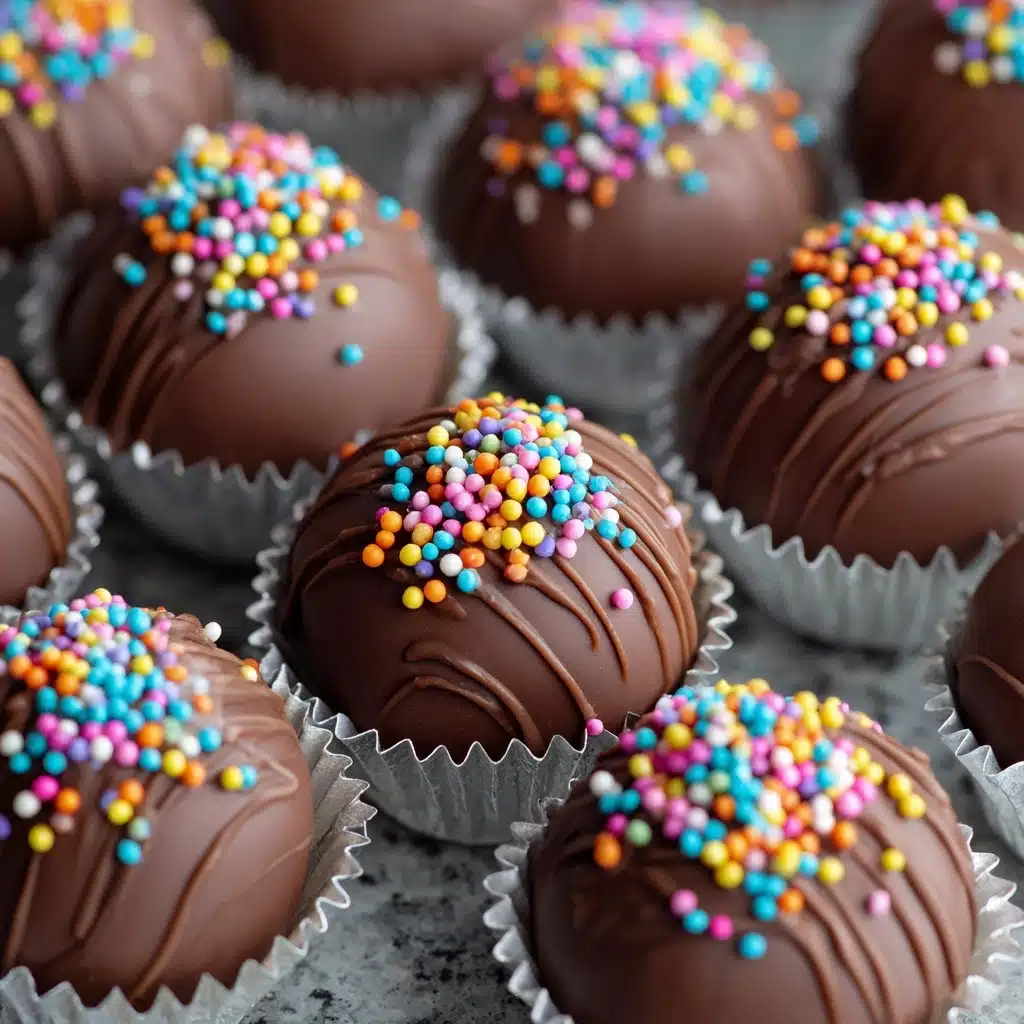
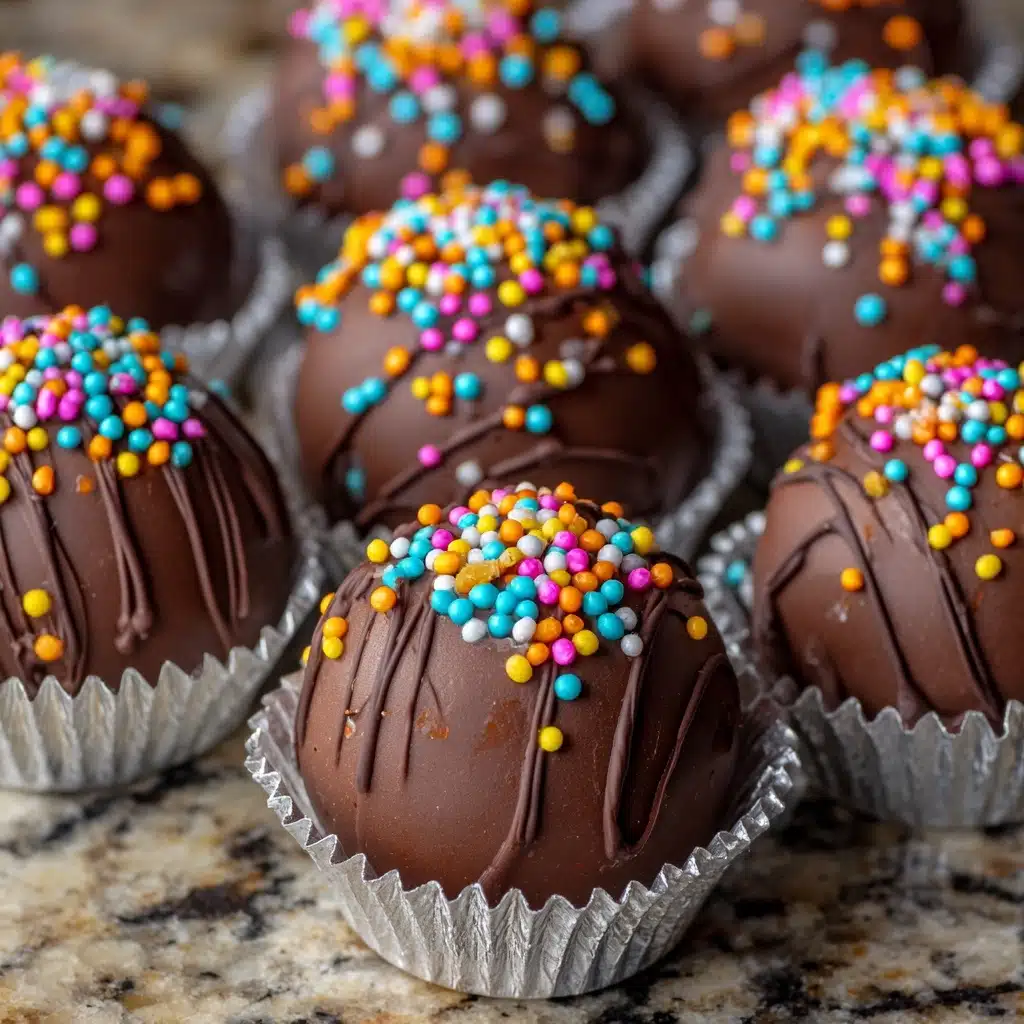
Get ready to make your holiday season extra magical with these Chocolate-covered Christmas Cake Puffs! Imagine rich, chocolate cake blended with silky cream cheese frosting, rolled into adorable little bites, dipped in smooth melted chocolate and topped with festive sprinkles. Every bite is a celebration—moist, fudgy, and coated in a shell of chocolate that crackles with every nibble. The best part? They’re wonderfully easy to whip up, require just a handful of pantry ingredients, and look like jewels on any holiday dessert platter. If you’re searching for an irresistible treat to share with family and friends, these Chocolate-covered Christmas Cake Puffs might just become your new Christmas tradition!
Ingredients You’ll Need
These simple, crowd-pleasing ingredients are all you need to create a treat that not only looks amazing but also delivers big on flavor. Each ingredient adds an essential note, whether it’s the rich foundation, creamy texture, or irresistible chocolate coating.
- Chocolate cake mix: The backbone of your puffs, this shortcut delivers deep chocolate flavor and keeps things easy for busy holidays!
- Eggs, oil, and water (as needed by cake mix): These unlock the cake’s structure and moisture, resulting in a tender, crumb-ready base.
- Cream cheese frosting: A half cup is all it takes to make the cake crumbs beautifully fudgy and easy to shape—like edible playdough, but so much tastier!
- Semi-sweet or dark chocolate chips: Melting these creates the luscious chocolate shell; choose your favorite to match the crowd’s taste buds.
- Coconut oil or shortening: Just a spoonful makes the melted chocolate shiny and silky, perfect for dipping!
- Festive sprinkles or crushed peppermint: The crowning touch—these toppings make your Chocolate-covered Christmas Cake Puffs pop with holiday cheer.
How to Make Chocolate-covered Christmas Cake Puffs
Step 1: Bake the Chocolate Cake
Start by preparing the chocolate cake according to your box instructions (or your favorite homemade recipe if you’re feeling from-scratch ambitious). Make sure to let the cake cool completely before moving to the next step; this keeps the texture just right and makes crumbling a breeze.
Step 2: Crumble the Cake
Once your cake is cool, crumble it into a large bowl until it’s reduced to fine, sandy crumbs. Don’t rush this part—consistent crumbs mean smooth, uniform puffs later on.
Step 3: Mix with Cream Cheese Frosting
Add the cream cheese frosting to your bowl of crumbs. Mix well using a spoon (or get in there with clean hands!) until the mixture comes together and holds its shape when squeezed. The frosting adds that creamy decadence and helps bind everything.
Step 4: Roll into Balls
Scoop the mixture by tablespoonfuls and roll into 1-inch balls, placing each on a parchment-lined baking sheet. If your kitchen is warm and things get sticky, a quick chill of your hands helps! You should get about 36 puffs.
Step 5: Freeze the Cake Balls
Pop the tray in your freezer for 30 minutes. Chilling is key—this sets the puffs so they hold their shape when dipped in melted chocolate, making life a whole lot easier.
Step 6: Melt the Chocolate
Combine chocolate chips and coconut oil in a microwave-safe bowl. Heat in 30-second bursts, stirring between each, until everything is melted and glossy smooth. The coconut oil keeps the chocolate dippable and gives it a tempting sheen.
Step 7: Dip and Decorate
Using a fork or dipping tool, dip each chilled cake ball into the melted chocolate, then gently tap to let any extra chocolate drip back into the bowl. Return the coated puff to the parchment-lined sheet and immediately sprinkle on your festive toppings so they stick perfectly. Work quickly here for best results!
Step 8: Chill Until Set
Transfer your beautiful, decorated puffs to the fridge for about 15 to 20 minutes. This helps the chocolate set hard, making the texture crisp and biteable. Once firm, they’re ready to serve or store for later.
How to Serve Chocolate-covered Christmas Cake Puffs
Garnishes
If you want your Chocolate-covered Christmas Cake Puffs to sparkle, don’t hold back on the garnish! Try a flurry of red and green sprinkles, a dusting of edible glitter, or a crunchy layer of crushed peppermint for a wintry touch. For an elegant twist, try a tiny drizzle of white chocolate over the dark shell.
Side Dishes
Pair these sweet bites with a mug of hot cocoa, mulled wine, or creamy coffee for a warming contrast. If you’re building a holiday dessert board, arrange them with fresh berries, shortbread cookies, or even a bowl of whipped cream for dipping.
Creative Ways to Present
Chocolate-covered Christmas Cake Puffs look fantastic stacked in a festive tower as a table centerpiece. You can also tuck them into small boxes or clear cellophane bags for delightful edible gifts. For parties, place each puff in a mini cupcake liner for a polished, bakery-style presentation, or turn them into pops by inserting a lollipop stick before dipping!
Make Ahead and Storage
Storing Leftovers
Keep any leftover Chocolate-covered Christmas Cake Puffs stored in an airtight container in the refrigerator. They’ll stay deliciously fresh for up to 5 days and are just as tasty straight from the fridge as at room temp.
Freezing
For longer-term storage, freeze your cake puffs in a single layer until solid, then transfer to a zip-top bag or airtight container. They’ll keep for up to a month—just let them thaw in the fridge for a couple of hours before serving (if you can wait that long!).
Reheating
No reheating necessary—these treats are designed to be enjoyed cold or at room temperature! If chilled or frozen, allow your Chocolate-covered Christmas Cake Puffs to soften for 10 to 15 minutes on the counter before serving for the best texture.
FAQs
Can I use homemade cake instead of a cake mix?
Absolutely! If you have a favorite homemade chocolate cake recipe, feel free to use it in place of the boxed mix. Just make sure the cake is cooled and crumbled well to achieve that uniform texture.
Do I have to use cream cheese frosting, or can I substitute?
Cream cheese frosting gives the puffs their classic tang and ultra-smooth texture, but you can swap in chocolate or vanilla frosting if you prefer a different flavor profile. Just keep the texture in mind—the mixture should still hold together easily.
How can I make these Chocolate-covered Christmas Cake Puffs gluten-free?
Simply use your favorite gluten-free chocolate cake mix and double-check that your frosting and chocolate chips are gluten-free certified. No one will ever guess they’re gluten-free!
Can I add flavors to the cake mixture?
Go for it! A tiny splash of peppermint or almond extract stirred into the cake-frosting blend adds a lovely holiday twist. Just start slowly—a little goes a long way.
Why do my cake puffs crack when dipped in chocolate?
If your puffs are too cold or the chocolate is very hot, the temperature difference can cause cracking. Let the puffs warm up for a few minutes at room temperature after freezing, and make sure the chocolate is melted but not scalding hot before dipping.
Final Thoughts
I can’t wait for you to experience just how fun and delicious Chocolate-covered Christmas Cake Puffs are to make and eat! Whether you’re celebrating with family, sharing with friends, or need a festive homemade gift, these treats are sure to bring big smiles. Happy holidays and happy baking!
Print
Chocolate-covered Christmas Cake Puffs Recipe
- Total Time: 1 hour 30 minutes (includes chilling)
- Yield: 36 cake puffs 1x
- Diet: Vegetarian
Description
Indulge in these delightful chocolate-covered Christmas cake puffs that make for a perfect holiday treat. These cake truffles are a festive and delicious addition to any dessert spread, combining rich chocolate cake with a creamy center and a decadent chocolate coating.
Ingredients
For the Cake Puffs:
- 1 box chocolate cake mix (plus ingredients listed on box)
- 1/2 cup cream cheese frosting
For the Coating:
- 12 ounces semi-sweet or dark chocolate chips
- 1 tablespoon coconut oil or shortening
- Festive sprinkles or crushed peppermint for topping
Instructions
- Prepare the Cake Puffs: Prepare and bake the chocolate cake according to the package instructions. Allow it to cool completely.
- Mix and Shape: Crumble the cake into fine crumbs in a bowl. Add the cream cheese frosting and mix until well combined. Shape the mixture into 1-inch balls and place on a parchment-lined baking sheet. Freeze for 30 minutes.
- Coat in Chocolate: Melt the chocolate chips and coconut oil in the microwave. Dip each chilled cake ball into the melted chocolate, allowing excess to drip off. Sprinkle with festive toppings.
- Chill and Serve: Chill the coated cake puffs in the fridge until set, about 15–20 minutes. Serve cold or at room temperature.
Notes
- You can use homemade cake and frosting for a personalized touch.
- For added flavor, consider incorporating a drop of peppermint or almond extract into the cake mixture.
- These cake puffs can be stored in the freezer for up to a month, making them a convenient make-ahead treat.
- Prep Time: 30 minutes
- Cook Time: 30 minutes (cake bake time)
- Category: Dessert
- Method: No-Bake (after cake is baked)
- Cuisine: American
Nutrition
- Serving Size: 1 cake puff
- Calories: 120
- Sugar: 12 g
- Sodium: 95 mg
- Fat: 6 g
- Saturated Fat: 3.5 g
- Unsaturated Fat: 2 g
- Trans Fat: 0 g
- Carbohydrates: 15 g
- Fiber: 1 g
- Protein: 1 g
- Cholesterol: 10 mg

