
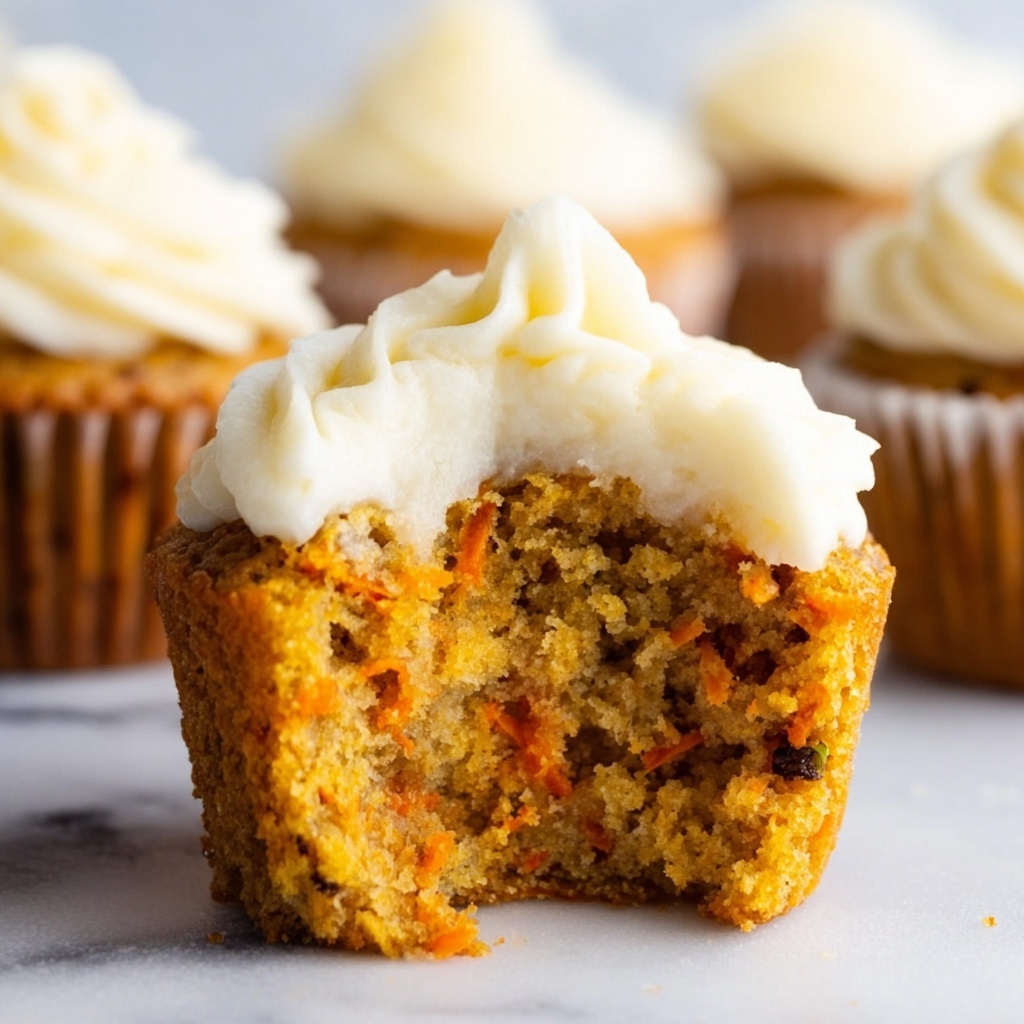
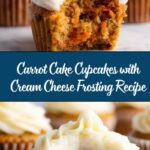
If you’re searching for a delightful treat that feels like a warm hug in cupcake form, this Carrot Cake Cupcakes with Cream Cheese Frosting Recipe is your new best friend. These cupcakes are bursting with warmly spiced shredded carrots and crunchy pecans, all wrapped up in a moist, tender crumb. Topped with a luscious, creamy frosting, they perfectly balance sweetness and spice, making each bite irresistibly comforting. Whether for a cozy afternoon snack or a celebratory dessert, these cupcakes bring joy that’s as colorful and inviting as their gorgeous orange hues.

Ingredients You’ll Need
The beauty of this recipe lies in its simple yet essential ingredients, each playing a vital role in creating the ultimate carrot cake cupcake experience. From the fragrant spices that add depth, to the shredded carrots and pecans lending texture and freshness, every element works in harmony to craft a standout cupcake.
- 1 ¼ cups all-purpose flour: Provides the perfect structure and tender crumb.
- ½ cup granulated sugar: Adds a clean sweetness that balances the spices.
- ½ cup light brown sugar, packed: Brings moistness and a subtle caramel note.
- ¾ tsp baking soda: Helps the cupcakes rise for a light texture.
- ½ tsp baking powder: Aids gentle lift along with the baking soda.
- ½ tsp fine sea salt: Enhances all the flavors without overpowering.
- ¼ tsp ground ginger: Adds a warm, zesty kick.
- ½ tsp cinnamon: Provides classic warming spice character.
- ¼ tsp nutmeg: Offers a fragrant, nutty spice touch.
- ¾ cups vegetable oil: Keeps the cupcakes moist and tender.
- 2 large eggs, room temperature: Bind the ingredients and contribute to fluffiness.
- 1 ½ tsp pure vanilla extract: Infuses a sweet, inviting aroma.
- 2 Tbsp whole milk: Balances batter moisture for softness.
- 1 ½ cups carrots, peeled and shredded: The star ingredient for natural sweetness and texture.
- 1 cup pecans, chopped: Adds crunch and a nutty flavor contrast.
- ½ cup unsalted butter, room temperature: Essential for the cream cheese frosting’s rich texture.
- 8 oz block cream cheese, room temperature: Provides tangy creaminess for the frosting.
- 3 tsp pure vanilla extract: Enhances the frosting’s flavor depth.
- 4 cups powdered sugar: Sweetens and thickens the frosting perfectly.
How to Make Carrot Cake Cupcakes with Cream Cheese Frosting Recipe
Step 1: Prepare the Oven and Pan
Start by heating your oven to 350°F (175°C) to ensure it reaches the perfect temperature. Line a 12-count muffin pan with cupcake liners to keep your cupcakes from sticking and make cleanup a breeze.
Step 2: Mix Dry Ingredients
In a large bowl, whisk together all-purpose flour, the sugars, baking powder, baking soda, salt, and warm spices like ginger, cinnamon, and nutmeg. Combining these dry ingredients first ensures that the spices and leavening agents are evenly distributed, setting your cupcakes up for perfect flavor and rise.
Step 3: Add Wet Ingredients
Using a stand mixer, carefully add the vegetable oil and eggs one at a time, scraping the bowl’s sides as you go to blend everything smoothly. Then stir in vanilla extract and whole milk to add moisture and aromatic depth.
Step 4: Incorporate Carrots and Pecans
Fold in the freshly shredded carrots and chopped pecans gently but thoroughly. The carrots bring natural sweetness and moisture, while the pecans add a satisfying crunch to every bite. This step is crucial for that true carrot cake texture.
Step 5: Fill Cupcake Liners
Spoon the batter into each cupcake liner, filling them about two-thirds to three-quarters full. This allows room for the cupcakes to rise beautifully without spilling over the sides.
Step 6: Bake the Cupcakes
Bake your cupcakes in the preheated oven for about 20 minutes. You’ll know they’re done when a toothpick inserted into the center comes out clean. Let them cool completely to room temperature before frosting – patience here leads to the best frosting results!
Step 7: Prepare the Cream Cheese Frosting
Beat the softened butter and cream cheese together until the mixture is smooth and lump-free. Add vanilla extract, then gradually beat in powdered sugar until your frosting is creamy, luscious, and perfectly sweetened.
Step 8: Frost the Cupcakes
Once your cupcakes are cooled, generously frost them using a piping bag for pretty swirls or a butter knife for a more rustic look. Each cupcake becomes a little masterpiece with this classic cream cheese frosting.
How to Serve Carrot Cake Cupcakes with Cream Cheese Frosting Recipe
Garnishes
Add a sprinkle of chopped pecans on top or a delicate dusting of cinnamon for an extra pop of color and flavor. For a touch of fun, tiny edible flowers or a small piece of shredded carrot can make each cupcake look irresistible.
Side Dishes
Serve these cupcakes alongside a cup of freshly brewed chai tea or coffee to complement their spice notes. A light fruit salad or a dollop of whipped cream can also balance the richness beautifully.
Creative Ways to Present
Arrange your cupcakes on a tiered stand for any celebration to create an inviting centerpiece. Wrapping individual cupcakes with decorative ribbons or placing them in mason jars also adds a charming personal touch.
Make Ahead and Storage
Storing Leftovers
Keep your cupcakes in an airtight container at room temperature for up to two days, or refrigerate them for up to five days to maintain freshness and prevent the cream cheese frosting from spoiling.
Freezing
You can freeze unfrosted cupcakes for up to three months. Wrap them tightly in plastic wrap and place them in an airtight freezer container. Thaw completely before frosting. Frosted cupcakes can also be frozen, but freezing might slightly affect the frosting texture.
Reheating
Bring refrigerated or thawed cupcakes to room temperature before serving. Avoid microwaving frosted cupcakes, as the frosting can melt and lose its texture. For an unfrosted cupcake, a gentle 10-second zap in the microwave can warm them slightly without drying out.
FAQs
Can I substitute the vegetable oil with butter?
Yes, you can substitute vegetable oil with melted butter for a richer flavor, but it may slightly change the texture, making it a bit denser. Use the same amount, melted and cooled before mixing in.
How finely should the carrots be shredded?
Shredding the carrots finely or medium-fine works best. If they’re too coarse, they might make the texture too chunky, but very fine shreds blend seamlessly and keep the cupcakes moist.
Can I make these cupcakes gluten-free?
Absolutely! Substitute the all-purpose flour with a gluten-free blend designed for baking, ensuring it includes xanthan gum for structure. The texture might vary slightly but will still be delicious.
Is it okay to use salted butter in the frosting?
If you only have salted butter, you can use it, but reduce or omit any added salt in the cupcake batter. The frosting might have a slightly different balance but will still taste great.
How long can I store frosted cupcakes at room temperature?
Because of the cream cheese frosting, it’s best to avoid leaving cupcakes out at room temperature for more than two hours to prevent spoilage. Refrigeration is recommended if you’re not serving them soon.
Final Thoughts
There’s something truly magical about these Carrot Cake Cupcakes with Cream Cheese Frosting Recipe that makes every bite a celebration of homey flavors and comfort. I hope these cupcakes find a special spot in your kitchen and heart, just like they do in mine. Grab your ingredients, get baking, and prepare to impress everyone with this timeless, utterly delicious treat!
Print
Carrot Cake Cupcakes with Cream Cheese Frosting Recipe
- Prep Time: 15 minutes
- Cook Time: 20 minutes
- Total Time: 42 minutes
- Yield: 12 servings
- Category: Dessert
- Method: Baking
- Cuisine: American
- Diet: Vegetarian
Description
Delight in these moist and flavorful Carrot Cake Cupcakes, featuring a perfect blend of warm spices, shredded carrots, and crunchy pecans, all topped with a rich and creamy cream cheese frosting. Perfect for any occasion, these cupcakes combine the classic taste of carrot cake in a convenient, individual portion size.
Ingredients
Dry Ingredients
- 1 ¼ cups all-purpose flour
- ½ cup granulated sugar
- ½ cup light brown sugar, packed
- ¾ tsp baking soda
- ½ tsp baking powder
- ½ tsp fine sea salt
- ¼ tsp ground ginger
- ½ tsp cinnamon
- ¼ tsp nutmeg
Wet Ingredients
- ¾ cups vegetable oil
- 2 large eggs, room temperature
- 1 ½ tsp pure vanilla extract
- 2 Tbsp whole milk
- 1 ½ cups carrots, peeled and shredded
- 1 cup pecans, chopped
Frosting
- ½ cup unsalted butter, room temperature
- 8 oz block cream cheese, room temperature
- 3 tsp pure vanilla extract
- 4 cups powdered sugar
Instructions
- Prepare the oven and pan: Preheat your oven to 350°F (175°C) and line a 12-count muffin pan with cupcake liners to ensure the cupcakes don’t stick and bake evenly.
- Mix dry ingredients: In a large bowl of a stand mixer, whisk together the all-purpose flour, granulated sugar, brown sugar, baking powder, baking soda, salt, ground ginger, cinnamon, and nutmeg until thoroughly combined.
- Add wet ingredients: Using your stand mixer, stir in the vegetable oil and then add eggs one at a time, scraping down the sides of the bowl often to mix fully. Then add the vanilla extract and whole milk, mixing until everything is fully incorporated.
- Incorporate carrots and pecans: Gently fold in the shredded carrots and chopped pecans to distribute them evenly throughout the batter without overmixing.
- Fill cupcake liners: Spoon the batter into the prepared cupcake liners, filling each about two-thirds to three-quarters full to allow space for rising.
- Bake the cupcakes: Place the muffin pan in the preheated oven and bake for approximately 20 minutes, or until a toothpick inserted into the center of a cupcake comes out clean. Let the cupcakes cool completely before frosting.
- Prepare the frosting: In a large bowl of a stand mixer, beat the room temperature butter and cream cheese together until creamy and smooth, free of lumps. Add the vanilla extract and continue mixing. Gradually add the powdered sugar, mixing until the frosting is smooth and well combined.
- Frost the cupcakes: Once the cupcakes have completely cooled, frost them using a piping bag for a decorative look or a butter knife for a simple spread.
Notes
- Ensure eggs and dairy are at room temperature to achieve smooth batter and frosting.
- Do not overmix the batter after adding the carrots and pecans to maintain a tender crumb.
- Use fresh grated carrots for the best texture and flavor.
- For nut allergies, pecans can be omitted or replaced with seeds like sunflower or pumpkin seeds.
- Store cupcakes in an airtight container in the refrigerator for up to 3 days.
- Bring refrigerated cupcakes to room temperature before serving for best taste.
