
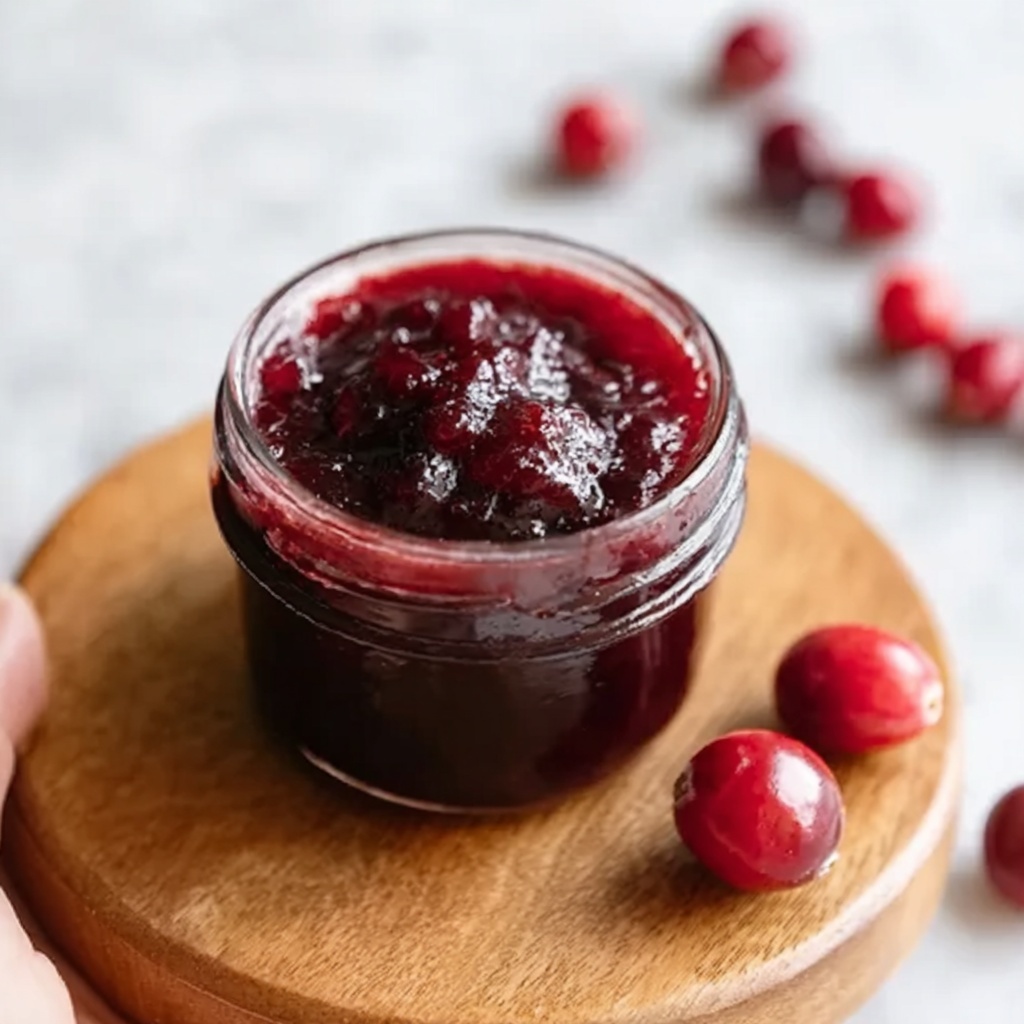
There is something truly magical about homemade preserves, and nothing beats the vibrant, sweet-tart flavor of cherries captured in your own kitchen. This Homemade Cherry Jam Recipe brings together just a handful of simple ingredients to create a luscious jam that bursts with the essence of fresh summer cherries. Whether you’re a seasoned jam-maker or trying your hand at preserves for the first time, this recipe promises an irresistible spread that’s perfect for elevating breakfast toast, spooning over desserts, or gifting to loved ones with a personal touch.
Ingredients You’ll Need
Whipping up this Homemade Cherry Jam Recipe is wonderfully straightforward, and each ingredient plays a vital role in building the perfect balance of flavor, texture, and color. Using fresh cherries ensures a natural sweetness and gorgeous ruby hue, while lemon juice adds brightness and helps preserve that fresh note. Sugar sweetens and helps create the classic jam consistency, and fruit pectin is the key to achieving that perfect set that holds everything together beautifully.
- 4 cups fresh cherries (pitted): Choose ripe, sweet-tart cherries for the best flavor and natural juiciness.
- 1 ½ cups granulated sugar: Essential for sweetness and for helping the jam set properly.
- 2 tablespoons lemon juice (freshly squeezed): Adds brightness and balances the sweetness while enhancing preservation.
- 1 package (1.75 oz) fruit pectin: The natural thickener that guarantees your jam has the perfect spreadable consistency.
How to Make Homemade Cherry Jam Recipe
Step 1: Prep Your Cherries
Start by washing your cherries thoroughly to remove any dirt or debris. Use a cherry pitter if you have one, or carefully halve each cherry and remove the pits by hand. This step is important to ensure a smooth texture without any unwanted pits in your jam.
Step 2: Combine Ingredients and Macerate
In a large pot, combine the pitted cherries, sugar, and freshly squeezed lemon juice. Stir everything together well and let the mixture sit for 30 minutes so the cherries can release their natural juices, which adds depth and juiciness to your jam.
Step 3: Heat to a Boil
Place the pot over medium heat and gradually bring the mixture to a boil, stirring frequently to prevent sticking or burning. This step helps dissolve the sugar completely and prepares the jam base for thickening.
Step 4: Add Pectin and Boil Again
Once the cherry-sugar mixture is boiling, stir in the fruit pectin according to the package instructions. Keep stirring and let the mixture return to a full rolling boil. This second boil activates the pectin so your jam will set properly.
Step 5: Test for Doneness
Grab a cold plate from your freezer and spoon a small amount of jam onto it. Push gently with your finger; if the surface wrinkles and doesn’t flood back, your jam is perfectly set and ready.
Step 6: Jar and Seal
Ladle the hot jam into sterilized jars, leaving a small headspace at the top. Seal them tightly with lids and process in boiling water for 5 to 10 minutes to ensure safety and longer shelf life.
How to Serve Homemade Cherry Jam Recipe

Garnishes
Elevate your homemade cherry jam with delicate garnishes like freshly chopped mint leaves or a sprinkle of lemon zest, which add a fresh aroma and pop of color that complement the natural cherry flavor perfectly.
Side Dishes
This jam shines when paired with crusty bread, buttery muffins, or even warm scones. It’s also a delightful spread for creamy cheeses such as brie or goat cheese, making your snack or appetizer plate truly irresistible.
Creative Ways to Present
Thinking beyond toast? Use this cherry jam as a topping for vanilla ice cream, swirl it into yogurt, or even glaze meats like pork or chicken for an exciting twist that brings a sweet and tangy punch to your meals.
Make Ahead and Storage
Storing Leftovers
If you happen to have leftover jam, keep it stored in the refrigerator in a tightly sealed jar. It will stay fresh and flavorful for several weeks, so you can enjoy those delicious cherry notes long after your initial batch.
Freezing
You can freeze homemade cherry jam to extend its shelf life even further. Simply transfer cooled jam into freezer-safe containers, leaving some headspace for expansion. Thaw it overnight in the refrigerator when ready to use, and the texture will still be fantastic.
Reheating
If you want to revive your jam’s luscious spreadability or use it warm as a sauce, gently reheat it on the stove over low heat, stirring occasionally. This keeps the flavors bright and enhances its luxurious texture.
FAQs
Can I use frozen cherries to make this jam?
Absolutely! Frozen cherries work just fine—just thaw and drain any excess liquid before using to ensure your jam isn’t too watery.
Is it necessary to use fruit pectin in this recipe?
Pectin is what helps the jam set properly, giving it that classic jam texture. Without it, your jam may turn out more like a syrup or compote, so unless you prefer that, it’s best to include the pectin.
How long does homemade cherry jam last once opened?
Once opened, keep your jam refrigerated and use it within 3 to 4 weeks for the best taste and safety.
Can I reduce the sugar in the recipe?
You can reduce sugar slightly if you prefer less sweetness, but keep in mind that sugar helps with preservation and setting, so don’t cut it too drastically without adjusting pectin as well.
What is the cold plate test for jam doneness?
The cold plate test is a simple way to check if your jam has set. Place a spoonful of hot jam on a chilled plate, let it cool, then press gently with your finger. If the surface wrinkles instead of running, the jam is ready.
Final Thoughts
This Homemade Cherry Jam Recipe is such a joy to make, filling your kitchen with incredible aromas and rewarding you with a jar full of sunshine. I encourage you to give it a try—whether for a leisurely weekend project or a heartfelt gift, your taste buds will thank you for this delicious, vibrant spread crafted from scratch.
Print
Homemade Cherry Jam Recipe
- Prep Time: 10 minutes
- Cook Time: 35 minutes
- Total Time: 45 minutes
- Yield: 2 cups (approximately 2 servings)
- Category: Jam/Preserves
- Method: Stovetop
- Cuisine: American
Description
This homemade Cherry Jam recipe offers a deliciously sweet and tangy spread made from fresh cherries, sugar, and lemon juice, thickened with fruit pectin. Perfect for breakfast spreads or desserts, this easy-to-make jam captures the vibrant flavor of summer cherries in a jar.
Ingredients
Fruit and Citrus
- 4 cups fresh cherries (pitted)
- 2 tablespoons lemon juice (freshly squeezed)
Sweetener and Thickener
- 1 ½ cups granulated sugar
- 1 package (1.75 oz) fruit pectin
Instructions
- Prepare the cherries: Wash and pit the cherries using a cherry pitter or by cutting them in half to remove the pits.
- Combine ingredients: In a large pot, combine the pitted cherries, granulated sugar, and freshly squeezed lemon juice. Stir well and let the mixture sit for 30 minutes to allow the cherries to release their juices.
- Heat the mixture: Place the pot over medium heat and heat the cherry mixture until it begins to boil, stirring frequently to prevent sticking and ensure even heating.
- Add pectin: Once boiling, stir in the fruit pectin according to the package instructions and continue cooking until the mixture returns to a rolling boil.
- Test for doneness: Use the cold plate test by placing a small amount of jam on a chilled plate and pushing it; if it wrinkles, the jam is ready.
- Jar and seal: Ladle the hot jam into sterilized jars, seal tightly, and process the jars in boiling water for 5-10 minutes to ensure proper preservation.
Notes
- Ensure that jars and lids are properly sterilized to prevent spoilage.
- The cold plate test is essential to confirm the jam has reached the proper gel stage.
- You can adjust sugar levels slightly depending on the sweetness of your cherries, but sugar is important for preservation and texture.
- Store sealed jars in a cool, dark place and refrigerate after opening.

