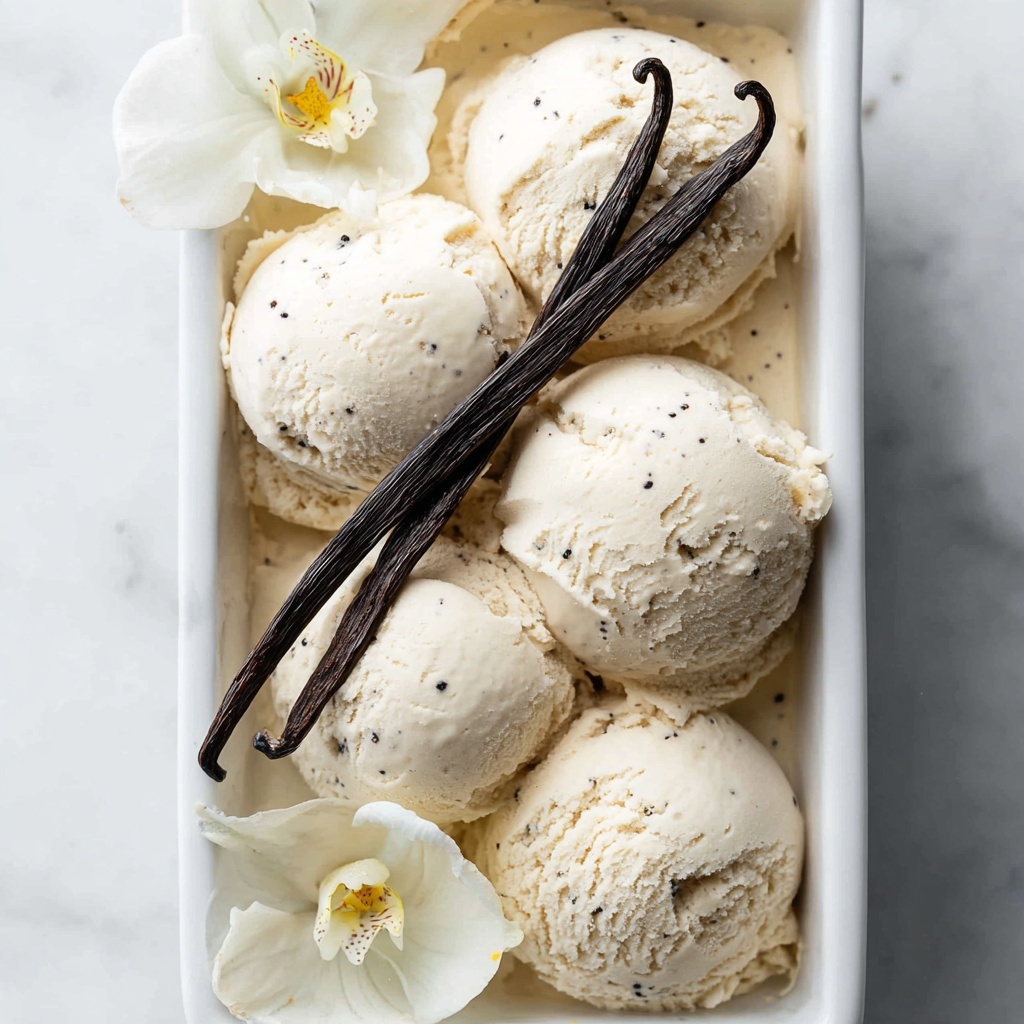
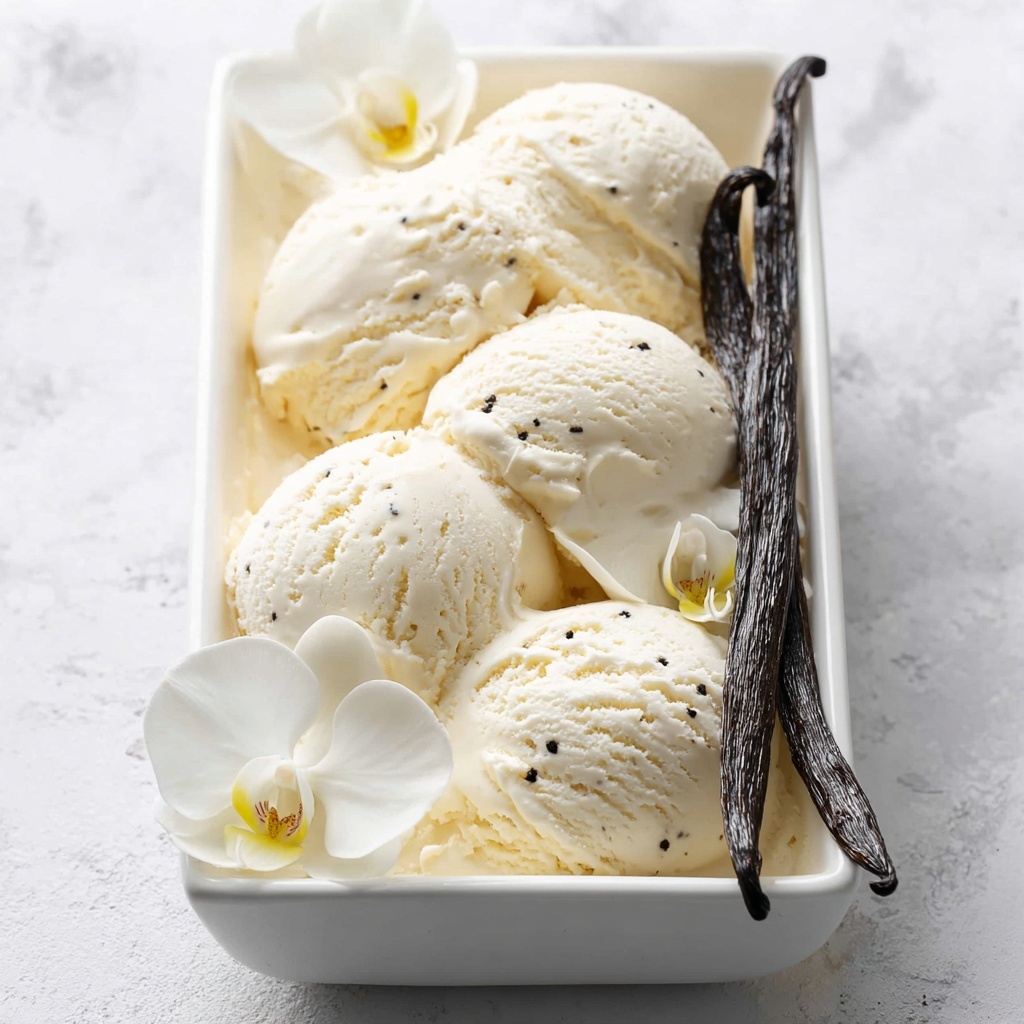
If you have been searching for a luscious, allergen-friendly dessert that can satisfy your sweet tooth without compromise, the Creamy Vegan Vanilla Ice Cream (Nut Free & GF) Recipe is exactly what you need. This recipe captures the dreamy richness of traditional vanilla ice cream using simple, wholesome ingredients that are both nut-free and gluten-free, making it accessible to many dietary preferences. Velvety soy milk, indulgent coconut cream, and the irresistible aroma of real vanilla pods come together in this silky frozen treat, proving that plant-based desserts can be utterly decadent and satisfying. Whether you’re vegan, have allergies, or just love a good homemade ice cream, this recipe is a must-try that brings a touch of pure joy in every scoop.
Ingredients You’ll Need
What’s so wonderful about this ice cream is how a handful of carefully chosen ingredients combine to create a profound depth of flavor and creaminess. Each component plays its part — from lending richness and texture to enhancing the vanilla essence — so the final result feels both indulgent and comforting.
- Soy milk (520 ml): A smooth and creamy dairy alternative that forms the base of the ice cream.
- Granulated sugar (100 g): Essential for sweetness and helps achieve that perfect smooth texture.
- Cornstarch or arrowroot starch (45 g): Thickens the custard-like base, giving the ice cream that delightful creamy body.
- Vanilla pod (1): Offers an unparalleled natural vanilla flavor with lovely flecks throughout the ice cream.
- Sea salt (¼ teaspoon): Enhances the sweetness and deepens all the flavors.
- Vegan condensed milk (200 g): Adds extra sweetness and creaminess without dairy.
- Chilled full-fat canned coconut milk (200 g): The thick cream layer ensures luscious richness and a silky texture.
- Vanilla extract (1 tablespoon): Boosts the vanilla flavor and rounds out the taste beautifully.
How to Make Creamy Vegan Vanilla Ice Cream (Nut Free & GF) Recipe
Step 1: Prep Your Ice Cream Machine
Ahead of time, freeze the ice cream machine’s bowl for at least 12 to 24 hours. This is a crucial step for achieving the perfect churn and texture, so don’t skip it!
Step 2: Create the Base Custard
Start by combining soy milk, sugar, and cornstarch in a saucepan. Whisk thoroughly until there are no lumps. Slice your vanilla pod in half lengthwise and scrape out the fragrant seeds, then add both the seeds and pod to the saucepan. Place it over medium heat to warm.
Step 3: Cook the Custard
Bring your mixture to a gentle simmer while whisking continuously. Alternate between the whisk and a rubber spatula to prevent the mixture from sticking or burning. You’ll know it’s ready when the mix thickens and becomes custard-like — about 5 minutes. Remove from heat, take out the vanilla pod, and stir in the sea salt.
Step 4: Cool Your Custard
Cover the custard with clingfilm directly over the surface to prevent a skin forming. Let it cool for 10 minutes at room temperature, then refrigerate for at least an hour until fully chilled. This resting period helps develop the flavors and ensures a smooth final texture.
Step 5: Mix the Creamy Base
In a large bowl, whisk the vegan condensed milk, chilled coconut cream, and vanilla extract until creamy and well combined. Gently add the chilled custard to this mixture and whisk again until fully incorporated.
Step 6: Churn the Ice Cream
Pour the mixture into your pre-frozen ice cream machine bowl and churn according to the manufacturer’s instructions. It typically takes 30-40 minutes for the perfect, creamy consistency.
Step 7: Freeze to Set
Once churned, transfer your ice cream to a loaf pan or airtight container. Cover it tightly with plastic wrap or a lid and freeze for a minimum of 2 hours to firm up for easy scooping.
How to Serve Creamy Vegan Vanilla Ice Cream (Nut Free & GF) Recipe

Garnishes
Enhance each scoop with fresh fruit like ripe berries or sliced bananas for a burst of natural sweetness and vibrant color. For crunch, sprinkle toasted seeds or gluten-free granola on top. A drizzle of chocolate or caramel sauce pairs beautifully as well!
Side Dishes
This ice cream shines alongside warm desserts like apple crisps or rich vegan brownies, creating a delicious balance of temperatures and textures. It can also be served with vegan waffles or pancakes for a decadent brunch twist.
Creative Ways to Present
For a fun surprise, serve scoops in hollowed-out fruit shells such as young coconuts or passion fruits. You can also layer it in parfait glasses with fruit compotes and coconut flakes for an elegant look that will impress guests and add a tropical vibe.
Make Ahead and Storage
Storing Leftovers
Keep any leftover ice cream in an airtight container in the freezer to preserve its flavor and texture, up to 2 months. Safe storage means you can enjoy this delightful treat anytime the craving strikes.
Freezing
If you plan to make the ice cream well in advance, freeze it as described after churning. Allow enough freezing time so that it sets properly but avoid freezing it too long without use to maintain its creamy consistency.
Reheating
Ice cream is best served chilled, but if it freezes too hard, leave it out for about 15 minutes before scooping. Using a warm wet spoon or scoop will make serving effortless while keeping that beautifully creamy texture intact.
FAQs
Can I substitute soy milk with another plant milk?
Yes, you can try other plant milks like oat or pea milk, though soy milk provides the best creaminess and protein balance in this recipe. Just note that substitutions might slightly change the texture.
Is this ice cream truly nut-free?
Absolutely! This recipe uses soy and coconut, which are not tree nuts, making it safe for those with nut allergies. Just ensure your coconut milk brand is processed in a nut-free facility if cross-contamination is a concern.
Do I need an ice cream machine to make this?
While an ice cream machine gives the best and creamiest results, you can try freezing the mixture and stirring it every 30 minutes to break up ice crystals manually. The texture won’t be quite as smooth but still delicious.
Can I make this recipe sugar-free?
You can experiment with sugar alternatives, but granulated sugar and vegan condensed milk provide specific sweetness and texture that are important. Using alternatives like maple syrup may require recipe adjustments.
How long should I churn the ice cream?
Typically, 30 to 40 minutes churn time works well for this recipe. Your machine’s instructions are the best guide, but you’ll know it’s done when the ice cream thickens to a soft-serve consistency.
Final Thoughts
This Creamy Vegan Vanilla Ice Cream (Nut Free & GF) Recipe is a treasure for anyone craving a smooth, flavorful treat that aligns with their dietary needs without sacrificing taste. Its rich, velvety texture and deep vanilla notes make it a firm favorite in my kitchen. I wholeheartedly encourage you to give this recipe a try — your taste buds will thank you, and you’ll feel wonderful knowing it’s as nourishing as it is indulgent. Happy churning!
Print
Creamy Vegan Vanilla Ice Cream (Nut Free & GF) Recipe
- Prep Time: 15 minutes (plus 1 hour chilling and 12-24 hours freezing ice cream bowl)
- Cook Time: 10 minutes
- Total Time: 4 hours 25 minutes (includes chilling and freezing times)
- Yield: 8 servings
- Category: Dessert
- Method: Ice Cream Machine (Churning)
- Cuisine: Vegan
- Diet: Gluten Free, Vegan, Nut Free
Description
This creamy vegan vanilla ice cream is a delightful dairy-free and nut-free treat that’s also gluten-free. Made with soy milk, vegan condensed milk, and rich coconut cream, it offers a smooth and indulgent texture with authentic vanilla flavor. Perfect for those seeking a plant-based dessert without compromising on creaminess or taste.
Ingredients
Base Ingredients
- 520 ml soy milk
- 100 g granulated sugar
- 45 g cornstarch (or arrowroot starch)
- 1 vanilla pod
- ¼ teaspoon sea salt
Mix-ins
- 200 g vegan condensed milk
- 200 g chilled full-fat canned coconut milk (thick part from top of the can only, or coconut cream)
- 1 tablespoon vanilla extract
Instructions
- Freeze Ice Cream Bowl: Freeze the ice cream bowl from your ice cream machine at least 12-24 hours ahead of making the recipe to ensure it is cold enough for proper churning.
- Prepare Custard Base: In a saucepan, combine the soy milk, sugar, and cornstarch. Whisk well to remove any lumps. Slice the vanilla pod down the center and scrape out the seeds. Add both seeds and pod to the saucepan and place over medium heat.
- Cook Custard: Bring the mixture to a gentle simmer and cook for 5 minutes while continuously whisking. Alternate between whisk and rubber spatula to prevent sticking and ensure even cooking. The mixture will thicken as the cornstarch activates. Once thickened, remove from heat and carefully discard the vanilla pod. Stir in the sea salt.
- Cool Custard: Cover the custard with cling film directly on the surface to prevent a skin from forming. Allow to cool at room temperature for 10 minutes, then transfer to the fridge to cool completely for about 1 hour.
- Whisk Mix-ins: In a large mixing bowl, combine vegan condensed milk, thick coconut milk or cream, and vanilla extract. Using an electric whisk, mix for a couple of minutes until creamy and smooth.
- Combine Custard and Mix-ins: Add the chilled custard to the bowl with the mix-ins and whisk for another minute until thoroughly combined.
- Churn Ice Cream: Pour the mixture into the pre-frozen ice cream machine bowl and churn according to your machine’s instructions, usually about 30-40 minutes, until the ice cream is creamy and frozen.
- Freeze to Set: Transfer the churned ice cream into a loaf pan or airtight container, cover tightly, and freeze for a minimum of 2 hours to firm up further.
- Storage and Serving: Store the ice cream in the freezer in an airtight container for up to 2 months. About 15 minutes before serving, remove it to slightly thaw for easier scooping. Use a hot, wet ice cream scoop to serve smoothly.
Notes
- Use full-fat soy milk for best creaminess and texture.
- Vegan condensed milk can be purchased or homemade using sweetened plant-based milks.
- Only use the thick cream from the top of canned coconut milk for richness; avoid the watery part.
- If you do not have an ice cream machine, the mixture can be frozen in a container, stirring every 30 minutes until firm to reduce ice crystals.
- Ensure to freeze the ice cream bowl ahead of time to get optimal churning results.

