
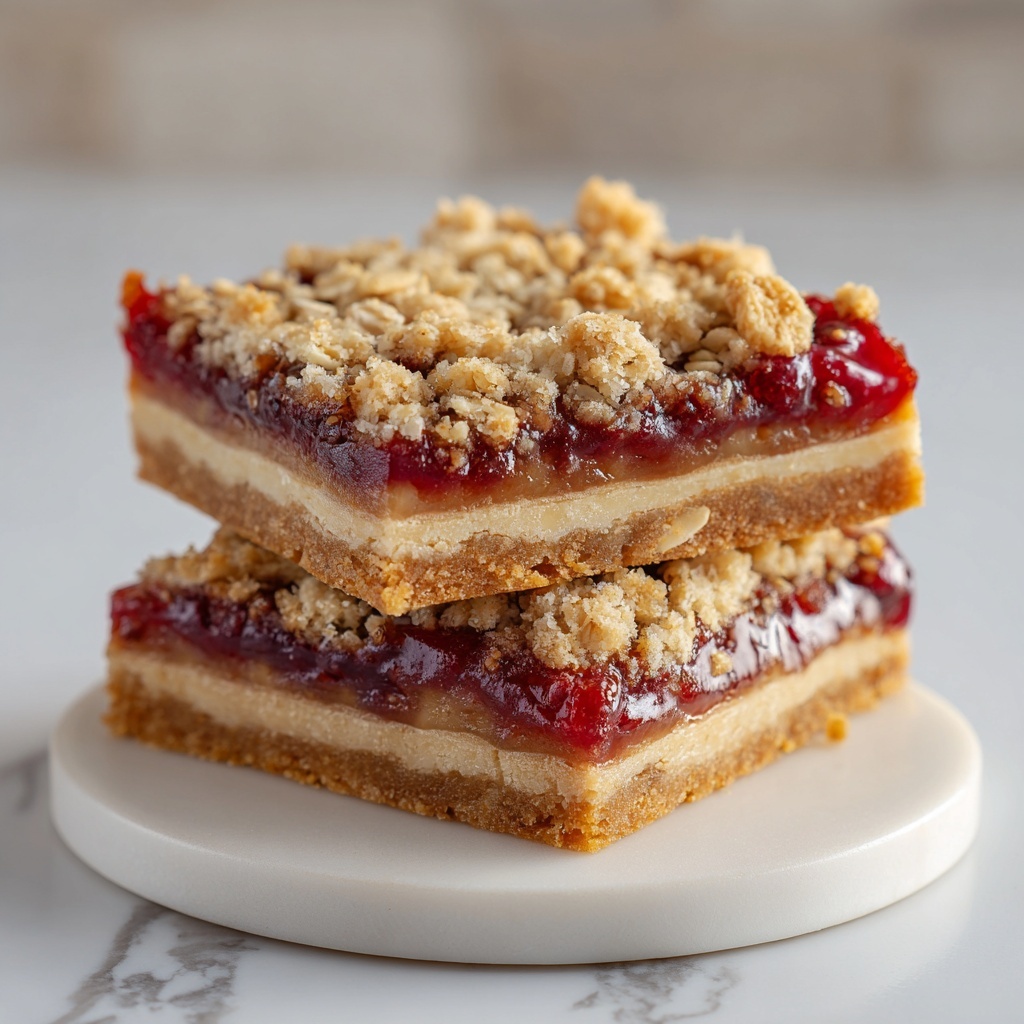
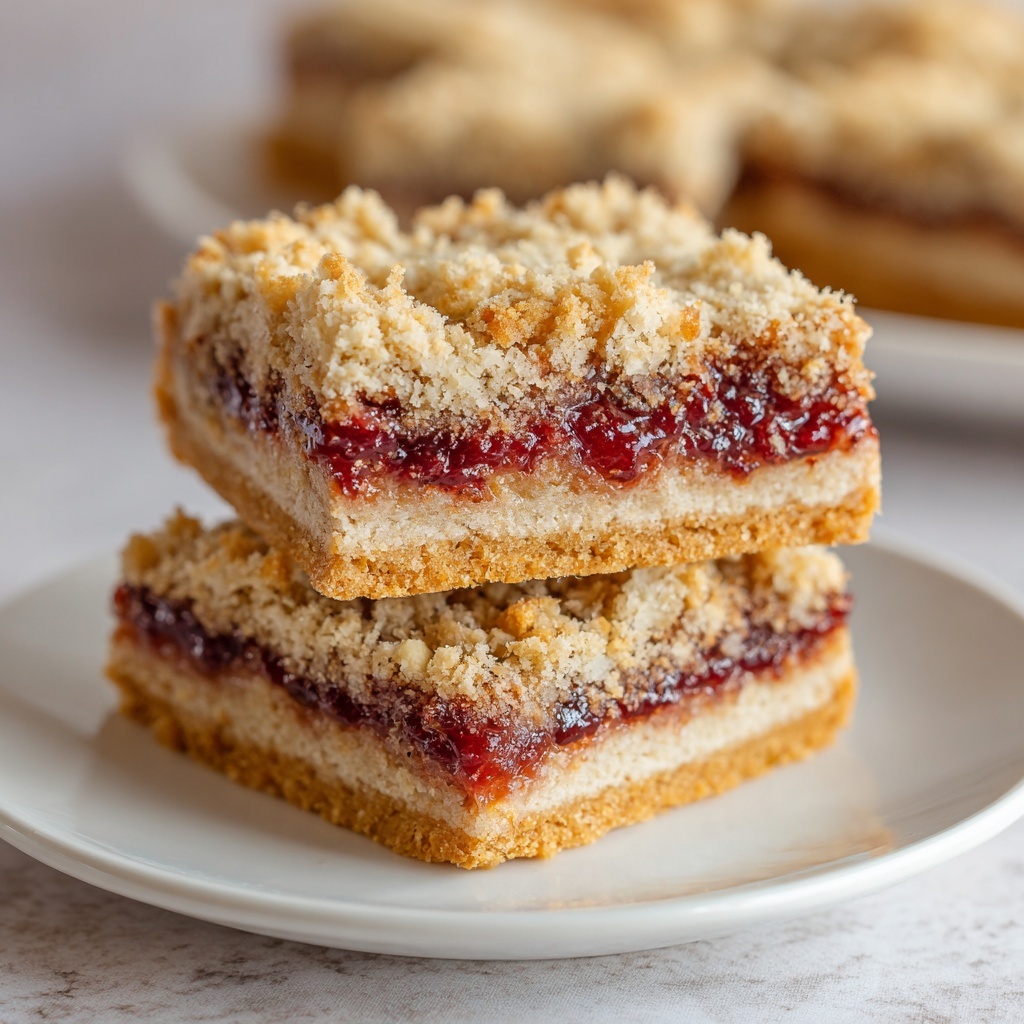
If you have a soft spot for fruity desserts that bring both a burst of flavor and a comforting, buttery texture, this Cherry Bars Recipe is a must-try. Imagine tender, golden layers of buttery goodness hugging a vibrant, juicy cherry filling, finished off with a sweet, delicate glaze that perfectly balances tart and sweetness. It’s the kind of dessert that feels like a warm hug and delivers on nostalgic charm while being incredibly easy to whip up for any occasion. With each bite, you’ll find that perfect harmony that makes these cherry bars a new favorite to add to your recipe collection.
Ingredients You’ll Need
Gathering the right ingredients is half the joy of baking these cherry bars. The beauty lies in their simplicity—each ingredient plays a crucial role from texture to flavor, ensuring your bars come out moist, flavorful, and beautifully balanced.
- Unsalted butter (1 cup, softened): This adds richness and creates a tender crumb in your bars.
- Granulated sugar (1¾ cups): Sweetens the bars and helps achieve a light, fluffy batter.
- Large eggs (4): Bind the ingredients and contribute to the structure of the bars.
- Vanilla extract (1 teaspoon): Enhances overall flavor with warm, comforting notes.
- Almond extract (½ teaspoon): Brings a subtle, nutty aroma that complements the cherries beautifully.
- All-purpose flour (3 cups): Provides the foundation and structure.
- Baking powder (1½ teaspoons): Gives a gentle lift, keeping the bars tender.
- Salt (½ teaspoon): Balances sweetness and intensifies flavors.
- Cherry pie filling (1 can, 21 oz): The star ingredient — juiciness and fruity goodness in every bite.
For the glaze:
- Powdered sugar (1 cup): Provides a smooth, sweet finish.
- Milk (2–3 tablespoons): Adjusts glaze consistency for easy drizzling.
- Vanilla or almond extract (½ teaspoon): Adds extra depth and aroma to your glaze.
How to Make Cherry Bars Recipe
Step 1: Prepare Your Pan and Batter
Start by preheating your oven to 350°F (175°C) and getting your 9×13-inch baking pan ready with either a light greasing or parchment paper lining for easy removal later. Then in a large bowl, cream together the softened butter and granulated sugar until the mixture is light and fluffy — this is where the magic begins, setting a luscious base for your bars.
Step 2: Add Eggs and Extracts
Beat in the eggs one at a time. This slow incorporation helps create an even, smooth batter. Follow this by mixing in both vanilla and almond extracts, which will make the flavor pop and bring a cozy, inviting scent to your kitchen.
Step 3: Combine Dry Ingredients and Mix
Whisk together the flour, baking powder, and salt in a separate bowl to ensure even distribution. Gradually add this dry mixture to your wet batter, stirring until fully combined but avoid overmixing so your bars stay tender and not dense.
Step 4: Layer Batter and Cherry Filling
Spread about two-thirds of your batter evenly into the prepared pan, creating a sturdy base. Next, spoon the entire cherry pie filling over this layer, distributing it evenly to guarantee each bite is bursting with fruit. Drop the remaining batter by spoonfuls on top; some cherry filling will peek through, giving the bars their signature look.
Step 5: Bake Until Golden
Pop your pan into the oven and bake for 35 to 40 minutes. Look for a golden top and test with a toothpick inserted in the center; it should come out clean. After baking, allow the bars to cool completely in the pan so they firm up perfectly before glazing.
Step 6: Make and Drizzle the Glaze
Whisk together powdered sugar, milk, and your choice of vanilla or almond extract until the glaze is smooth and drizzlable. Pour it generously over your cooled cherry bars and let it set before slicing into 24 luscious squares.
How to Serve Cherry Bars Recipe
Garnishes
To elevate your Cherry Bars Recipe even more, consider adding fresh cherries or a sprinkle of finely chopped toasted almonds on top of the glaze. A dollop of whipped cream or a dusting of powdered sugar can add that extra touch of elegance and richness for presentation that wows.
Side Dishes
These cherry bars pair beautifully with a scoop of vanilla ice cream or a dollop of crème fraîche. For a refreshing twist, a side of lightly sweetened whipped ricotta topped with a few extra cherries can make your dessert feel extra special and well-rounded.
Creative Ways to Present
For gatherings, try stacking your cherry bars on a pretty cake stand and garnish with edible flowers or mint leaves. You could also cut them into bite-sized pieces and serve them on a dessert platter with assorted fresh fruit for a colorful, inviting display that invites everyone to grab a treat.
Make Ahead and Storage
Storing Leftovers
If you find yourself lucky enough to have leftovers, store the cherry bars in an airtight container at room temperature for up to 3 days. This keeps them soft and flavorful without drying out, making them perfect for a quick snack or dessert the next day.
Freezing
These bars freeze wonderfully! Wrap individual squares tightly in plastic wrap and place them in a freezer-safe container or bag for up to 2 months. Just thaw at room temperature when ready to enjoy, and they’ll taste freshly baked.
Reheating
To enjoy your Cherry Bars Recipe warm, simply microwave a bar for about 15 seconds or pop it in a low-temperature oven for a few minutes. The warmth revitalizes the buttery layers and softens the cherry filling, making it taste just like fresh from the oven.
FAQs
Can I use fresh cherries instead of canned pie filling?
Fresh cherries are wonderful but they release a lot of juice, which might make the bars too wet. If you want to use fresh, consider cooking them down with some sugar and cornstarch to create a thick filling similar to the canned version.
What happens if I overmix the batter?
Overmixing can develop gluten in the flour and make your bars tough instead of tender. Stir gently just until the ingredients are combined for the best texture.
Can I substitute the almond extract?
Yes! You can leave it out or replace it with an equal amount of vanilla extract for a slightly different but still delicious flavor profile.
Is it possible to make this recipe gluten-free?
Absolutely. Simply substitute the all-purpose flour with a gluten-free baking blend that includes xanthan gum for similar texture and rise.
How thick should the bars be before baking?
Spreading about two-thirds of the batter to cover the bottom evenly creates a sturdy base, usually around 1/2 to 3/4 inch thick before adding the cherry topping. This ensures even baking and the perfect chewy texture.
Final Thoughts
This Cherry Bars Recipe is one of those timeless desserts that feels like a homemade treasure every time you make it. With its tender buttery layers, juicy fruit filling, and sweet glaze, it’s hard not to fall in love. Whether you’re baking for family, friends, or just yourself, these bars bring joy to any moment. So go ahead—give this recipe a try and add a delicious new favorite to your dessert repertoire!
Print
Cherry Bars Recipe
- Prep Time: 15 minutes
- Cook Time: 40 minutes
- Total Time: 55 minutes
- Yield: 24 bars
- Category: Dessert
- Method: Baking
- Cuisine: American
- Diet: Vegetarian
Description
Delightfully sweet and fruity cherry bars featuring a buttery crust and luscious cherry pie filling, topped with a smooth vanilla-almond glaze. Perfect as an easy-to-make American dessert for any occasion.
Ingredients
For the Bars
- 1 cup unsalted butter (softened)
- 1¾ cups granulated sugar
- 4 large eggs
- 1 teaspoon vanilla extract
- ½ teaspoon almond extract
- 3 cups all-purpose flour
- 1½ teaspoons baking powder
- ½ teaspoon salt
- 1 (21 oz) can cherry pie filling
For the Glaze
- 1 cup powdered sugar
- 2–3 tablespoons milk
- ½ teaspoon vanilla or almond extract
Instructions
- Preheat and prepare pan: Preheat the oven to 350°F (175°C) and lightly grease or line a 9×13-inch baking pan with parchment paper to ensure easy removal of the bars after baking.
- Cream butter and sugar: In a large bowl, cream together the softened butter and granulated sugar until the mixture becomes light and fluffy, which helps create a tender texture.
- Add eggs and extracts: Beat in the eggs one at a time to fully incorporate them. Then mix in the vanilla and almond extracts to infuse the batter with flavor.
- Mix dry ingredients: In a separate bowl, whisk together the all-purpose flour, baking powder, and salt to evenly distribute the leavening and seasoning.
- Combine wet and dry ingredients: Gradually add the dry ingredients to the wet mixture, stirring until the batter is fully combined and smooth.
- Layer the batter and filling: Spread about two-thirds of the batter evenly into the prepared pan, creating a solid base for the filling. Spoon the cherry pie filling evenly over the batter layer, followed by dolloping the remaining batter by spoonfuls over the cherry filling, allowing some filling to peek through.
- Bake the bars: Place the pan in the preheated oven and bake for 35–40 minutes until the top turns golden brown and a toothpick inserted into the center comes out clean, indicating doneness.
- Cool completely: Remove the pan from the oven and let the bars cool completely in the pan to allow them to set and make glazing easier.
- Prepare and drizzle glaze: Whisk together the powdered sugar, milk, and vanilla or almond extract until smooth. Drizzle this glaze evenly over the cooled bars and let it set before cutting into squares.
- Serve: Cut into 24 squares and serve as a delightful dessert or sweet snack.
Notes
- For variety, substitute cherry pie filling with blueberry, apple, or raspberry pie filling.
- Store the bars in an airtight container at room temperature for up to 3 days to maintain freshness.


