
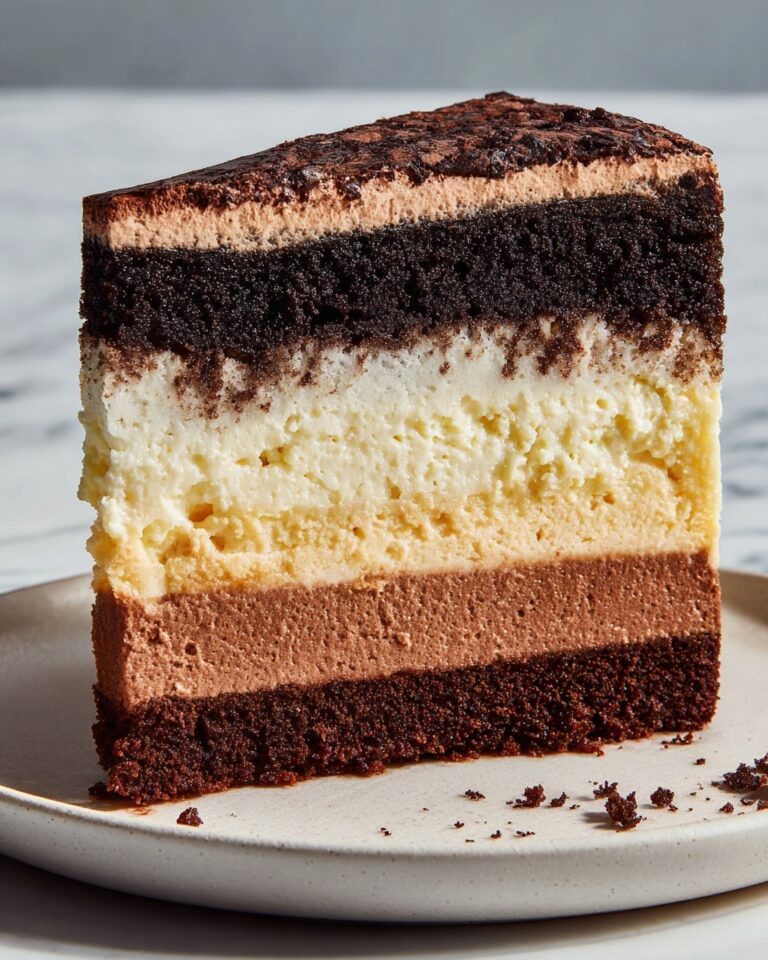
If you love the magical pairing of chocolate and peanut butter, then this Instant Pot Peanut Butter Cup Cheesecake Recipe is about to become your new favorite indulgence. Creamy, rich, and bursting with that classic peanut butter cup flavor, this cheesecake comes together effortlessly in your Instant Pot, delivering a perfectly smooth texture and a luscious chocolate-peanut butter topping that feels like an absolute dream. Whether you’re a cheesecake connoisseur or just looking for a show-stopping dessert, this recipe guarantees smiles with every bite.
Ingredients You’ll Need
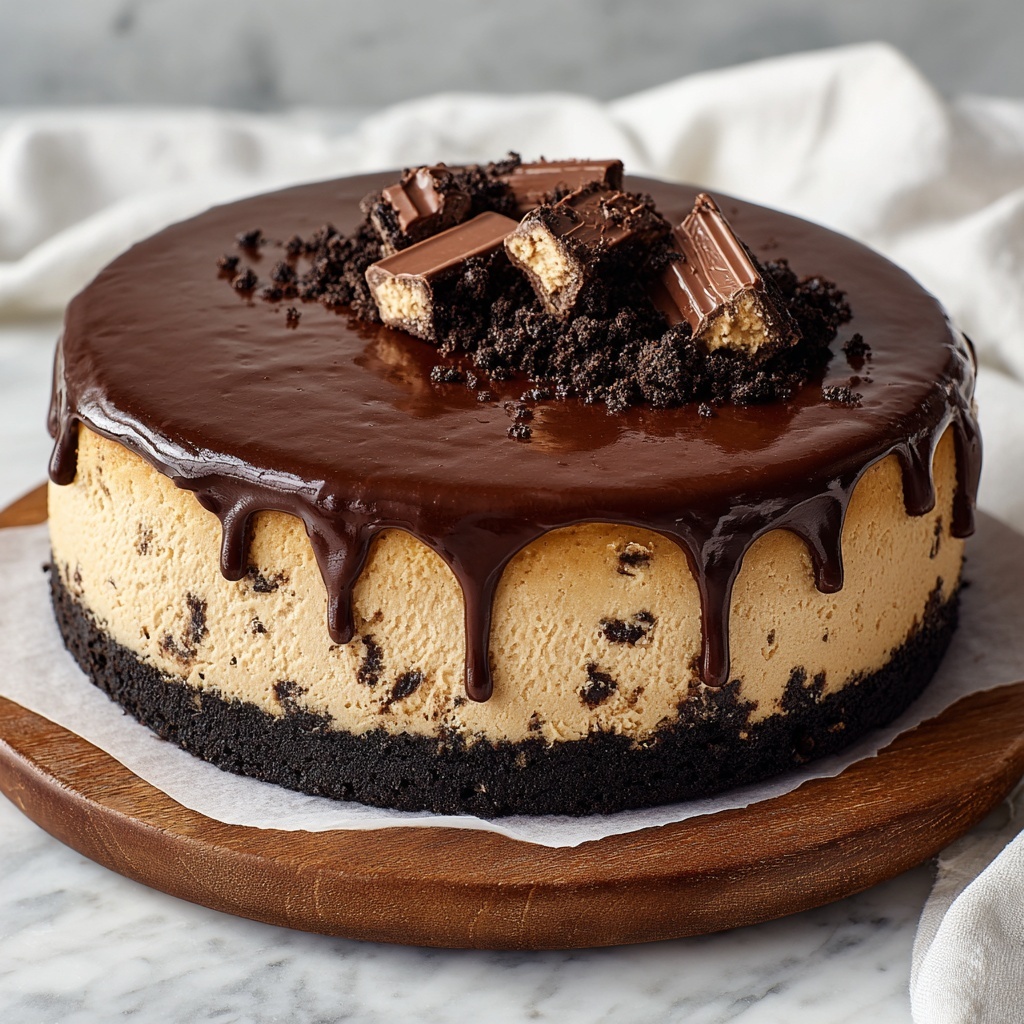
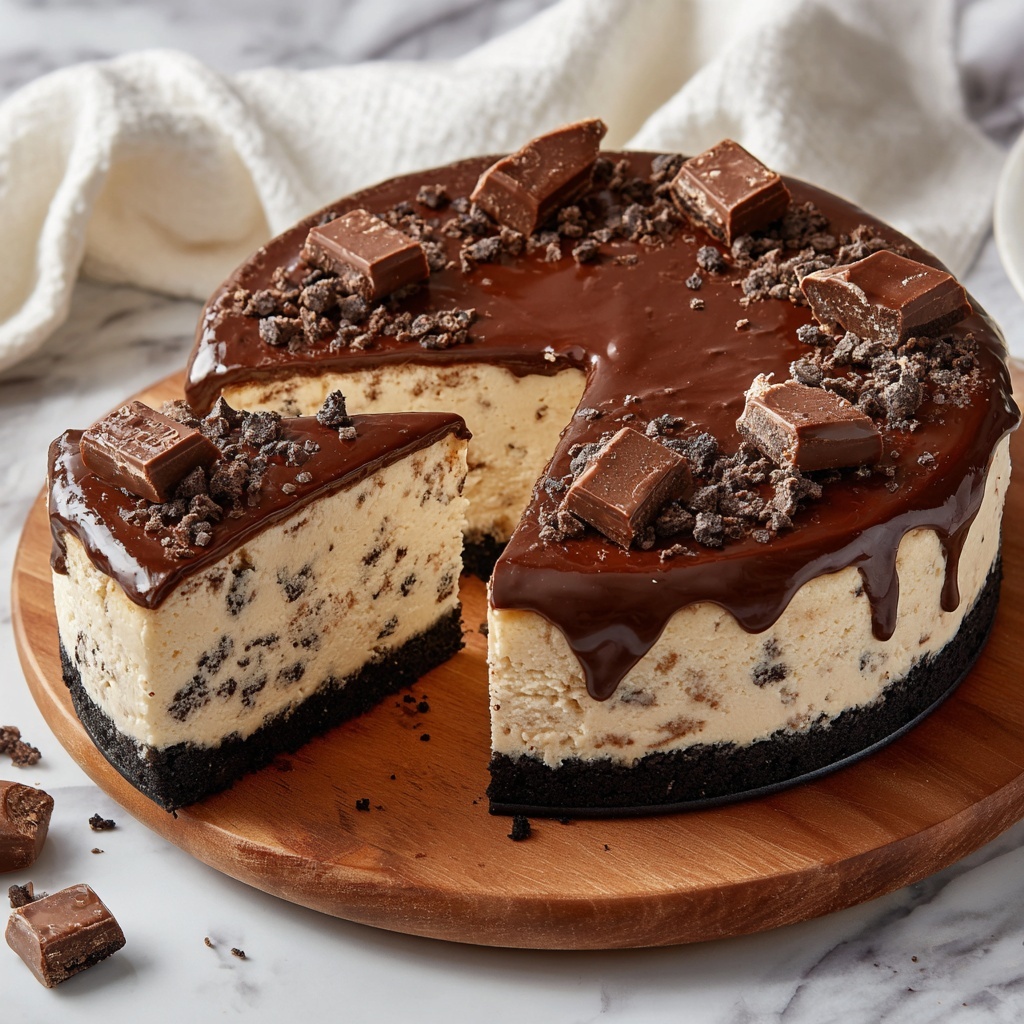
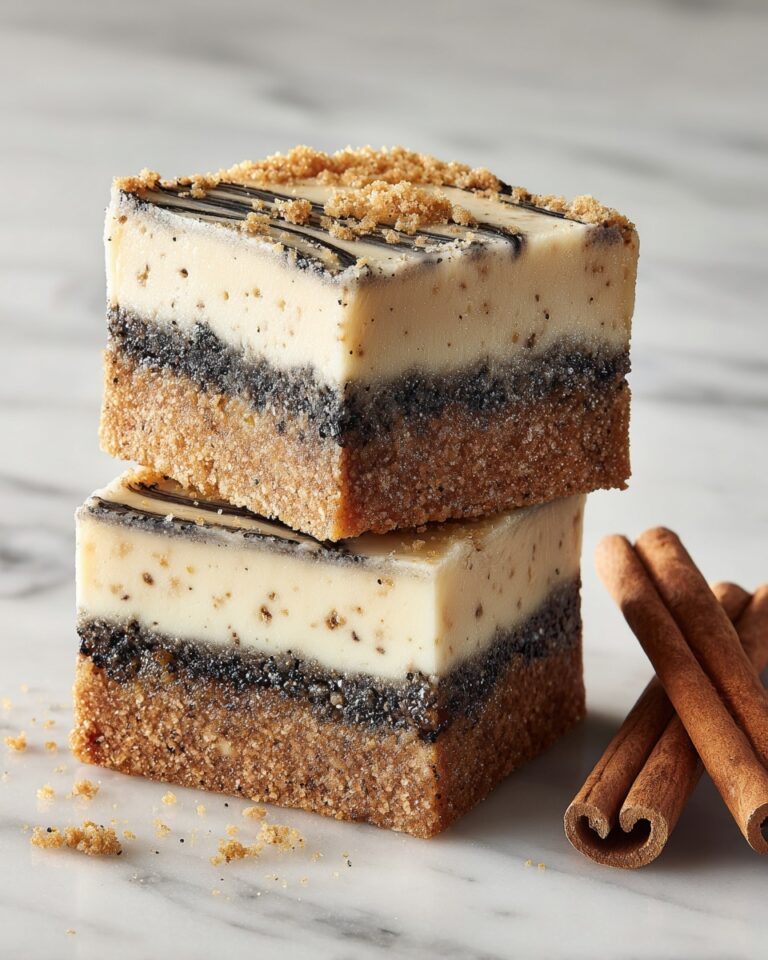
Simple, everyday ingredients come together to create a cheesecake that’s both decadent and satisfying. Each element plays a key role: from the crunchy chocolate cookie crust to the velvety peanut butter filling, and the silky chocolate ganache topping topped with mini peanut butter cups for that perfect finishing touch.
- 1 cup chocolate cookie crumbs: Choose Oreos or similar cookies, finely crushed to make a rich, crunchy crust base.
- 3 tablespoons unsalted butter: Melted to bind the crust ingredients beautifully.
- 16 oz cream cheese: Softened for a creamy, smooth cheesecake base.
- ½ cup creamy peanut butter: Adds that unmistakable peanut butter flavor and luscious texture.
- ½ cup granulated sugar: Sweetens the filling just right without overpowering.
- ¼ cup sour cream: Brings tanginess and a silky finish to the cheesecake.
- 2 large eggs: Provide structure and richness to the filling.
- 1 teaspoon vanilla extract: Enhances all the flavors with subtle warmth.
- Pinch of salt: Balances sweetness and enhances the peanut butter notes.
- ½ cup heavy cream: Used to create the luscious ganache topping.
- ½ cup semi-sweet chocolate chips: Melts into a silky chocolate sauce for that perfect finish.
- ½ cup chopped mini peanut butter cups: Adds texture and extra peanut buttery goodness as a garnish.
How to Make Instant Pot Peanut Butter Cup Cheesecake Recipe
Step 1: Prepare the Crust
First, grease your 7-inch springform pan and line the bottom with parchment paper to prevent sticking. Then mix the chocolate cookie crumbs with the melted butter until combined evenly. Press this mixture firmly into the bottom of the pan to create a sturdy crust. Pop it into the freezer while you get the filling ready—the cold crust helps set a strong base for your cheesecake.
Step 2: Mix the Filling
In a large bowl, beat together the softened cream cheese, creamy peanut butter, and sugar until everything is smooth and velvety. Add in the sour cream, vanilla extract, and just a pinch of salt, blending gently. Crack the eggs in one at a time, mixing on low speed—this is important to avoid any cracks in the cheesecake. Pour the filling over the chilled crust and smooth the top with a spatula for a perfectly even finish.
Step 3: Pressure Cook Your Cheesecake
Cover your springform pan tightly with foil to keep moisture out. Pour one cup of water into your Instant Pot and place the metal trivet inside. Carefully set the cheesecake on the trivet. Seal the lid and cook on high pressure for 35 minutes. Once the timer goes off, let the pressure release naturally for 10 minutes, then quick release the rest. Taking it slow here prevents any sudden changes that might crack your cheesecake.
Step 4: Cool and Chill
Remove the cheesecake from the Instant Pot and let it cool at room temperature for about 30 minutes. Then refrigerate it for at least four hours or ideally overnight—this resting time is where all those flavors deepen and the texture becomes silky smooth, ready for the topping and serving.
Step 5: Prepare the Chocolate Ganache Topping
Warm the heavy cream just until it simmers, then pour it over the semi-sweet chocolate chips in a bowl. Let it sit for a minute or two until the chocolate melts, then stir gently until you have a glossy, smooth ganache. Spread this over your chilled cheesecake, then sprinkle chopped mini peanut butter cups on top for that irresistible crunch and beauty. Chill again briefly until serving.
How to Serve Instant Pot Peanut Butter Cup Cheesecake Recipe
Garnishes
Sprinkle extra mini peanut butter cups or even some chopped roasted peanuts for added texture. A light drizzle of melted chocolate or a handful of chocolate shavings can elevate the look and flavor even further, creating an irresistible dessert center stage.
Side Dishes
Serve alongside fresh berries like raspberries or strawberries for a fruity contrast to the rich peanut butter and chocolate flavors. A dollop of whipped cream or a scoop of vanilla ice cream also pairs perfectly with this luxurious cheesecake.
Creative Ways to Present
Consider creating mini cheesecake jars using mason jars for individual servings—layer crust, filling, and ganache right inside for a fun and portable dessert. Or arrange slices on a platter garnished with edible flowers or gold leaf accents to wow your guests at special occasions.
Make Ahead and Storage
Storing Leftovers
Keep your cheesecake tightly covered in the refrigerator to maintain the creamy texture and prevent it from absorbing other odors. Well-wrapped, it stays fresh and delicious for up to 4 days.
Freezing
This cheesecake freezes beautifully. Wrap individual slices in plastic wrap and then foil before freezing. When ready to enjoy, thaw in the fridge overnight for a perfect treat whenever you want.
Reheating
Since cheesecake is best served chilled, reheating isn’t necessary. Just remove from the fridge about 10–15 minutes before serving to take the chill off—this lets the flavors shine without compromising the texture.
FAQs
Can I use crunchy peanut butter instead of creamy?
You can, but creamy peanut butter will give you the smooth, velvety texture this cheesecake is famous for. Crunchy peanut butter might compromise that silky mouthfeel but will add extra nutty bites.
Why do I need to cover the pan with foil when cooking in the Instant Pot?
Covering the pan with foil prevents condensation from the Instant Pot’s steam from dripping onto the cheesecake surface, which could cause an uneven texture or water spots.
Can I make this cheesecake without an Instant Pot?
Absolutely! You can bake this cheesecake in a conventional oven at 325°F for about 50–60 minutes using a water bath to achieve similar creamy results.
How do I avoid cracks on the cheesecake surface?
Mix the filling just until combined and avoid overbeating, especially after adding eggs. Also, allowing the cheesecake to cool gradually and refrigerating it properly helps prevent cracking.
Can I substitute the chocolate cookie crust with graham crackers?
Yes, graham cracker crust works as well. It will give a slightly different flavor profile but still provide a delicious base for this peanut butter cup cheesecake.
Final Thoughts
This Instant Pot Peanut Butter Cup Cheesecake Recipe is a celebration of flavors and textures that’s surprisingly easy to make. Whether you’re treating yourself or impressing loved ones, it’s the kind of dessert that brings smiles and happy sighs. Give it a try—you won’t regret having this luscious, chocolatey peanut buttery delight ready in your Instant Pot!
Print
Instant Pot Peanut Butter Cup Cheesecake Recipe
- Prep Time: 20 minutes
- Cook Time: 35 minutes
- Total Time: 6 hours
- Yield: 8 servings
- Category: Dessert
- Method: Instant Pot
- Cuisine: American
- Diet: Vegetarian
Description
This Instant Pot Peanut Butter Cup Cheesecake is a luscious and creamy dessert combining the rich flavors of peanut butter and chocolate in a smooth cheesecake texture. Perfectly cooked in an Instant Pot, it boasts a chocolate cookie crust, a peanut butter-infused cream cheese filling, and a decadent ganache topping adorned with chopped mini peanut butter cups. Ideal for peanut butter and chocolate lovers seeking a quick yet indulgent treat.
Ingredients
For the crust:
- 1 cup chocolate cookie crumbs (such as Oreos, finely crushed)
- 3 tablespoons unsalted butter (melted)
For the filling:
- 16 oz cream cheese (softened)
- ½ cup creamy peanut butter
- ½ cup granulated sugar
- ¼ cup sour cream
- 2 large eggs
- 1 teaspoon vanilla extract
- pinch of salt
For the topping:
- ½ cup heavy cream
- ½ cup semi-sweet chocolate chips
- ½ cup chopped mini peanut butter cups
Instructions
- Prepare the crust: Grease a 7-inch springform pan and line the bottom with parchment paper. In a bowl, mix the chocolate cookie crumbs and melted butter until well combined. Press the mixture firmly into the bottom of the pan to form an even crust. Place the pan in the freezer while preparing the filling to set the crust.
- Make the filling: In a large mixing bowl, beat together the softened cream cheese, creamy peanut butter, and granulated sugar until the mixture is smooth and creamy. Add sour cream, vanilla extract, and a pinch of salt, stirring to combine. Add the eggs one at a time, mixing on low speed just until incorporated, being careful not to overmix.
- Assemble and cook in Instant Pot: Pour the cheesecake filling over the chilled crust in the springform pan, smoothing the top evenly. Cover the pan tightly with foil to prevent moisture from dripping onto the cheesecake. Pour 1 cup of water into the bottom of the Instant Pot and place the trivet inside. Lower the foil-covered pan onto the trivet. Seal the Instant Pot lid and set it to cook at high pressure for 35 minutes.
- Release pressure and cool: After cooking, allow a natural pressure release for 10 minutes, then carefully quick release any remaining pressure. Remove the springform pan from the Instant Pot, discard the foil, and let the cheesecake cool at room temperature for 30 minutes before refrigerating.
- Chill the cheesecake: Refrigerate the cheesecake for at least 4 hours, preferably overnight, to allow it to set and develop full flavor and texture.
- Prepare the ganache topping: In a small saucepan or microwave, heat the heavy cream until it just begins to simmer. Pour the hot cream over the semi-sweet chocolate chips in a heatproof bowl. Let stand for 1–2 minutes, then stir gently until the ganache is smooth and glossy.
- Decorate and serve: Spread the ganache evenly over the chilled cheesecake. Sprinkle the chopped mini peanut butter cups over the ganache as a decorative topping. Chill the cheesecake until ready to serve, ensuring the ganache firms up slightly for easy slicing.
Notes
- Do not overmix the cheesecake filling to avoid cracks on the surface.
- For easier slicing, run a warm knife under water before cutting each slice.
- This cheesecake tastes best when made a day in advance to allow flavors to meld and texture to set.
