
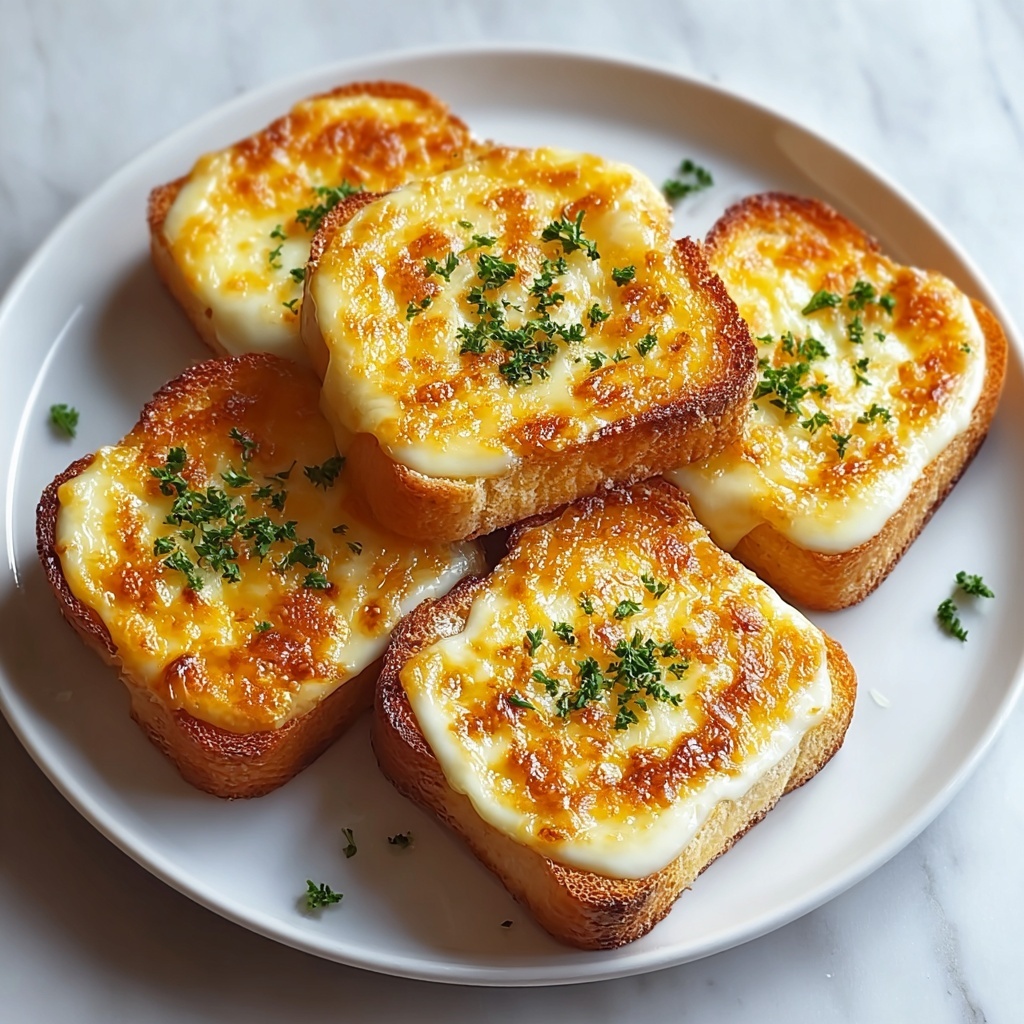
If you have a craving for something irresistibly cheesy and delightfully sweet, this Mini Grilled Cheese Hawaiian Rolls Recipe is going to be your new best friend in the kitchen. Soft, fluffy Hawaiian rolls envelop a gooey blend of sharp cheddar and stretchy mozzarella cheeses, all kissed by golden, buttery edges that add the perfect contrast in texture. This recipe transforms simple ingredients into a crowd-pleasing snack or appetizer that’s perfect for sharing, sure to light up any occasion with its rich flavors and comforting warmth.
Ingredients You’ll Need
Getting the ingredients right is the key to nailing this Mini Grilled Cheese Hawaiian Rolls Recipe. Each component plays a vital role, from the tender sweetness of the Hawaiian rolls to the flavorful cheeses that bring the melty magic. The butter and seasonings create that irresistible crust and subtle depth that keep you coming back for more.
- 12 pieces Hawaiian rolls: Soft and sweet, these rolls provide the perfect base for the sandwich.
- 1 cup shredded cheddar cheese: Adds a sharp, tangy punch that balances the sweetness of the rolls.
- 1 cup shredded mozzarella cheese: Brings gooey, stretchy texture that melts beautifully.
- 1/2 cup butter, softened: Ensures a golden, crispy exterior that’s rich and buttery.
- 1 teaspoon garlic powder (optional): Offers a subtle savory boost to elevate the flavors.
- 1 teaspoon dried herbs (oregano or basil) (optional): Adds an earthy depth that makes the grilled cheese even more enticing.
How to Make Mini Grilled Cheese Hawaiian Rolls Recipe
Step 1: Preheat the Oven
Start by setting your oven to 350°F (175°C). This moderate temperature is perfect for getting the cheese melted just right without burning the tender rolls. The magic really begins here, so let the oven warm up fully while you prepare the rolls.
Step 2: Slice Your Rolls Horizontally
Take the whole pack of Hawaiian rolls and slice them in half horizontally, but don’t separate them into individual rolls yet. This keeps everything together as one big sandwich, making the baking process easier and allowing all those melty cheeses to meld perfectly inside.
Step 3: Butter and Season the Rolls
Spread the softened butter generously over the cut sides of both the top and bottom halves. The butter is essential for that golden, crispy crust. If you love a little more flavor, sprinkle garlic powder evenly over the buttered surface for an irresistible aroma and taste.
Step 4: Add the Cheese
Evenly distribute the shredded cheddar and mozzarella cheeses over the bottom half of the rolls. This is where the creamy, cheesy goodness begins to build up — the cheddar adds flavor intensity while the mozzarella guarantees stretchy, melty perfection with every bite.
Step 5: Assemble and Wrap
Carefully place the top half of the rolls back over the cheese-covered bottom half, pressing down gently so everything sticks together. Then wrap the entire sandwich tightly in aluminum foil, locking in all the heat and moisture to melt the cheeses beautifully.
Step 6: Bake and Unwrap
Bake the wrapped rolls in your preheated oven for about 15-20 minutes until the cheese is fully melted. Then, unwrap the foil and return the sandwich to the oven for an extra 5 minutes — this step crisps up the exterior and makes those buttery edges perfectly golden.
Step 7: Serve Warm
Once baked to perfection, remove the sandwich from the oven, let it cool for a minute or two, then slice into individual mini grilled cheese sliders. Serve these warm to enjoy the best melty, cheesy experience possible.
How to Serve Mini Grilled Cheese Hawaiian Rolls Recipe

Garnishes
A sprinkle of fresh parsley or some finely chopped chives can add a vibrant touch and a burst of color that contrasts beautifully with the golden buns. A light drizzle of honey or a side of spicy ketchup also offers a sweet or tangy balance that pairs perfectly.
Side Dishes
For a full meal or party platter, these mini grilled cheese sliders shine next to a classic tomato soup, crisp green salad, or even some crunchy pickles. The creamy cheesiness of the rolls pairs wonderfully with lighter, fresh sides to keep things balanced and exciting.
Creative Ways to Present
Try serving your Mini Grilled Cheese Hawaiian Rolls Recipe on a rustic wooden board, stacked high like a tower for a fun visual impact. You can also cut the slider sandwich into smaller bite-sized pieces for parties, or wrap each individually with a colorful napkin and toothpick for easy grab-and-go snacking.
Make Ahead and Storage
Storing Leftovers
If you have leftovers, wrap them tightly in foil or plastic wrap and store in the refrigerator. They’ll remain tasty for up to 3 days, but be aware the rolls will lose some of their original crispiness when cold.
Freezing
To freeze, wrap the entire sandwich or individual rolls well in plastic wrap and then foil to prevent freezer burn. They can last up to 2 months in the freezer. Thaw overnight in the fridge before reheating for the best texture and flavor retention.
Reheating
Reheat leftover mini grilled cheese rolls wrapped in foil at 350°F (175°C) for about 10-12 minutes until warmed through and melty again. Avoid microwaving if possible to keep the bread crispy and the cheese perfectly melted.
FAQs
Can I use other types of cheese in this recipe?
Absolutely! While cheddar and mozzarella are classic choices for flavor and melt, feel free to experiment with provolone, pepper jack, or even gouda to add your own twist to the Mini Grilled Cheese Hawaiian Rolls Recipe.
Is it necessary to wrap the sandwich in foil while baking?
Yes, wrapping in foil helps trap heat and moisture to melt the cheese evenly without drying out the rolls. It also prevents the tops from browning too quickly before the cheese is fully melted.
Can I make this recipe without butter?
Butter is key for creating the golden, crispy crust that contrasts so nicely with the soft rolls. If you want to reduce fat, consider using a butter substitute or brushing with olive oil, but the flavor and crispiness might be slightly different.
How do I prevent the rolls from becoming soggy?
Make sure to properly butter the cut sides to create a seal and always finish baking unwrapped to crispen the bread. Avoid adding any watery ingredients inside the sandwich to keep the rolls from getting soggy.
Can this be made ahead for a party?
Definitely! You can assemble and butter the rolls, then cover and refrigerate them a few hours before baking. When ready, bake as directed for a crowd-pleasing treat that feels fresh and warm.
Final Thoughts
This Mini Grilled Cheese Hawaiian Rolls Recipe is a joy to make and even more delightful to eat. Its simple ingredients come together in such a comforting, tasty way that it quickly becomes a household favorite. Whether you’re feeding a crowd or indulging in a cozy snack, these cheesy, buttery rolls will never disappoint — so grab your ingredients and give this recipe a try, your taste buds will thank you!
Print
Mini Grilled Cheese Hawaiian Rolls Recipe
- Prep Time: 10 minutes
- Cook Time: 21 minutes
- Total Time: 31 minutes
- Yield: 12 servings
- Category: Appetizer
- Method: Baking
- Cuisine: American
Description
These Irresistible Mini Grilled Cheese Hawaiian Rolls combine the soft, sweet texture of Hawaiian rolls with the gooey, melty goodness of cheddar and mozzarella cheeses. Perfect as a crowd-pleasing appetizer or snack, these cheesy sandwiches are baked to golden perfection with a buttery, garlicky crust and flavorful herb accents.
Ingredients
Rolls
- 12 pieces Hawaiian rolls (soft, sweet rolls)
Cheese
- 1 cup shredded cheddar cheese (adds sharp flavor)
- 1 cup shredded mozzarella cheese (gooey, stretchy texture)
Butter & Seasoning
- 1/2 cup butter, softened (for golden exterior)
- 1 teaspoon garlic powder (optional flavor boost)
- 1 teaspoon dried herbs (oregano or basil) (optional for added depth)
Instructions
- Preheat Oven: Preheat your oven to 350°F (175°C) to ensure it reaches the perfect temperature for baking your rolls evenly.
- Slice Rolls: Take the entire pack of Hawaiian rolls and slice them in half horizontally without separating the rolls from each other, allowing them to stay connected for easier handling later.
- Butter the Rolls: Spread softened butter generously on the cut sides of both the top and bottom halves of the rolls. This will help create a golden, crispy exterior during baking.
- Add Seasoning: Sprinkle garlic powder evenly over the buttered surfaces if you want to add a savory garlic flavor. Optionally, you can also add dried herbs like oregano or basil for extra aroma.
- Layer Cheese: Evenly distribute the shredded cheddar and mozzarella cheeses across the bottom half of the rolls, making sure to spread the cheese all the way to the edges for an even melt.
- Assemble the Sandwich: Carefully place the top half of the rolls back onto the cheesy bottom half, pressing gently to ensure the rolls adhere without squashing them.
- Wrap in Foil: Wrap the entire sandwich tightly in aluminum foil to lock in moisture and help the cheese melt perfectly.
- Bake Covered: Place the foil-wrapped rolls on a baking sheet and bake in the preheated oven for 15-20 minutes, or until the cheese is completely melted and gooey.
- Unwrap and Crisp: Carefully unwrap the foil and return the rolls to the oven for an additional 5 minutes to allow the tops to get golden and slightly crisp.
- Cool and Serve: Remove from the oven once golden and bubbly. Let the rolls cool for a minute, then slice between each roll to serve warm and enjoy your cheesy treats.
Notes
- For extra flavor, add a pinch of red pepper flakes to the cheese mixture before baking.
- Use freshly shredded cheese rather than pre-shredded for better melting quality.
- If you prefer a stronger herb flavor, sprinkle additional herbs on top after unwrapping the foil.
- Ensure the butter is softened to spread easily and evenly over the rolls.
- These rolls are best served warm, fresh out of the oven, for ideal gooey texture.


