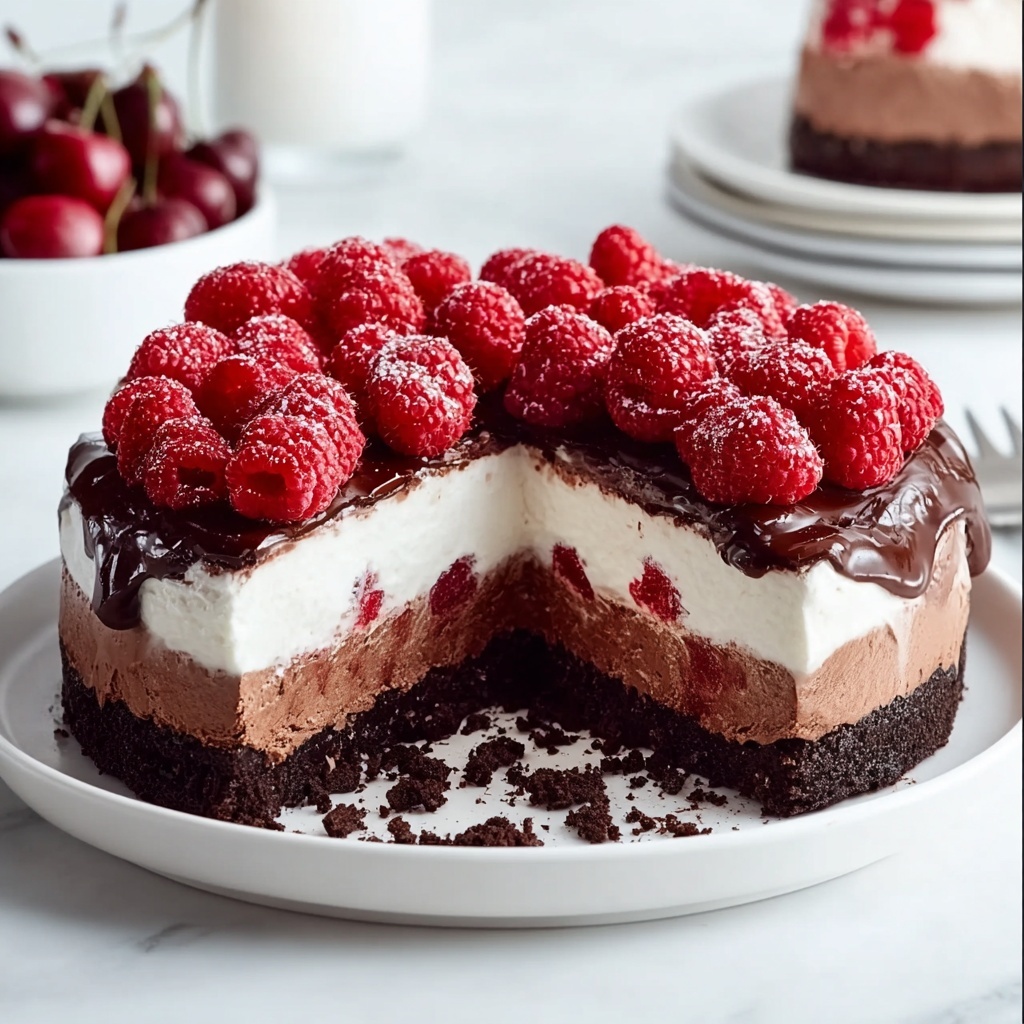
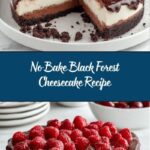
If you’re craving a dessert that’s as stunning to look at as it is to eat, then this No Bake Black Forest Cheesecake Recipe is about to become your new best friend. Bursting with luscious layers of creamy chocolate and tangy cherry, all nestled in a rich Oreo crust, this cheesecake offers all the decadent flavors of the classic Black Forest cake but with the ease and convenience of no baking required. It’s perfect for those warm days when turning on the oven feels like too much effort, yet you still want to impress with a homemade treat. You’re going to love how effortlessly this recipe comes together and how every bite is a little moment of indulgence.
Ingredients You’ll Need
Keeping things simple is key with the No Bake Black Forest Cheesecake Recipe. Each ingredient is chosen not just for flavor, but for texture and that beautiful harmony that turns this cheesecake into a showstopper.
- 6 ounces pre-made Oreo pie crust: Saves time and adds a deliciously chocolatey foundation for the cheesecake.
- 12 ounces cream cheese (room temperature): Ensures a smooth, creamy texture without lumps.
- ½ cup granulated sugar: Perfectly balances the tanginess of the cream cheese.
- ¾ cup full-fat sour cream: Adds a subtle tang and extra creaminess to the filling.
- 1½ teaspoons vanilla extract: Brings a warm, fragrant aroma that elevates every bite.
- 3 ounces semi-sweet baking chocolate (chopped): For that rich chocolate layer that’s simply irresistible.
- 8 ounces tub whipped topping (thawed): Lightens the cheesecake, giving it a fluffy, airy mouthfeel.
- 1 cup canned cherry pie filling: Provides the classic Black Forest flavor with sweet, juicy cherries.
- 4 ounces semi-sweet chocolate baking bar: Used to create beautiful chocolate curls for garnish.
- 1 tablespoon vegetable shortening: Helps melt the chocolate smoothly for making curls.
How to Make No Bake Black Forest Cheesecake Recipe
Step 1: Prepare the Crust and Filling
Start by removing the plastic cover from your pre-made Oreo crust and setting it aside—it will keep your crust fresh while you mix the filling. Then, in a large bowl, beat the cream cheese and sugar on medium speed until fluffy and light. This step is crucial as it creates the creamy base that makes this cheesecake feel so indulgent.
Step 2: Incorporate Sour Cream and Vanilla
Add the sour cream and vanilla extract to the cream cheese mixture and beat just until everything is smooth and well combined. The sour cream adds just the right amount of tang to balance out the sweetness and keeps the filling silky.
Step 3: Melt the Chocolate
Divide the cream cheese mixture into two bowls, then melt the chopped semi-sweet chocolate in the microwave carefully—heat at 60% power for one minute, stir, then heat again for another 30 seconds to one minute until perfectly smooth. This melted chocolate is what transforms half of the filling into a decadent chocolate layer.
Step 4: Create Chocolate and Plain Layers
Gently fold the melted chocolate into one bowl of the cream cheese mixture until creamy and fully blended. Then split the whipped topping between both bowls, folding it in carefully to keep that fluffy texture intact—this is where the cheesecake gets its dreamy lightness.
Step 5: Assemble and Chill
Spread the chocolate layer evenly over the Oreo crust, then follow with the plain cream cheese layer on top, smoothing it out beautifully. Cover the pie with the plastic piece from the crust packaging and refrigerate for at least 8 hours, or preferably overnight to let all those flavors meld and set properly.
Step 6: Add Cherry Topping and Chocolate Curls
Once chilled, spoon a generous layer of cherry pie filling over the cheesecake to capture that signature Black Forest sweetness. Next, melt the remaining semi-sweet chocolate with vegetable shortening in the microwave and pour onto a rimmed tray in a thin layer. Freeze for a few minutes until solid, then use a spatula to create elegant chocolate curls for garnish. Keep these curls frozen until you’re ready to decorate.
How to Serve No Bake Black Forest Cheesecake Recipe
Garnishes
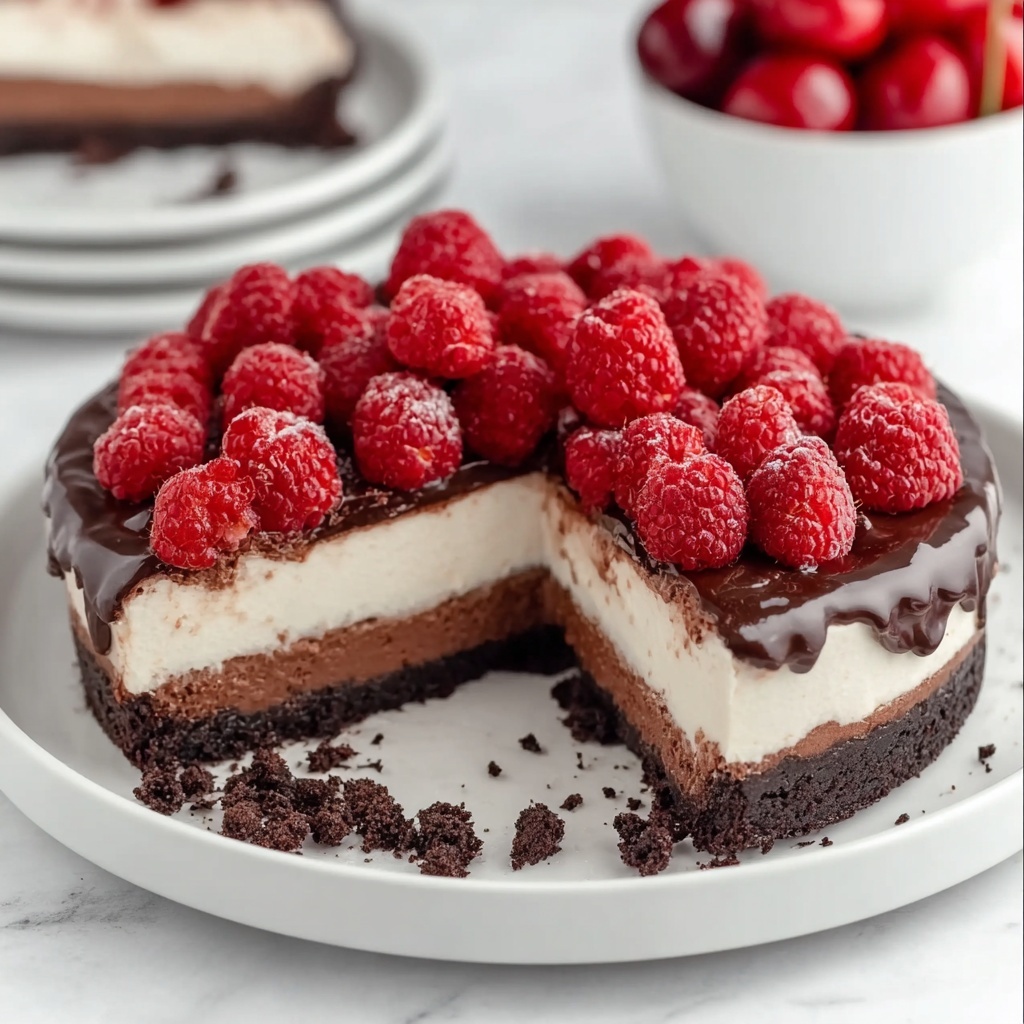
Adding chocolate curls and fresh cherries on top instantly upgrades the cheesecake, making it as pretty as it is delicious. You can also add a dusting of cocoa powder or a light sprinkle of powdered sugar if you want a bit more flair—just be sure your garnishes complement the rich layers underneath.
Side Dishes
This cheesecake shines best when served alongside simple accompaniments like a scoop of vanilla ice cream or a dollop of freshly whipped cream. For a more refreshing balance, serve with a small bowl of mixed berries or a crisp, lightly sweetened fruit salad.
Creative Ways to Present
For parties or gatherings, cut the cheesecake into neat squares and place each piece in mini dessert cups layered with extra cherries and a sprinkle of chocolate curls. Another idea is to serve it with individual spoonfuls of cherry sauce on the side, so everyone can customize their slice to taste.
Make Ahead and Storage
Storing Leftovers
Store any leftover cheesecake tightly covered in the refrigerator. Because it’s made with dairy and whipped topping, it will stay fresh for up to 4 days. Keeping it chilled ensures it maintains that perfect creamy texture with no soggy crusts.
Freezing
This No Bake Black Forest Cheesecake Recipe freezes beautifully. Just wrap the entire cheesecake or individual slices in plastic wrap and then a layer of foil to prevent freezer burn. When you’re ready to enjoy, thaw it overnight in the fridge to preserve the flavors and texture.
Reheating
Since this is a no bake cheesecake, reheating is generally unnecessary and not recommended. It is best served cold or at room temperature to maintain its signature creamy consistency and vibrant flavors.
FAQs
Can I use a different crust instead of Oreo?
Absolutely! While the Oreo crust adds that perfect chocolate base, you can substitute with graham cracker crust or even a nut-based crust if you want to mix things up. Just make sure it complements the rich flavors of the filling.
Is it possible to make this cheesecake vegan?
Making this exact recipe vegan would require several substitutions like dairy-free cream cheese and sour cream alternatives, as well as vegan chocolate. It’s doable but might change the flavor and texture slightly, so experiment if you’re feeling adventurous!
How long can the cheesecake sit out before serving?
Since it contains dairy, it’s best not to leave it out at room temperature for more than two hours. Keeping it chilled until just before serving keeps the cheesecake fresh and safe to eat.
Can I prepare this recipe without using the microwave?
Yes, you can melt the chocolate using a double boiler on the stove if you prefer that method. Just be sure to stir frequently and remove from heat before the chocolate gets too hot to avoid seizing.
Why is it important to use full-fat sour cream?
Full-fat sour cream adds richness and creaminess to the filling that low-fat versions can’t provide. It helps balance the tanginess and maintain a smooth texture, resulting in a more luxurious cheesecake experience.
Final Thoughts
There’s something truly magical about a dessert that requires no baking but delivers on elegance and flavor like the No Bake Black Forest Cheesecake Recipe. Whether it’s for a special occasion or a cozy night in, this cheesecake invites you to indulge without stress. Give it a try—you might just find yourself reaching for this recipe again and again when you want to impress with minimal effort and maximum deliciousness.
Print
No Bake Black Forest Cheesecake Recipe
- Prep Time: 15 minutes
- Cook Time: 0 minutes
- Total Time: 8 hours 15 minutes
- Yield: 8 servings
- Category: Dessert
- Method: No-Cook
- Cuisine: American
Description
This irresistible no-bake Black Forest cheesecake combines the rich chocolate flavor of a pre-made Oreo crust with a creamy, fluffy chocolate and vanilla cream cheese filling, topped with classic cherry pie filling and elegant chocolate curls. This easy-to-make dessert requires minimal preparation and refrigeration, making it perfect for effortless indulgence.
Ingredients
Crust
- 6 ounces pre-made Oreo pie crust
Cream Cheese Mixture
- 12 ounces cream cheese, room temperature
- ½ cup granulated sugar
- ¾ cup full-fat sour cream
- 1½ teaspoons vanilla extract
Chocolate Layer
- 3 ounces semi-sweet baking bar, chopped
Whipped Topping
- 8 ounces tub whipped topping, thawed
Toppings
- 1 cup canned cherry pie filling
- 4 ounces semi-sweet chocolate baking bar
- 1 tablespoon vegetable shortening
Instructions
- Preparation: Remove the plastic cover from the pre-made Oreo pie crust and set it aside to prepare for filling.
- Mix Cream Cheese and Sugar: In a large mixing bowl, beat the cream cheese and granulated sugar with a handheld mixer on medium speed for 1 minute until the mixture is light and fluffy.
- Add Sour Cream and Vanilla: Add sour cream and vanilla extract, then continue beating for 30 seconds until fully incorporated and smooth.
- Divide Mixture: Transfer half of the cream cheese mixture into a separate bowl.
- Melt Chocolate: In a small microwave-safe bowl, add the chopped semi-sweet baking bar. Microwave at 60% power for 1 minute, stir, then continue microwaving in 30-second increments until smooth.
- Combine Chocolate with Cream Cheese: Gently fold the melted semi-sweet chocolate into one bowl of the cream cheese mixture until creamy and well blended.
- Incorporate Whipped Topping: Divide the thawed whipped topping equally between both bowls of cream cheese mixture. Fold the whipped topping gently into each bowl to maintain a fluffy texture.
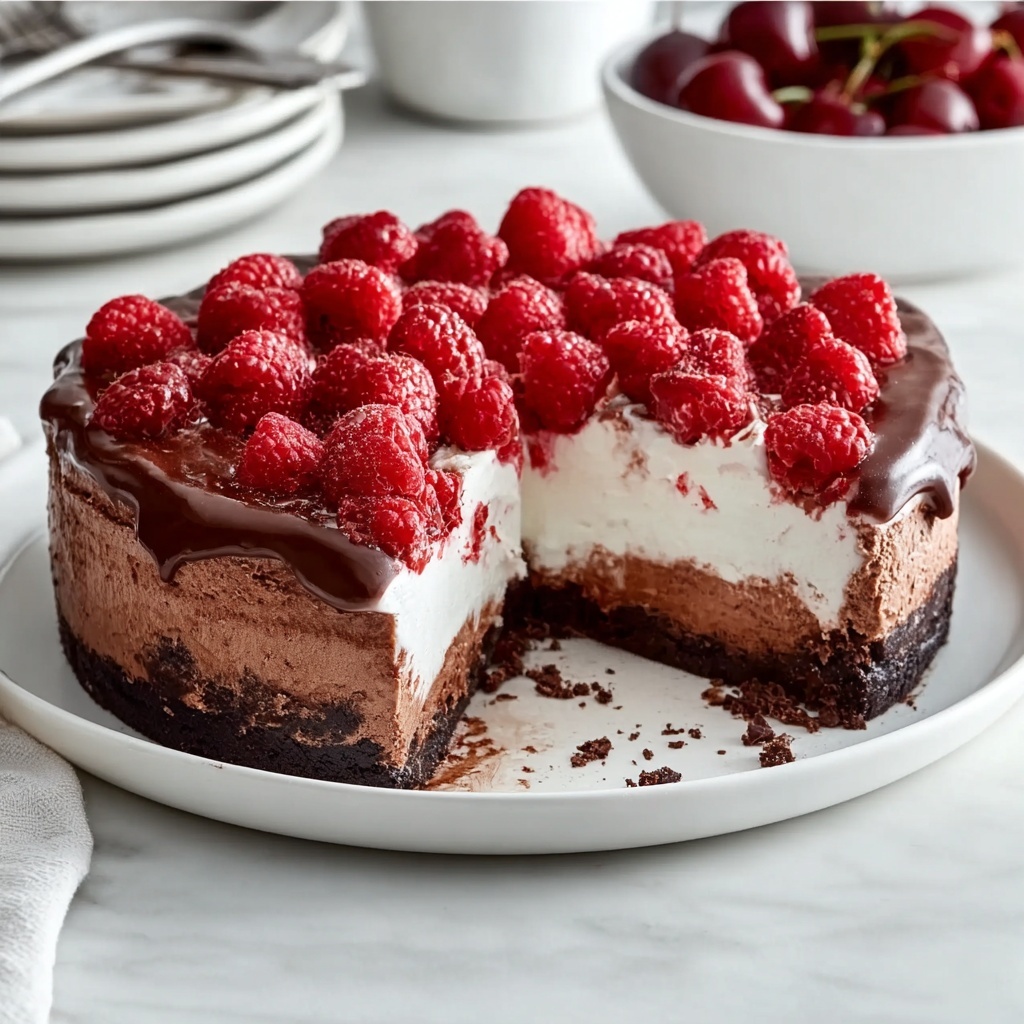
- Assemble Layers: Spread the chocolate cream cheese mixture evenly onto the bottom of the Oreo pie crust. Then, layer the plain cream cheese mixture evenly on top.
- Refrigerate: Cover the pie with the plastic piece from the crust and refrigerate for at least 8 hours or overnight to set.
- Add Cherry Pie Filling: After chilling, spread the canned cherry pie filling evenly over the top of the cheesecake.
- Melt Chocolate for Garnish: In a small microwave-safe bowl, combine the semi-sweet chocolate pieces with vegetable shortening. Microwave until melted and smooth.
- Create Chocolate Curls: Pour the melted chocolate onto an upside-down rimmed baking tray and spread into a thin, even layer. Freeze for 3 to 5 minutes until set.
- Lift and Store Curls: Using a sharp spatula, lift sections of the hardened chocolate from the tray to form curls. Place curls on a freezer-safe plate and keep frozen until ready to garnish the cheesecake.
Notes
- Ensure the cream cheese is at room temperature to achieve a smooth, lump-free mixture.
- Gently folding whipped topping retains the airy, fluffy texture essential for a light cheesecake.
- Chilling the filled cheesecake overnight improves firmness and flavor melding.
- Freeze the chocolate layer briefly to make lifting curls easier and prevent breakage.
- Use high-quality semi-sweet chocolate baking bars for the best taste and texture.
- If you prefer, homemade Oreo crust can be used instead of pre-made for a personalized touch.

