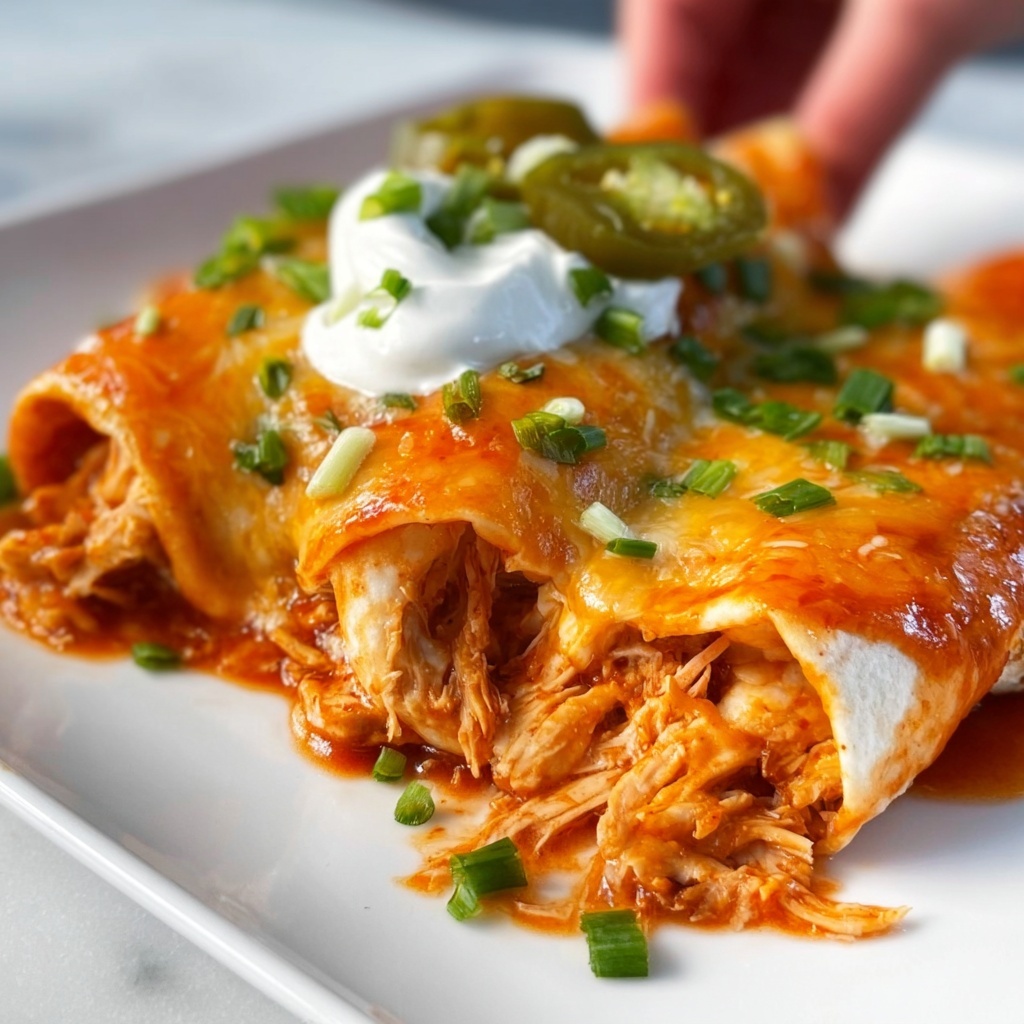
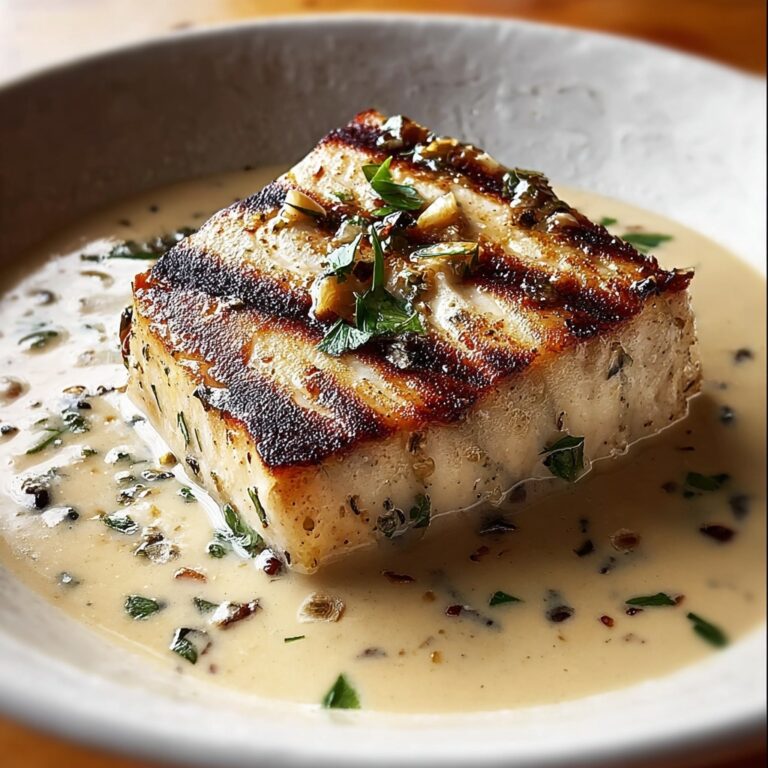
If you’re craving something that perfectly balances creamy, cheesy, and spicy all in one bite, you’ve got to try this Jalapeño Popper Cheesy Chicken Enchiladas Recipe. It’s the ultimate comfort food mashup that takes the beloved flavors of jalapeño poppers and enchiladas and wraps them up into one irresistible dish. Imagine tender shredded chicken mingling with creamy cream cheese, sharp cheddar, and just the right kick of diced jalapeños, all baked in warm flour tortillas smothered with savory enchilada sauce. This recipe is guaranteed to light up your dinner table and become a new favorite for any occasion.

Ingredients You’ll Need
The secret to great cooking often lies in simple, quality ingredients that each play a starring role. For this Jalapeño Popper Cheesy Chicken Enchiladas Recipe, every item brings something special — from the creamy textures to the spicy heat and the fresh brightness.
- 2 cups cooked chicken, shredded: The hearty protein base that soaks up all those fabulous flavors.
- 1 cup cream cheese, softened: Adds luscious creaminess and binds the filling beautifully.
- 1 cup shredded cheddar cheese: Offers sharp, melty goodness that cheese lovers will swoon over.
- 1 cup jalapeños, diced: Brings essential spice and just the right amount of boldness to keep things exciting.
- 8 flour tortillas: Soft and warm, perfect for rolling and holding all the cheesy filling inside.
- 1 cup enchilada sauce: Coats the enchiladas with rich, tangy flavor ensuring every bite is juicy and satisfying.
- 1/2 cup green onions, chopped: Adds a fresh burst of color and mild crunch to finish off the dish elegantly.
How to Make Jalapeño Popper Cheesy Chicken Enchiladas Recipe
Step 1: Preheat Your Oven
Start by setting your oven to 350°F (175°C). This moderate temperature ensures the enchiladas bake evenly, melting the cheeses perfectly while giving a wonderful meld of flavors.
Step 2: Mix the Filling Ingredients
In a large bowl, combine the shredded cooked chicken, softened cream cheese, shredded cheddar cheese, and diced jalapeños. Mix gently until everything is well incorporated. This mixture is the heart of the enchiladas, packing each bite with creamy, spicy goodness.
Step 3: Assemble the Enchiladas
Lay out each flour tortilla and spoon a generous portion of the chicken-cheese filling onto it. Roll up each tortilla tightly, making sure the filling stays inside for maximum flavor in every bite.
Step 4: Prepare the Baking Dish
Spread a thin layer of enchilada sauce across the bottom of your baking dish. This not only prevents sticking but also adds a burst of saucy flavor from below.
Step 5: Arrange the Rolled Tortillas
Place the rolled enchiladas seam side down in the baking dish. This keeps everything sealed and prevents the filling from escaping as they bake.
Step 6: Top with Sauce and Green Onions
Pour the remaining enchilada sauce evenly over the top, making sure each enchilada is well covered. Sprinkle the chopped green onions across the surface for a pop of fresh color and mild onion flavor.
Step 7: Bake Until Bubbly
Slide the dish into your preheated oven and bake for 25 to 30 minutes. You’ll know it’s ready when the cheese is melted, bubbly, and the edges of the tortillas start to turn golden. The aroma filling your kitchen at this point is utterly irresistible!
How to Serve Jalapeño Popper Cheesy Chicken Enchiladas Recipe

Garnishes
Top your enchiladas with a dollop of sour cream or a sprinkle of fresh cilantro for extra zest. A squeeze of fresh lime juice over each plate adds just the right touch of brightness that contrasts beautifully with the creamy, spicy filling.
Side Dishes
Serve your enchiladas alongside a fresh Mexican-style salad or simple Spanish rice to round out the meal. Crunchy tortilla chips with guacamole or salsa make for fantastic accompaniments that complement each forkful.
Creative Ways to Present
Try serving these enchiladas in individual ramekins for a special touch, or sprinkle a little smoked paprika or crumbled queso fresco on top to make the dish look as fabulous as it tastes. Presentation can turn a simple family dinner into a festive feast!
Make Ahead and Storage
Storing Leftovers
If you have any leftovers (though they rarely last long), store them in an airtight container in the refrigerator for up to 3 days. The flavors only deepen after resting, making them even better the next day.
Freezing
Want to save some for later? Wrap the assembled but unbaked enchiladas tightly with foil or plastic wrap and freeze for up to 2 months. When you’re ready, simply bake from frozen, adding extra time as needed until fully heated through and bubbly.
Reheating
Reheat leftover enchiladas in a 350°F oven until warmed through, usually about 15-20 minutes. Cover the dish to prevent drying out, then uncover near the end for a perfectly melty top.
FAQs
Can I use canned jalapeños instead of fresh?
Yes, canned jalapeños work well and add a milder heat. Just drain them thoroughly to avoid excess moisture in the filling.
What can I substitute if I don’t have cream cheese?
You can use ricotta or a soft goat cheese for a slightly different creamy texture, but cream cheese gives the best traditional richness for this recipe.
Is this recipe very spicy?
The jalapeños add a bright, lively heat but aren’t overwhelmingly spicy. You can always adjust the amount to make it milder or hotter according to your taste.
Can I make this recipe vegetarian?
Absolutely! Swap the chicken out for sautéed mushrooms, roasted veggies, or black beans for a delicious vegetarian version that still captures all the cheesy, spicy goodness.
What type of enchilada sauce is best?
A classic red enchilada sauce works beautifully here, but if you prefer, a green or tomatillo sauce adds a tangy twist that’s equally delicious with the jalapeño popper flavors.
Final Thoughts
This Jalapeño Popper Cheesy Chicken Enchiladas Recipe is a shining example of how comfort food can be exciting, simple, and utterly crave-worthy all at once. Once you try it, you’ll find yourself reaching for it again and again whenever you want to treat your taste buds to a warm, cheesy hug with a little spicy kick. So go ahead—grab your ingredients, roll up those tortillas, and get ready to impress everyone at your table with a dish that feels like a celebration in every bite!
Print
Jalapeño Popper Cheesy Chicken Enchiladas Recipe
- Prep Time: 15 minutes
- Cook Time: 30 minutes
- Total Time: 45 minutes
- Yield: 4 servings
- Category: Main Dish
- Method: Baking
- Cuisine: Mexican
Description
These Jalapeño Popper Cheesy Chicken Enchiladas combine shredded chicken with creamy cheeses and spicy jalapeños, wrapped in warm flour tortillas and baked in a rich enchilada sauce for a flavorful and comforting Mexican-inspired dish. Perfect for a family dinner or entertaining guests, these enchiladas balance heat and creaminess with a cheesy, bubbly finish.
Ingredients
Filling
- 2 cups cooked chicken, shredded
- 1 cup cream cheese, softened
- 1 cup shredded cheddar cheese
- 1 cup jalapeños, diced
Assembly
- 8 flour tortillas
- 1 cup enchilada sauce
- 1/2 cup green onions, chopped
Instructions
- Preheat Oven: Preheat your oven to 350°F (175°C) to prepare for baking the enchiladas.
- Mix Filling: In a large bowl, combine the shredded cooked chicken, softened cream cheese, shredded cheddar cheese, and diced jalapeños. Stir the mixture until all ingredients are evenly blended.
- Assemble Enchiladas: Spoon a portion of the chicken and cheese mixture onto each flour tortilla. Roll each tortilla tightly around the filling.
- Prepare Baking Dish: Spread a thin layer of enchilada sauce evenly across the bottom of a baking dish to prevent sticking and add flavor.
- Arrange Tortillas: Place each rolled tortilla seam side down in the baking dish, lining them up snugly side by side.
- Add Toppings: Pour the remaining enchilada sauce over the arranged tortillas. Sprinkle chopped green onions evenly on top for added color and flavor.
- Bake: Bake the enchiladas in the preheated oven for 25-30 minutes until the sauce is bubbly and the cheese is melted and golden.
Notes
- You can adjust the number of jalapeños to control the heat level according to your preference.
- For extra cheesiness, sprinkle additional cheddar cheese on top before baking.
- Use corn tortillas instead of flour if you prefer a gluten-free option.
- Make sure the cream cheese is softened to mix easily with the other ingredients.
- Leftovers can be refrigerated for up to 3 days and reheated in the oven for best results.


