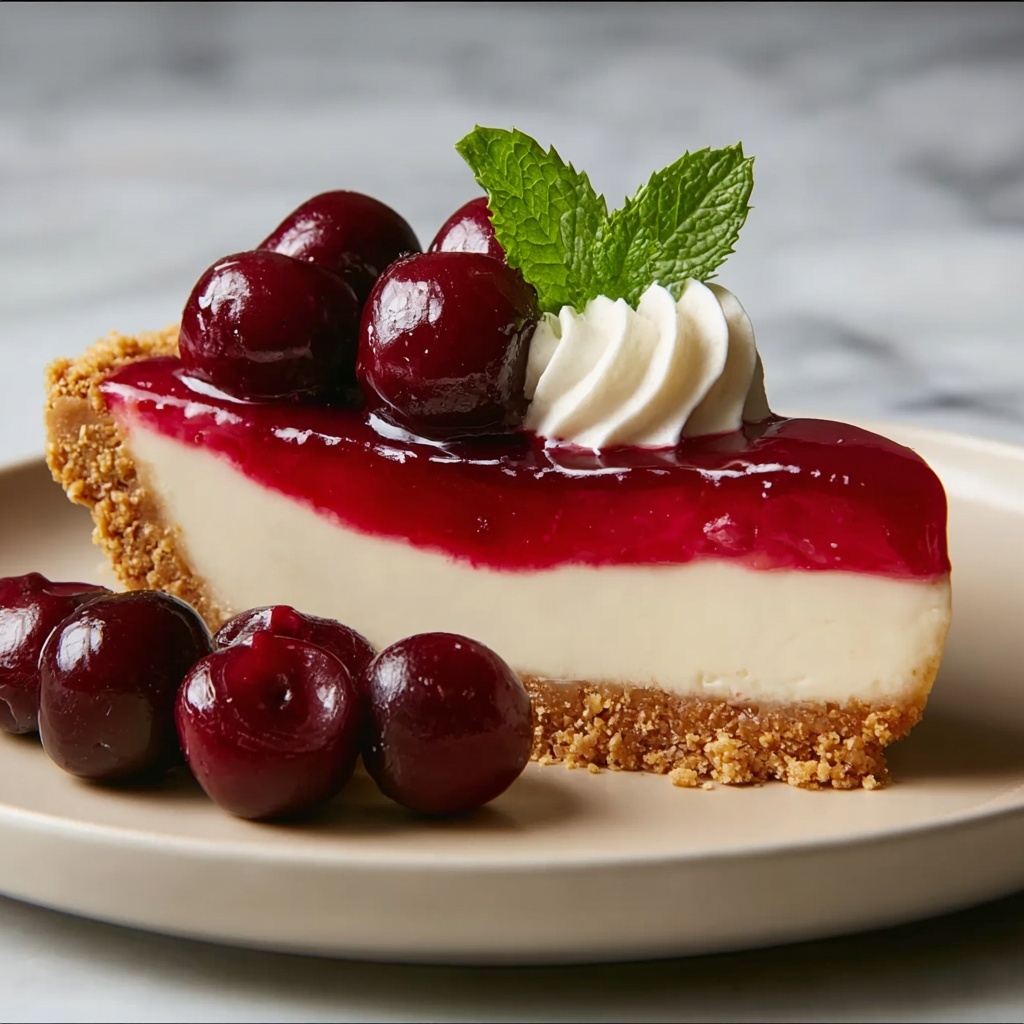
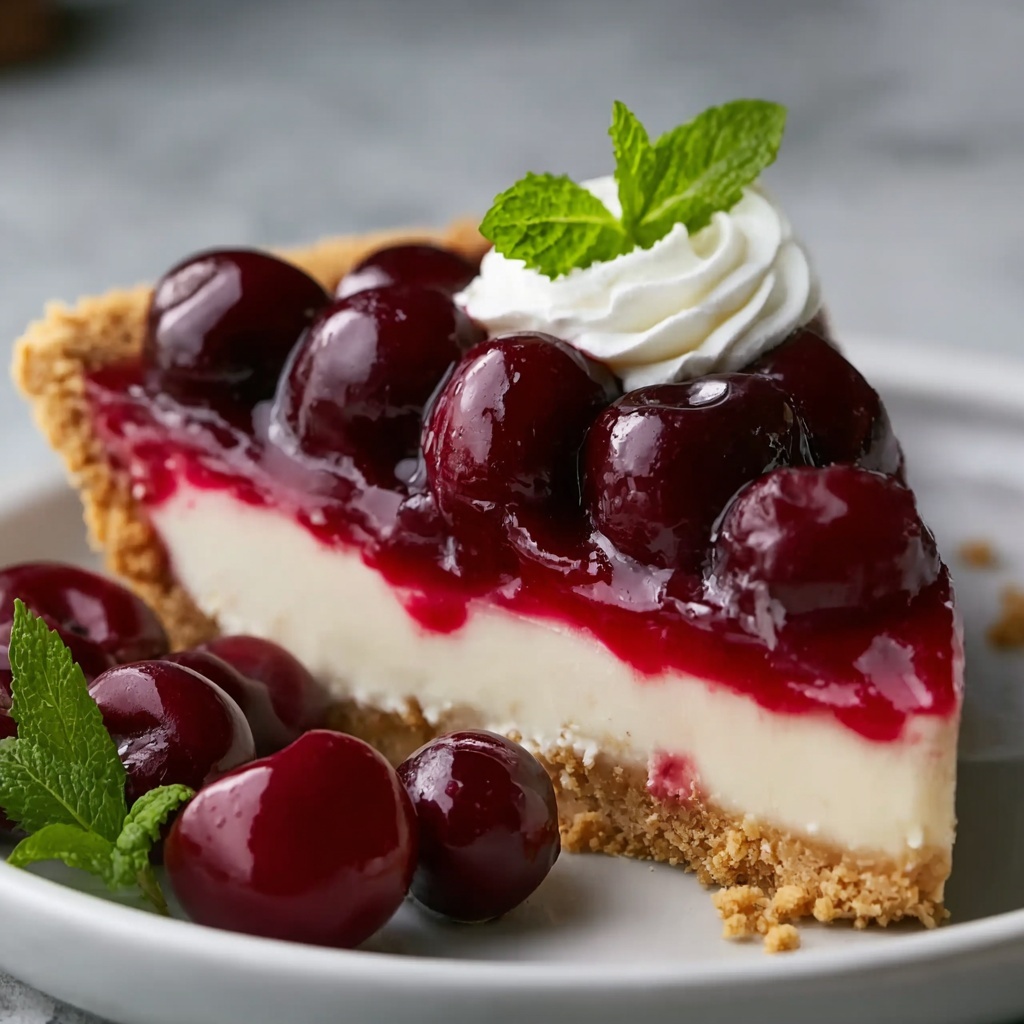
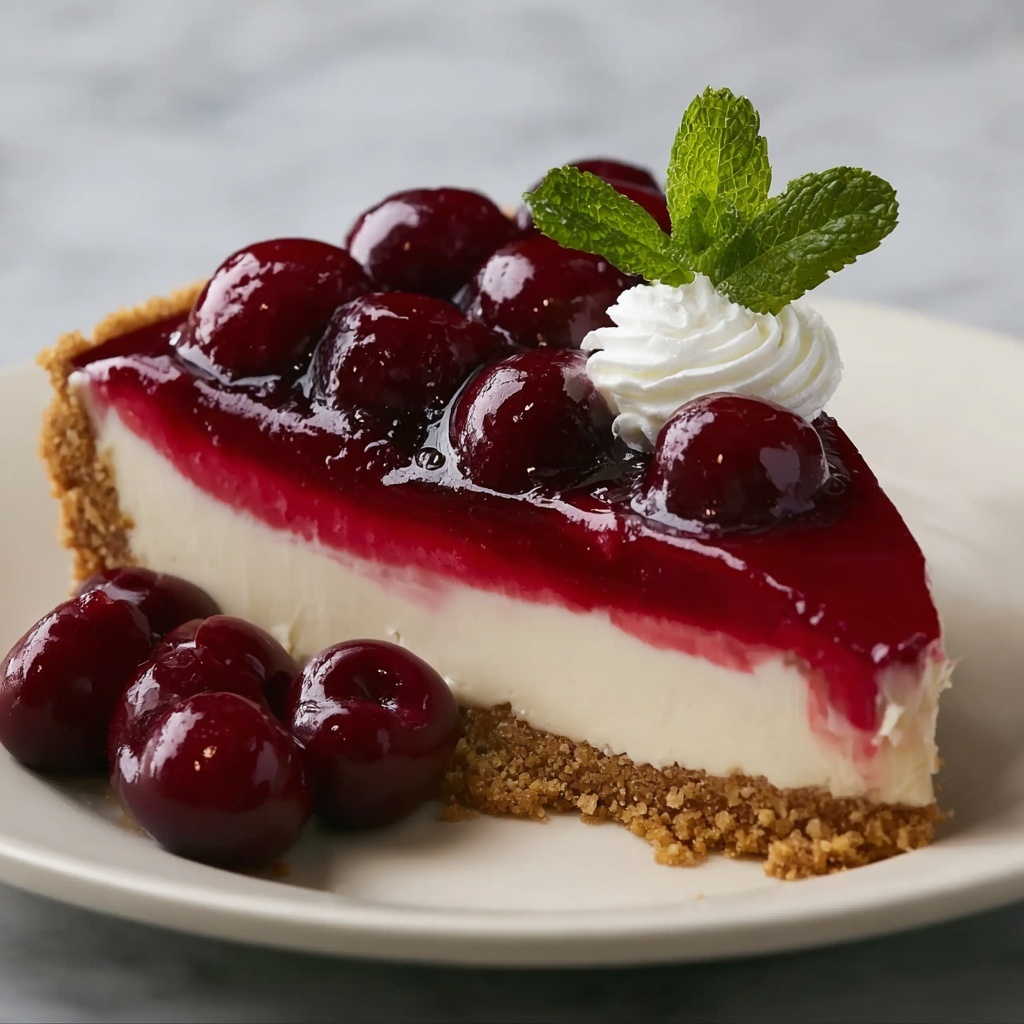
There is something truly magical about a Classic Cherry Cheesecake Recipe that instantly brings a smile and a feeling of celebration to any table. This dessert combines a buttery graham cracker crust with a luxuriously creamy cheesecake filling, all topped with a vibrant cherry topping that dances between tart and sweet. Whether you’re making it for a special occasion or simply to treat yourself, this cheesecake is a crowd-pleaser that never disappoints. Let me walk you through this timeless favorite that’s as delicious as it is comforting.
Ingredients You’ll Need
The beauty of this Classic Cherry Cheesecake Recipe lies in its simplicity and carefully chosen ingredients. Each one plays a vital role in creating that perfect balance of rich, creamy texture and bright, fruity flavor you crave in a cheesecake.
- Graham cracker crumbs: The foundation of the crust, providing a sweet, slightly crunchy base.
- Granulated sugar: Sweetens both crust and filling for that perfect, balanced flavor.
- Unsalted butter: Melted and mixed into the crust to bind those crumbs with richness.
- Cream cheese: The star of the filling, softened for a smooth, creamy texture.
- Vanilla extract: Adds a warm, aromatic note enhancing the filling’s flavor.
- Eggs: Help bind the filling and give it structure while keeping it silky smooth.
- Sour cream: Adds a subtle tanginess and extra creaminess to the cheesecake.
- All-purpose flour: Provides structure to the filling without compromising creaminess.
- Cherry pie filling or fresh cherries: The luscious topping that gives this cheesecake its signature burst of color and flavor.
- Cornstarch (optional): Helps thicken fresh cherry topping for the perfect consistency.
How to Make Classic Cherry Cheesecake Recipe
Step 1: Prepare the Crust
Begin by preheating your oven to 325°F (163°C). Mix graham cracker crumbs, sugar, and melted butter thoroughly until well combined. Press this mixture firmly into the bottom of a 9-inch springform pan. Don’t be shy—get it nice and compact for that sturdy, crunchy base. Bake it for about 10 minutes until the crust turns a lovely golden brown, then set it aside to cool.
Step 2: Make the Cheesecake Filling
Next, take your softened cream cheese and beat it using an electric mixer on medium speed until smooth and creamy—no lumps allowed! Add in sugar and vanilla, mixing until fully blended. One by one, add the eggs, beating well after each addition to maintain that silky texture. Finally, mix in the sour cream and flour until everything is perfectly combined and creamy.
Step 3: Bake the Cheesecake
Pour the luscious cheesecake filling over the cooled crust, spreading it evenly. Gently tap the pan on your countertop to release any trapped air bubbles. Bake the cheesecake for about 50 to 60 minutes until the edges are set but the center still jiggles slightly—a sign of perfect creaminess. Then, turn off the oven and let the cheesecake cool inside with the door cracked open for an hour to prevent cracks from forming. Afterward, let it cool at room temperature for an additional 30 minutes before chilling it in the refrigerator for at least 4 hours or overnight.
Step 4: Prepare the Cherry Topping
If you’re using canned cherry pie filling, simply spoon it over the chilled cheesecake when ready. If fresh cherries are your choice, rinse and pit them before cooking with sugar over medium heat until soft and syrupy. For a thicker topping, stir in a cornstarch slurry until the mixture reaches the desired consistency. Cool it completely before topping your cheesecake.
Step 5: Serve
When the cheesecake is fully chilled and your cherry topping is ready, carefully release the springform pan and remove the sides. Spoon the cherry topping generously over the cheesecake, slice it up, and watch your guests’ eyes light up with every delicious bite.
How to Serve Classic Cherry Cheesecake Recipe
Garnishes
Elevate your cheesecake by adding a sprinkle of freshly grated lemon zest for a subtle citrus brightness or a few whole cherries for a stunning, fresh look. A dollop of whipped cream will add extra indulgence and a light, airy contrast to the rich texture.
Side Dishes
A simple refreshment like a cup of freshly brewed coffee or a glass of dessert wine pairs beautifully with the luscious cheesecake, complementing its flavors without overpowering them. Fresh fruit or a crisp green salad can balance the richness if you’re serving this as part of a larger meal.
Creative Ways to Present
For a show-stopping dessert experience, try serving the cheesecake in individual clear glasses layered with cherry topping and crushed graham crackers. Alternatively, decorate with edible gold leaf or chocolate shavings to impress guests at your next dinner party.
Make Ahead and Storage
Storing Leftovers
Wrap any remaining cheesecake tightly with plastic wrap or store it in an airtight container in the refrigerator. It stays fresh and delicious for up to 5 days, giving you plenty of opportunities to enjoy every bite.
Freezing
You can freeze slices of this Classic Cherry Cheesecake Recipe by wrapping them individually in plastic wrap and then placing in a freezer-safe container. Thaw overnight in the refrigerator before serving for a convenient and tasty treat anytime.
Reheating
Cheesecake is best served chilled, so it’s ideal to enjoy it straight from the refrigerator. If you prefer it slightly less cold, allow slices to sit at room temperature for about 15 minutes before serving. Avoid microwaving as it changes the texture.
FAQs
Can I use fresh cherries instead of canned cherry pie filling?
Absolutely! Fresh cherries make a wonderful topping, and cooking them with sugar helps create a syrupy, delicious sauce. Just be sure to pit them first and thicken the sauce with cornstarch if needed.
How do I prevent cracks in my cheesecake?
Cooling the cheesecake gradually is key. After baking, leave it in the oven with the door slightly open for an hour, then let it cool at room temperature before refrigerating. This slow cooling helps prevent cracks.
Can I substitute sour cream with Greek yogurt?
Yes, Greek yogurt can be used as a substitute and will add a similar creamy tang to the filling, making it a great alternative if you don’t have sour cream on hand.
Is it necessary to chill the cheesecake overnight?
While chilling for at least 4 hours is important for setting, chilling overnight allows flavors to meld beautifully and gives the best texture, so I definitely recommend it when you have the time.
Can I make this cheesecake gluten-free?
Yes! Swap the graham cracker crumbs with gluten-free alternatives or crushed gluten-free cookies, and make sure any other ingredients you use are gluten-free to enjoy this dessert safely.
Final Thoughts
If you’re looking for a dessert that’s both comforting and impressive, this Classic Cherry Cheesecake Recipe is simply a must-try. Its creamy filling, buttery crust, and bright cherry topping create the perfect harmony of flavors every time. So grab your ingredients, dive into the process, and treat yourself and your loved ones to a homemade cheesecake that truly feels like a warm hug on a plate.
Print
Classic Cherry Cheesecake Recipe
- Prep Time: 30 minutes
- Cook Time: 1 hour 10 minutes
- Total Time: 5 hours 20 minutes
- Yield: 12 servings
- Category: Dessert
- Method: Baking
- Cuisine: American
Description
This Classic Cherry Cheesecake recipe features a creamy, smooth cheesecake on a buttery graham cracker crust, topped with a luscious cherry topping. Perfectly baked to a light golden finish, this dessert balances rich, tangy cheesecake flavors with the sweet, tart burst of cherries. Ideal for special occasions or anytime you crave a classic, indulgent dessert.
Ingredients
For the Crust:
- 1 ½ cups of graham cracker crumbs
- ¼ cup of granulated sugar
- ½ cup (1 stick) of unsalted butter, melted
For the Cheesecake Filling:
- 3 (8 oz) packages of cream cheese, softened
- 1 cup of granulated sugar
- 1 teaspoon of vanilla extract
- 3 large eggs
- 1 cup of sour cream
- 2 tablespoons of all-purpose flour
For the Cherry Topping:
- 1 can (21 oz) of cherry pie filling (or fresh cherries)
- 1 tablespoon of cornstarch (optional for thickening if using fresh cherries)
- 2 tablespoons of sugar (if using fresh cherries)
Instructions
- Prepare the Crust: Preheat your oven to 325°F (163°C). In a medium bowl, mix together the graham cracker crumbs, sugar, and melted butter until well combined. Press this mixture firmly into the bottom of a 9-inch springform pan to form an even crust using the back of a spoon or your hands. Bake for about 10 minutes until golden brown. Set aside to cool.
- Make the Cheesecake Filling: In a large mixing bowl, beat the softened cream cheese on medium speed with an electric mixer until smooth and creamy. Add sugar and vanilla extract, mixing until combined. Add eggs one at a time, beating well after each. Mix in sour cream and flour until the batter is thick and smooth.
- Bake the Cheesecake: Pour the filling over the cooled crust and spread evenly. Tap the pan gently on the counter to release air bubbles. Bake for 50–60 minutes until the center is almost set but still slightly wobbly and the top is lightly golden. Turn off the oven and crack the door open, letting the cheesecake cool inside for 1 hour to prevent cracking. Then cool at room temperature for 30 minutes more.
- Chill the Cheesecake: Once cooled, refrigerate the cheesecake for at least 4 hours, preferably overnight, to fully set and develop flavors.
- Prepare the Cherry Topping: For canned filling, simply spoon over the cheesecake. For fresh cherries, rinse and pit them, then cook with sugar over medium heat until soft and syrupy. If a thicker topping is desired, stir in cornstarch mixed with water until thickened. Cool topping before using.
- Serve: Carefully remove the chilled cheesecake from the springform pan. Spoon the cherry topping over the cheesecake evenly. Slice and serve to enjoy a delicious homemade cherry cheesecake.
Notes
- Using full-fat cream cheese and sour cream creates the creamiest texture.
- For best results, ensure cream cheese is fully softened before mixing to avoid lumps.
- Allow the cheesecake to cool gradually in the oven and then at room temperature to prevent cracking.
- Refrigerate overnight for optimal flavor and texture.
- Fresh cherries offer a more natural topping but require cooking; canned cherry pie filling is a convenient alternative.


